Sunday, 25 July 2010

Cherry and almond cake


Fruit, sponge and a crunchy sugar topping – it doesn’t take much to please me! You’ll see in my footnote below that this was rather a last minute bake but that doesn’t detract from just how tasty it was. It was certainly a crowd pleaser too, and disappeared in a blink of an eye!


Almond in the sponge gives this a Bakewell kind of vibe and I suppose you could leave off the sugar topping and make glace icing instead. But I would struggle to do that...I do like a sugar crust! Close up of sugar crust:


This recipe originally used plums and so I’ll be making it again once my parent’s damson tree burst forth with fruit. Any fruit would work with this basic batter of butter and almonds.


The cake is moist without being squidgy and is really comforting to eat; it’s not fancy or glamorous but relies on good flavour and texture to get it noticed.


Footnote: I wasn’t planning on making this cake; it was rather an eleventh hour raid-the-store-cupboard-for-ingredients affair. I had planned on making Bill Granger’s blueberry butter cake but found the recipe to be a nightmare – there was far too much batter which ended up spewing Vesuvius-like all over my oven, and I only used half the topping as there was so much of it. I didn’t use his book; the recipe was published in “Woman and Home” magazine. I wonder if the magazine had some typos in the ingredients listing. Has anyone made this cake? Did the recipe all fit in the tin? The ingredients weren’t cheap and I was desperately disappointed.

Ingredients

200g (drained weight) cherries – I used tinned but fresh would be great too
100g unsalted butter, at room temperature
225g self raising flour
100g ground almonds
100g light muscovado sugar
100ml milk
2 eggs

For the topping: 2 tablespoons Demerara sugar

To serve: cream

Method

Preheat the oven to 180˚C/fan oven 160˚C/350˚F/Gas mark 4.

Prepare a 20cm round springform tin by lining with baking paper.

Drain the cherries and leave to one side so they dry a little.

Place the butter and flour in a bowl and rub in the butter, using your fingertips until the mixture forms breadcrumbs.

Stir in the almonds and muscovado sugar.

Measure the milk out in a jug and break the eggs into it. Whisk until they are combined.

Stir the milk and eggs into the cake mixture.

Gently stir in the cherries; some may break down and colour the batter but don’t worry – it looks rather good!

Spoon into the prepared tin and level the surface.

Sprinkle the Demerara sugar over the top.

Bake the cake for 40-5o minutes or until a skewer inserted into the cake comes out clean. Mine took 50 minutes.

Leave to cool, in the tin, on a wire rack until the tin is cool enough to remove. Leave to cool completely before storing in an airtight container.

Serve the cake at room temperature with thick cream.

Bask in the glory of the wonderful thing you have created.

Eat.

Tuesday, 20 July 2010

Interflora “Sweet Nostalgia” hamper


As I type I am a very happy Caked Crusader. My fingers are slightly sticky as I have been unable to resist unwrapping a fruit salad sweet from the gorgeous Interflora
Sweet Nostalgia hamper; this is just one of the many amazing hampers that Interflora have in their range.


The quality of this hamper started the minute I undid the box – this beautiful wicker chest has leather straps with working brass buckles. I have it earmarked for holding toiletries in my bathroom as soon as the small matter of eating all the sweets is dealt with!


Ooh, the excitement – what’s in the box?


Goodies galore would be the short answer but for those of you who like details (this is basically a checklist of where my pocket money went between the ages of 5-10 years old!):

Rosey Apples 100g
Cola Cubes 100g
Haribo Tangfastics
100g Haribo Jelly Beans
100g Cadbury Chocolate Eclairs
100g Haribo Cola Bottles
100g Curly Wurly x 2
Love Hearts
Refreshers
Nestle Rolos 52g
Flying Saucers x 10
Sherbet Fountain x 2
Paynes Poppets Toffee x 2
Refresher Chews x 4
Giant Double Lollies x 2
Fruit Salad x 10
Black Jacks x 10
Mars Milky Way 26g x 2
Ice Cream Cones x 2 (I’m very excited about these as I’ve never had them before)

I couldn’t actually fit all the contents into one photo, so here are three photos!


Thanks to
Interflora for sending me this treat – it certainly brightened up an otherwise mundane Tuesday evening. I think it would brighten up the day of any recipient – who wouldn’t want this as a gift?

Sunday, 18 July 2010

Coconut sandwich cake with coconut buttercream


Whilst rummaging through my larder cupboard this week I found something I’d bought a while back and not really considered since: cream of coconut. I got it from a large off-licence and it’s meant for making cocktails, hence the rather snazzy squeezy bottle. Far more practical too as, once you open a tin how do you store any leftover coconut cream?


But what to do with my coconut cream? As I pondered the question the Universe revealed the answer to me. Maybe Noel Edmonds was right with his ‘
cosmic ordering’. Maybe I have stumbled upon a baker’s belief system ‘cosmic cake ordering’? For no sooner did I think of how to use my ingredient than I came across this recipe!


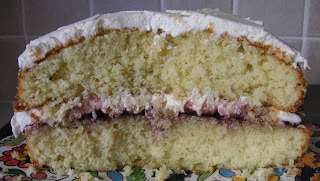
I would describe this cake as a classic crumbly coconut sponge teamed with a rich, flavoursome buttercream. The addition of the jam adds a fruity kick and stickiness that works well with the sponge.


We all agreed that the buttercream to sponge ratio was spot on – usually you wouldn’t top a sponge sandwich with buttercream but this is so flavoursome with coconut that the more the better! I love it when you fill a sponge with jam and buttercream and the two start to amalgamate – mouth wateringly yummy!


And that concludes another successful day’s baking:


Ingredients

For the cake:

175g unsalted butter, at room temperature
175g golden caster sugar
175g self raising flour
1 ½ teaspoons baking powder
3 eggs
50g desiccated coconut
2 tablespoons coconut cream

For the buttercream:

280g icing sugar
100g unsalted butter, at room temperature
3 tablespoons coconut cream

For the filling:

5 tablespoons raspberry jam

Method

Preheat the oven to 180˚c/fan oven 160˚c/350˚f/gas mark 4

Line the base of two 20cm round sandwich tins with baking paper.

Place the butter, golden caster sugar, flour, baking powder and eggs into a food processor and blitz until completely smooth. You can also do this with an electric mixer.

Stir in the coconut and coconut cream.

Spoon the mixture into the two prepared pans and level the surfaces.

Bake for approximately 25 minutes or until a skewer inserted into the centre of the sponges comes out clean.

Cool in the tins for 10 minutes and then turn out the sponges to cool completely on a wire rack.

The cakes can be stored in a tin at this point and kept for a day until you fill them.

Now make the buttercream: place all the ingredients in a bowl and mix until smooth and light.

Now you can assemble the finished cake: place one sponge (flat side up) on a plate and spread the jam over it.

Spread just under half the buttercream on top of the jam and top with the other sponge (flat side down).

Spread the top with the remaining buttercream.

Bask in the glory of the wonderful thing you have created.

Eat.

Wednesday, 14 July 2010

Mrs Portions' Potables

My dear friends, Mr and Mrs Portions, have finally – after much encouragement from me (i.e. nagging) – set up their own blog: Mrs Portions’ Potables

Why not say hello and check out their liqueur-making exploits?