Showing posts with label gingerbread. Show all posts

Sunday, 20 December 2015

Gingerbread houses


It isn’t Christmas without gingerbread and, much as I always love classic gingerbread men...


... I wanted to make something different to anything I’d made before.  I found this shop on Etsy selling cutters to make the cutest little gingerbread houses and I fell in love!  (Etsy is an incredible site; I know it gets some stick for some of the weird stuff you can find on it but I challenge anyone to spend 20 minutes or so browsing the site without finding something they want!)


The houses are a bit of work but can be made in stages, as gingerbread keeps very well for days and days in an airtight tin.  I always prefer piping on a flat surface so decorate all the panels and let the icing set, before assembling the houses.  As these are small they don’t require much icing to hold them together.



To provide a bit of scale, here’s a house next to my favourite mug (I dread to think how many cups of tea this cup has held!):


I’m not much of a decorator and – weak and pathetic as it sounds – get hand cramps if I do too much piping, so my houses are minimalist, but, if you’re better at that sort of thing you could really go to town.


The gingerbread was lovely – it was somewhere between ginger biscuit and the softer, more cakey, gingerbread.  It puffed up while cooking giving a nice smooth finish and the taste had just enough fire to it.  I don’t think it’s been a very exciting year for cookery books but this recipe came from one book that did capture my interest – Gingerbread Wonderland by Mima Sinclair.


This is likely to be my last post before Christmas so I shall sign off hoping that you all have a lovely day – doing whatever it is you have chosen to do! Happy Christmas everyone!


Ingredients

140g golden syrup
200g soft light brown sugar
200g unsalted butter
4 teaspoons ground ginger
2 teaspoon ground cinnamon
1 teaspoon ground nutmeg
1 teaspoon bicarbonate of soda
500g plain flour
1 teaspoon salt
1 egg

To decorate: tubes of icing, and anything else you wish!


Method

Place the golden syrup, sugar, butter and spices in a saucepan larger than you need and melt together over a gentle heat stirring all the time until the sugar has dissolved – you can tell when this has happened by looking at the back of your spoon: if you can still see tiny grains it needs a bit longer.

Increase the heat and bring to the boil (don’t stir during this process).

Remove the pan from the heat and beat in the bicarbonate of soda – it will froth up, hence using a larger saucepan.

Stir only until the bicarbonate of soda is incorporated and put to one side to cool – about 15 minutes should be enough.

Fold the flour and salt into the cooled mixture.

Beat in the egg – take care not to overbeat the mixture; as soon as the egg is incorporated stop mixing.

Tip the dough out onto a work surface or – and this is my preference – a sheet of non stick foil.

Knead until it is smooth.  Initially the dough will be very sticky and it will be tempting to add flour but DON’T!  This will make the biscuit tough.

Cut the dough in half and shape into fat discs before wrapping separately in clingfilm and refrigerating for 1 hour.

Preheat the oven to 160C/fan oven 140C/325F/gas mark 3.

Roll the chilled dough out between two sheets of clingfilm and use the cutters of your choice.

Place on a baking sheet lined with either baking paper or non stick foil.

Bake for about 6-7 minutes, if making a small biscuit, or until just starting to feel firm to the touch.  It will puff up during cooking and if it feels almost marshmallow soft, it needs a couple of minutes longer.

Leave to cool for at least 10 minutes on the baking sheet before moving to a wire rack to cool completely.

Decorate as you wish.

Bask in the glory of the wonderful thing you have created.

Eat.


Sunday, 27 September 2015

Lincoln ginger biscuits and Grantham gingerbread


Mr CC and I had a lovely long weekend in Lincoln recently (Lincoln is in Lincolnshire – England’s second largest county); it’s very hard to find much wrong with a county that has two fabulous ginger biscuit recipes. I was going to split the recipes into separate posts but spent so long wondering which one to post first that I decided it would be easier to do a double post!

Grantham gingerbread:


Lincoln ginger biscuits:


The biscuits are quite different; their only shared feature is ginger. Lincoln ginger biscuits are a crisp ginger biscuit with a buttery/syrup background that adds depth of flavour.  They are a crisper, more buttery version of the ginger biscuits you will typically find in any supermarket.  Grantham gingerbread is more unusual – it is a pale gingery, buttery rusk of a biscuit with a hollow, almost honeycomb style centre; not like any other gingerbread.  Utterly addictive, we worked our way through the majority of the box we brought back in one sitting.  It was only because we closed the box and moved it out of arm’s length that any survived to the next day!


Like many great recipes, Grantham gingerbread came about by a mistake.  In the 1740s William Egglestone ran a coaching house in Grantham where people would stop for some rest and sustenance.  He made a mistake, mixing up ingredients, for his Grantham Whetstones (a hard flat biscuit which was sold at the time) and created these puffy little delights, which were so popular he continued making them.  Sadly, so many local bakeries have closed that it’s actually hard to find Grantham gingerbread for sale anymore.  I hunted all over Lincoln and found them in one shop – this biscuit is too good to be allowed to die!


I made the biscuits per the recipes in the Lincolnshire cookbooks I picked up whilst on hols; I would make a couple of tweaks next time and note these in the ingredients listings below; mostly the tweaks are upping the amount of ginger - I like my ginger fiery!


If the biscuits alone aren’t enough to convince you to visit Lincoln then look at this – it’s the stunning cathedral, lit so beautifully at night that it glows with golden beauty!


Lincoln ginger biscuits

Ingredients

350g self raising flour
225g caster sugar
2 teaspoons bicarbonate of soda
2 teaspoons ground ginger – next time I would use 4 teaspoons
115g unsalted butter
10g golden syrup – next time I would use 30g to get a better spread whilst baking
1 egg, beaten


Method

Preheat the oven to 180C/ fan oven 160C/ 350F/ gas mark 4.

Line two baking sheets with non stick foil.

Place the self raising flour, caster sugar, bicarb and ginger in a bowl and mix together.

Heat the butter and syrup together in a pan until melted and combined.

Pour over the dry ingredients whilst mixing.

Add the egg, again, whilst mixing.

Bring the dough together into a firm, stiff ball.

Take walnut sized pieces of dough and roll into balls.

Place on the baking sheet – well spaced – and flatten.  Place 12 per tray (I got 28 in total)

Bake for 15-20 minutes or until golden brown and firm to the touch.

Leave to cool on the baking sheets before moving to a wire rack to cool completely.

Bask in to glory of the wonderful thing you have created.

Eat.


Grantham gingerbread

Ingredients

340g caster sugar
115g unsalted butter, at room temperature
1 egg
250g plain flour
½ teaspoon bicarbonate of soda
1½ teaspoons ground ginger – next time I would use 3 teaspoons


Method

Preheat the oven to 150C/ fan oven 140C/ 300F/ gas mark 2.

Line two baking sheets with non stick foil.

Beat together the sugar and butter until light and whippy.

Beat in the egg.

Fold in the flour, bicarb and ginger.

Take small balls of the dough and roll into balls

Place on the baking sheet, spaced apart to allow for spreading, No need to flatten.  Place 12 per tray; I chanced my arm with 15 and the touched. (I got 30 in total)

Bake for 20 minutes, then turn the trays and bake for a further 20 mins (about 40 mins in total) or until golden and puffy.

Leave to cool and firm up on the baking sheet before moving to a wire rack to cool completely.

Bask in the glory of the wonderful thing you have created.


Eat.

Sunday, 18 January 2015

Brown butter spice cake


Christmas may be over but winter is definitely here, which is why I was drawn to a spicy cake this week.  This cake had so many lovely facets that appealed to me: tea, spice, treacle, brown butter and even a bit of citrus.  All the flavours were offset by a very simple classic buttercream.


It’s worth taking your time over making the brown butter.  Your nose will tell you without any doubt that there is a huge difference between brown butter and burnt butter!  Gently heat the butter and it will become foamy; let this stage pass and the butter will turn clear and a wonderful dark amber colour…and it smells divine.  It’s also a bit like caramel in that you’re better to take it off the hob just before it’s at the stage you want, as it carries on darkening and you risk taking it too far.


This is such a comforting, homely looking cake but it packs in so much flavour – the best of all worlds.  The tea and citrus lifts what would otherwise be a lovely but ordinary dense gingerbread; I expected the cake to be more sponge-like but it isn’t – it’s definitely in the gingerbread camp.    Not sure what I did but my cakes came out huge!  I had to shave a bit off each one just to get it to a size that would fit in any of my storage tins!  Still, it gave me the opportunity to photograph a whole layer:


This cake is a keeper, by which I mean you’re best off making it a day or two in advance – it gets stickier and more flavoursome.  Bring on the snow – I’m ready for it!


Ingredients

For the cake:
250g unsalted butter
250g caster sugar
2 eggs
100g treacle
250ml tea, made using 2 teabags
Grated zest of 1 orange
600g self raising flour
1 teaspoon ground cinnamon
½ teaspoon ground ginger
½ teaspoon mixed spice

For the buttercream:
100g unsalted butter, at room temperature
1 teaspoon vanilla extract
200g icing sugar
1 tablespoon milk


Method


Preheat the oven to 180C/fan160C/350F/ gas 4. 
Line two loose bottomed 20cm round sandwich tins with baking paper.
Now make the cakes: melt the butter in a pan until it turns brown (but not burned).  Do this over a gentle heat – at first it will foam, but will brown shortly after.
Strain the butter through a coffee filter or several sheets of kitchen paper into a bowl and leave to cool.
Beat the cooled brown butter into the sugar, eggs and treacle.
Stir in the cooled tea and orange zest (I put the zest in the tea so that it infused the flavour into the tea).
In a separate bowl mix together the flour, spices and baking powder.
Beat the butter mixture into the flour mixture.
Divide evenly between the prepared tins and level the surfaces.
Bake for 20-25 minutes or until a skewer comes out clean.   Mine actually took a fair bit longer – nearer to 40 minutes.
Cool, in their tins, for 20 minutes before de-tinning and leaving to cool completely on a wire rack.
Now make the buttercream: beat the butter until it is soft and whippy.
Beat in the vanilla and icing sugar.
Beat in the water.
Place one of the cakes on the serving plate and spread the buttercream over it.
Place the other sponge on top.
Bask in the glory of the wonderful thing you have created.
Eat.


Sunday, 19 May 2013

Birthday gingerbread train


Mr CC is very weird in that he prefers biscuits to cake.  How I find myself married to a man with such an obvious and serious flaw is a mystery but – to quote Some Like it Hot – nobody’s perfect!  When I saw this biscuit cutter set that allows you to build a 3D free-standing steam train I knew I had found the design for Mr CC’s birthday cake (I’m sorry, but calling it a ‘birthday biscuit’ is just plain wrong), for Mr CC likes trains almost as much as he likes biscuits.


I used the recipe included with the cutter set...and that was perhaps a mistake.  It baffles me why companies include recipes with their products that don’t quite bring out the best in their product.  Firstly, they called it a gingerbread train recipe but it didn’t include any ginger – so I had to amend that!  Secondly, the quantities they list to make a whole three carriage train looked mighty scanty.  I doubled the quantities and still only had enough for a two carriage train.  Thirdly, they tell you to brush the uncooked biscuits with egg yolk – I assume to glaze the biscuit.  This came out a bit streaky, so I didn’t glaze the second batch and it looked much better.  However, the gingerbread was very tasty (even if it did puff up during baking!):


It’s like the spongier gingerbread you get at German markets, rather than the crisp biscuit type.  Very nice texture indeed:


The big benefit with this recipe is that you can make the dough in advance and keep it in the fridge.  I made it two days ahead although it will apparently keep for up to fourteen days.  The other benefit is that the recipe is dairy-free – I was sceptical as to whether one could make good gingerbread without butter, but you can!


About once a year I like to take on an ambitious (for me) decorating project, for no reason other than to remind myself that I am not a decorator, never will be a decorator and that watching ‘Amazing Wedding Cakes’ on the Food Network channel will never turn me into a decorator.  I think this train has achieved it...I don’t think there is a straight line on it.


If you are wondering why the loco tender has ‘4472’ on it (or rather icing squiggles that look a bit like it if you squint), it is because this is the number of the famous Flying Scotsman train, the first steam loco to reach 100mph.  However hard you may fight it, you learn things like this when you are married to a train enthusiast (and, of course, by enthusiast I mean an out-and-proud nerd...and I wouldn’t have him any other way!)


Happy birthday Mr CC!


Ingredients

2 eggs
320g plain flour
100g icing sugar
80g runny honey
2 teaspoons bicarbonate of soda
½ teaspoon ground cinnamon
4 teaspoons ground ginger


Method

Place all the ingredients into a bowl and mix together to form a dough.

Knead until you have an even ball of dough – it will be sticky.

Form into two fat discs and wrap in clingfilm.

Refrigerate for at least 2 hours or up to 14 days.

Preheat the oven to 150°C/fan oven 130°C/300°F/gas mark 2.

Line three baking sheets with non-stick foil or baking paper.

Roll out the dough between two sheets of clingfilm – I dusted the dough with a little extra icing sugar as it was still tacky to the touch and I worried about it sticking.

Roll the dough to just under 0.5cm thick.

Cut out the dough and place on the prepared baking sheets; it will not expand in width so you can place them close together.

Bake for approximately 15 minutes, turning the trays halfway through cooking.  It is ready when it has turned a dark golden colour.

Leave to cool on the baking sheets until cold and firm.

Decorate as desired.

Bask in the glory of the wonderful thing you have created.

Eat.

Sunday, 23 December 2012

Gingerbread cupcake Christmas trees with salted caramel buttercream


As someone who doesn’t like ‘traditional’ Christmas baking such as mince pies, Christmas cake or pudding, I have looked further afield for my own favourite traditional flavours – and decided that ginger is top of the list.  Any spice is perfect for winter but ginger always seems warmer and spicier than the others...not that I don’t love them too.


These cupcakes mix traditional with modern due to the addition of salted caramel in the buttercream.  I like my salted caramel more caramel than salt – it’s the hit of sweetness just tempered by salt that tickles my taste buds.  Obviously, we all make things to suit our own palate, so feel free to add more salt or entirely omit it if it’s not your thing.  The cakes will be lovely whichever path you choose.


I’d seen the idea of stacking cupcakes into a tree on a website selling silicon cases for the job.  However, you only got three of each size...who can exist on three cupcakes?  (Even huge cupcakes like these!)  So I decided to adapt it to foil cases and make a forest! 


Gingerbread and salted caramel is a lovely combination and not one I’d considered putting together before.  Surprisingly, given the huge amount of sugar in the buttercream, it doesn’t taste too sweet.  It also helps that – because of the stacking – each cupcake gets only a ring of buttercream rather than a huge pile.


When the lovely people at Tala asked if I’d like to try out some of their products my answer was – of course – a resounding yes!  Tala has a special place in my affections; the CCM (Caked Crusader’s Ma) didn’t have much baking equipment but she did have a set of Tala cockolly cutters which she used to make pie decorations from spare pastry.  Her set probably dates from the 1960s and it’s incredible that the flimsy cardboard box still survives:


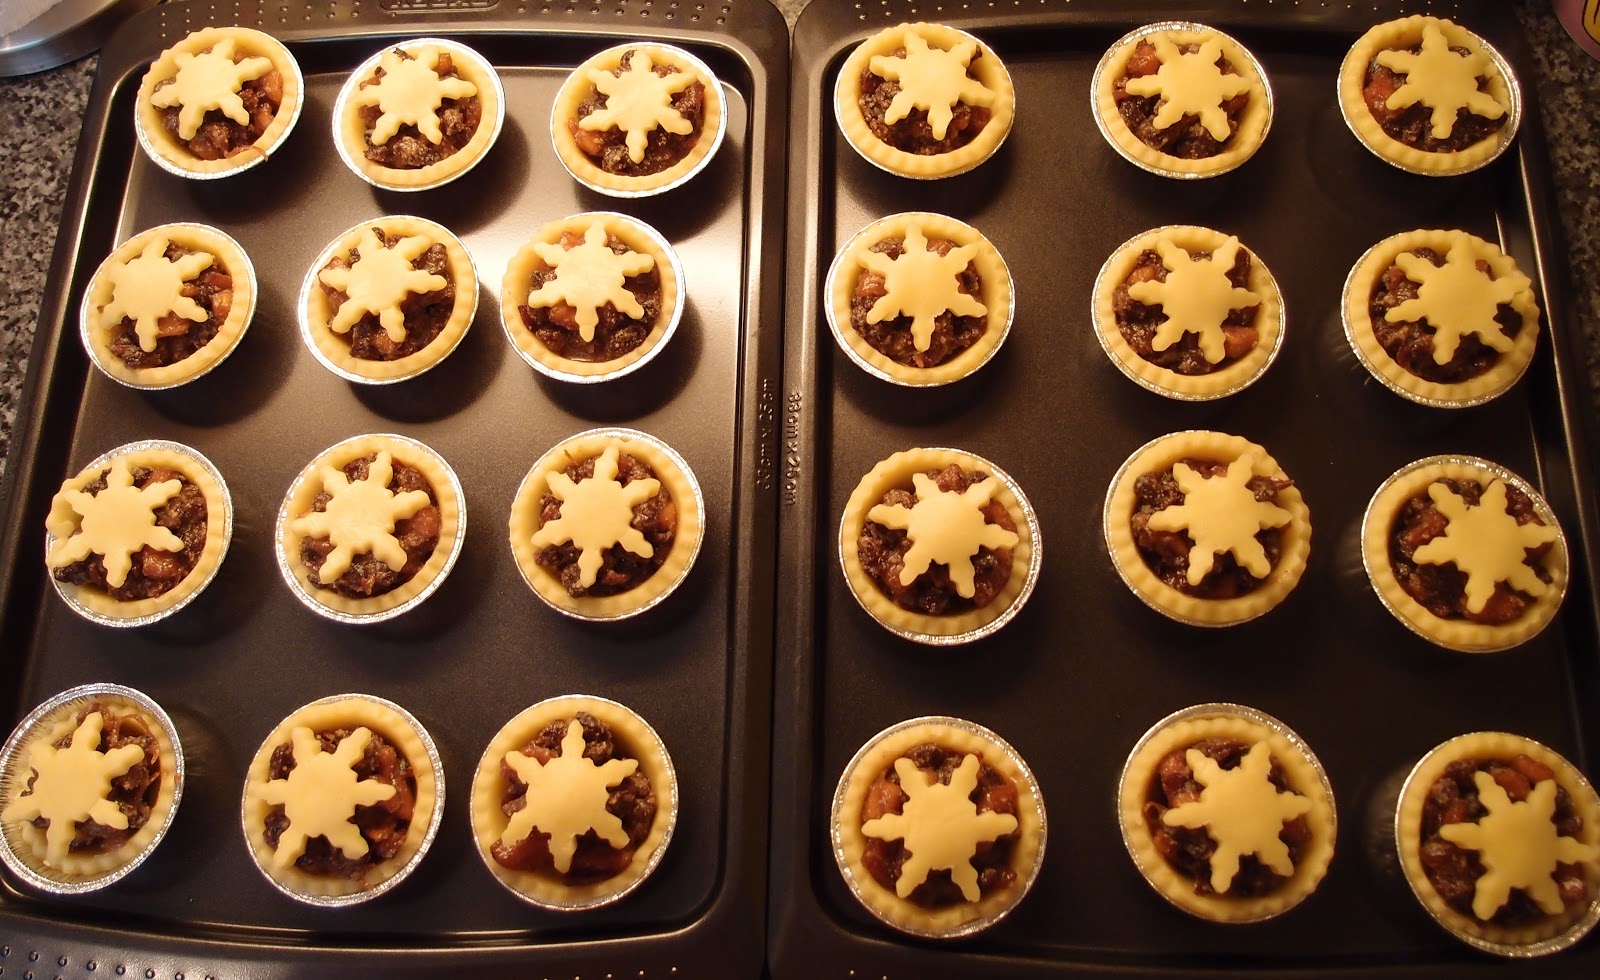
 I decided to use the lovely snowflake cutters as the lid for my mince pies this year...and I think they look rather good!


This is my last blog post before Christmas so all that remains is to wish everyone an extremely happy and tasty Christmas!


Ingredients

For the gingerbread:
210g unsalted butter – at room temperature
300g golden caster sugar
90g black treacle
90g golden syrup
3 eggs plus 3 egg yolks
450g plain flour
2 teaspoons ground ginger
1 teaspoon ground nutmeg
3 teaspoons baking powder
360ml full fat milk – warmed gently

For the buttercream:
190g caster sugar
6 tablespoons cold water
120ml double cream
½ teaspoon salt (or to taste)
1 ½ teaspoons vanilla extract
240g salted butter – at room temperature
300g icing sugar
Dr Oetker natural green food colouring gel


Method

Preheat the oven to 190°C/fan oven 170°C/375°F/gas mark 5.

Line two 12 hole cupcake pan with cases – you’ll need 16 of each size case.  If you have a mini cupcake pan use this for the mini cupcake cases.  For the truffle case sized cases, simply place on a baking sheet.  If you use foil cases they will hold their shape.

Beat together the butter and sugar until smooth, creamy and light.  At first it will seem like this will never happen – but persist!  It may take five or ten minutes depending on how soft the butter was.

Beat in the treacle, golden syrup, eggs and egg yolks until well combined.

Weigh out the flour and add the spices and baking powder to it.

Stir in half the flour mix to the butter mixture.

Stir in half the warmed milk.

Stir in the remaining flour, followed by the remaining milk taking care to ensure the batter is well mixed.

Spoon into the prepared cases.

Bake the larger cupcakes for 20-25 minutes.  You can risk baking all the different sizes together but you might disturb the larger cakes when you open the oven to remove the small ones.

Bake the medium cupcakes for approximately 15 minutes or until well risen and a skewer inserted into the cakes comes out clean.

The smallest need only about 10 minutes.
Leave to cool on a wire rack.

Now make the caramel: place the caster sugar and water in a saucepan (a silver one is best as you can monitor the colour better) and heat gently until the sugar has dissolved.  Shake the pan to mix the ingredients rather than stir – stirring can make the sugar crystallise and produce a grainy caramel.

Increase the heat and cook, swirling the pan occasionally, until the caramel has turned golden and thickened a little.

Remove the pan from the heat and stir in the cream.  It may spit a bit so be prepared for it – I wore my oven gloves so my hand didn’t get burned.

Stir in the salt and vanilla and leave to cool.  Taste it (when cool enough to do so safely) to gauge the salt.  It should be a smidge too salty at this point because the saltiness will be greatly reduced when you beat it into the butter and sugar.

It must be completely cool before you make the buttercream.

Beat together the butter and sugar until it is light and fluffy – it will look almost whipped.  It will be a little thicker than is normal at this point but don’t fret, the caramel will soften it.

Beat in the caramel.

Beat in enough green colouring to tint the buttercream.

Spoon into a piping bag and – if the buttercream is particularly soft – pop it into the fridge for 5 minutes.

Now build the Christmas trees: push a cocktail stick into the centre of a large cupcake.  Skewer a medium sized cupcake onto it.  Take another cocktail stick and skewer the smallest cupcake to the medium one - cut the sticks to size so nothing is poking out the top.  It is best to do this before piping as it’s cleaner!

Now pipe the buttercream in small points over all the visible gingerbread to replicate a Christmas tree.

Decorate with sprinkles and baubles.

Bask in the glory of the wonderful thing you have created.

Eat.

Sunday, 6 November 2011

Yorkshire parkin


As my love affair with all Yorkshire related baking grows, I chose to make parkin
this week. Parkin is traditionally eaten in Yorkshire on 5th November, Bonfire Night, and as I was heading to a firework display with Mr CC and the CCMIL (Caked Crusader’s Mother in Law) it seemed an appropriate treat to have waiting for us on our return.


Parkin is a true test of willpower as it needs to be allowed to age – you can’t leap on it and gobble it up the minute it comes out of the oven! It needs to be stored, in an airtight container, for at least 4 days so the spice and treacle can mellow and mature; the texture also changes and becomes darker and stickier.


I have to admit that when my parkin came out of the oven I was a little disappointed, because it didn’t look particularly dark or sticky. Here it is, freshly baked:


Now, I understand the need for aging. Just look at the difference after two days in an airtight container. It’s sunk, it’s darker and it’s sticky to the touch. If ever there was a reward for patience, this is it:


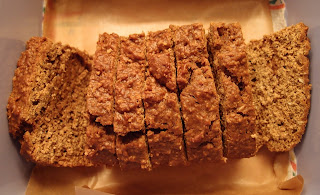
After four days it had improved even further:


What makes parkin different to gingerbread is the inclusion of oatmeal. This was a stumbling block as I couldn’t find oatmeal anywhere; so I bought rolled oats and blitzed them to a fine, gritty flour in my food processor. The look and taste of my finished parkin matched those I’d eaten in Whitby, so I’m assuming this is an acceptable substitution:


When a slice of parkin is put in front of you, you have a big decision to make – to butter or not to butter? In the interests of science I tried both and liked both. I think buttering the parkin makes it a more substantial bite to eat, and I liked the salty contrast of the butter with the sticky spiced cake. Remember the rule re:buttering - it must be so thick that you can leave teeth marks in it! My dentist could probably identify me from this photo:


Ingredients

300ml milk
225g golden syrup
225g black treacle
115g unsalted butter
50g dark brown sugar
450g plain flour
½ teaspoon bicarbonate of soda
2 teaspoons ground ginger – next time I would use more, probably 4 teaspoons
350g medium oatmeal – I couldn’t find this so blitzed rolled oats (i.e. porridge oats) in the food processor until it resembled coarse flour
1 egg

Optional extra: pinch cayenne pepper

To serve: butter


Method

Preheat the oven to 180°C/fan oven 160°C/350°F/Gas mark 4.

Line a 20cm square cake tin with baking paper that comes up above the height of the tin – this makes it easier to lift the baked parkin out.

Place the milk, golden syrup, black treacle, butter, and dark brown sugar into a saucepan. I placed the saucepan on the scales and weighed the syrup and treacle directly into the pan – it stops the scale’s tray getting icky.

Place the pan over a gentle heat and stir continuously until the ingredients have melted and combined. Do not let the mixture boil.

Remove from the heat and leave to cool for 5 minutes.

Place the flour, bicarbonate of soda, ground ginger, oatmeal and – if using – the cayenne into a large bowl and mix.

Stir in the egg, then make a well for the wet ingredients.

Stirring all the time, pour in the wet ingredients (from the saucepan) and stir until well combined. It will look a bit gritty because of the oatmeal, so don’t panic.

Pour into the prepared tin and level the surface.

Bake for approximately 40 minutes or, until the surface of the parkin is firm to the touch. The skewer test isn’t great here because you want to retain some squidginess.

Leave the parkin to cool in the tin, until the tin is cool enough to handle.

Remove the parkin from the tin and leave to cool completely on a wire rack.

Store in an airtight tin for at least 4 days before eating. You can eat it plain, or buttered.

Bask in the glory of the wonderful thing you have created.

Eat.

Friday, 24 December 2010

Gingerbread

I always make gingerbread men at Christmas time – there’s something about the warming spice of ginger that seems festive. This year, I decided to give my trusted recipe a rest, and try a new version; mainly because my recipe is more of a biscuit and I wanted to find a truer ginger-bread.


This recipe intrigued me because of its unusual method; it doesn’t require you to melt the butter and syrup/treacle, and the flour is self raising. It also includes an egg. Using dark treacle (my usual recipe uses the paler golden syrup) produced a darker, spicier biscuit that I particularly enjoyed. I also found the dough easier to work with than some gingerbreads:


Wherever I travel I’m always likely to return with biscuit cutters and cake tins! Salzburg was no exception and I came back with two rather unusual biscuit cutters in my suitcase: a Krampus cutter ...


...and a cutter in the shape of the Stiegl brewery logo...


....oh yes, my Christmas biscuits can be filed under “e” for “eclectic” this year! Just to balance out the weirdness I did go for the more standard Christmas cutters:


It pains me to type this next sentence, but I’ve noticed that – over the Christmas period – people don’t always seem to want cake whereas they’ll always gladly accept a biscuit. Do you think I made enough?


Happy Christmas to you all – I hope your Christmas is filled with sugar and spice and everything nice!

Ingredients

325g self raising flour
3 teaspoons ground ginger – I used a lot more, but this is a guideline amount
1 ½ teaspoons ground cinnamon
85g unsalted butter, from the fridge
115g dark brown sugar
85g black treacle ( I tried a second batch with 45g golden syrup and 40g black treacle and preferred it)
1 egg

To decorate: whatever you choose!

Method

Place the flour, ginger, cinnamon and butter in a food processor and blitz until you have something akin to breadcrumbs. If you don’t have a food processor rub the butter into the flour, then stir in the spices – it will stop your fingers getting stained with the spice!

Place the brown sugar, black treacle and egg in a mixing bowl and beat until runny and well combined. I always place the mixing bowl on the scales when weighing out black treacle as it saves you having to scrape it out of the scale's bowl.

Tip the flour mixture into the treacle mixture and beat until the dough forms clumps.

Tip the dough onto a large sheet of clingfilm and use the clingfilm to help you bring the dough together – I recommend this for three reasons: firstly it saves you over-handling the dough, secondly you don’t get dirty and thirdly, you don’t have to add extra flour to the dough to stop it sticking so the finished biscuit will be softer and moister.

Wrap in clingfilm and refrigerate for one hour.

Preheat the oven to 180˚C/fan oven 160˚C/350˚F/gas mark 4.

Line two baking sheets with baking paper.

Roll out the dough between two sheets of clingfilm – don’t add flour unless necessary – I needed a little flour when I used solely black treacle as I had sticky treacle patches in my dough; it definitely made it harder to re-roll. You’re aiming to roll it about 0.5cm thick. When I used a blend of black treacle and golden syrup no flour was necessary and re-rolling was a dream!

Use the cutters you have chosen to cut out the dough.

Re-roll the scraps and keep on until you have used all the dough. If you’ve dusted the surface with flour, it may be hard to get the gingerbread back into a ball; try wetting your hands a little and kneading the dough – it should do the trick!

Bake for approximately 10-12 minutes or until the biscuits feel firm to the touch.

Leave, in the trays, for 10 minutes to firm up, then transfer to a wire rack to cool completely.

Decorate as desired.

Gingerbread gets better with age – make this several days in advance for a biscuit that packs a punch with its flavour!

Bask in the glory of the wonderful thing you have made.

Eat.