Showing posts with label no-bake. Show all posts

Monday, 28 March 2016

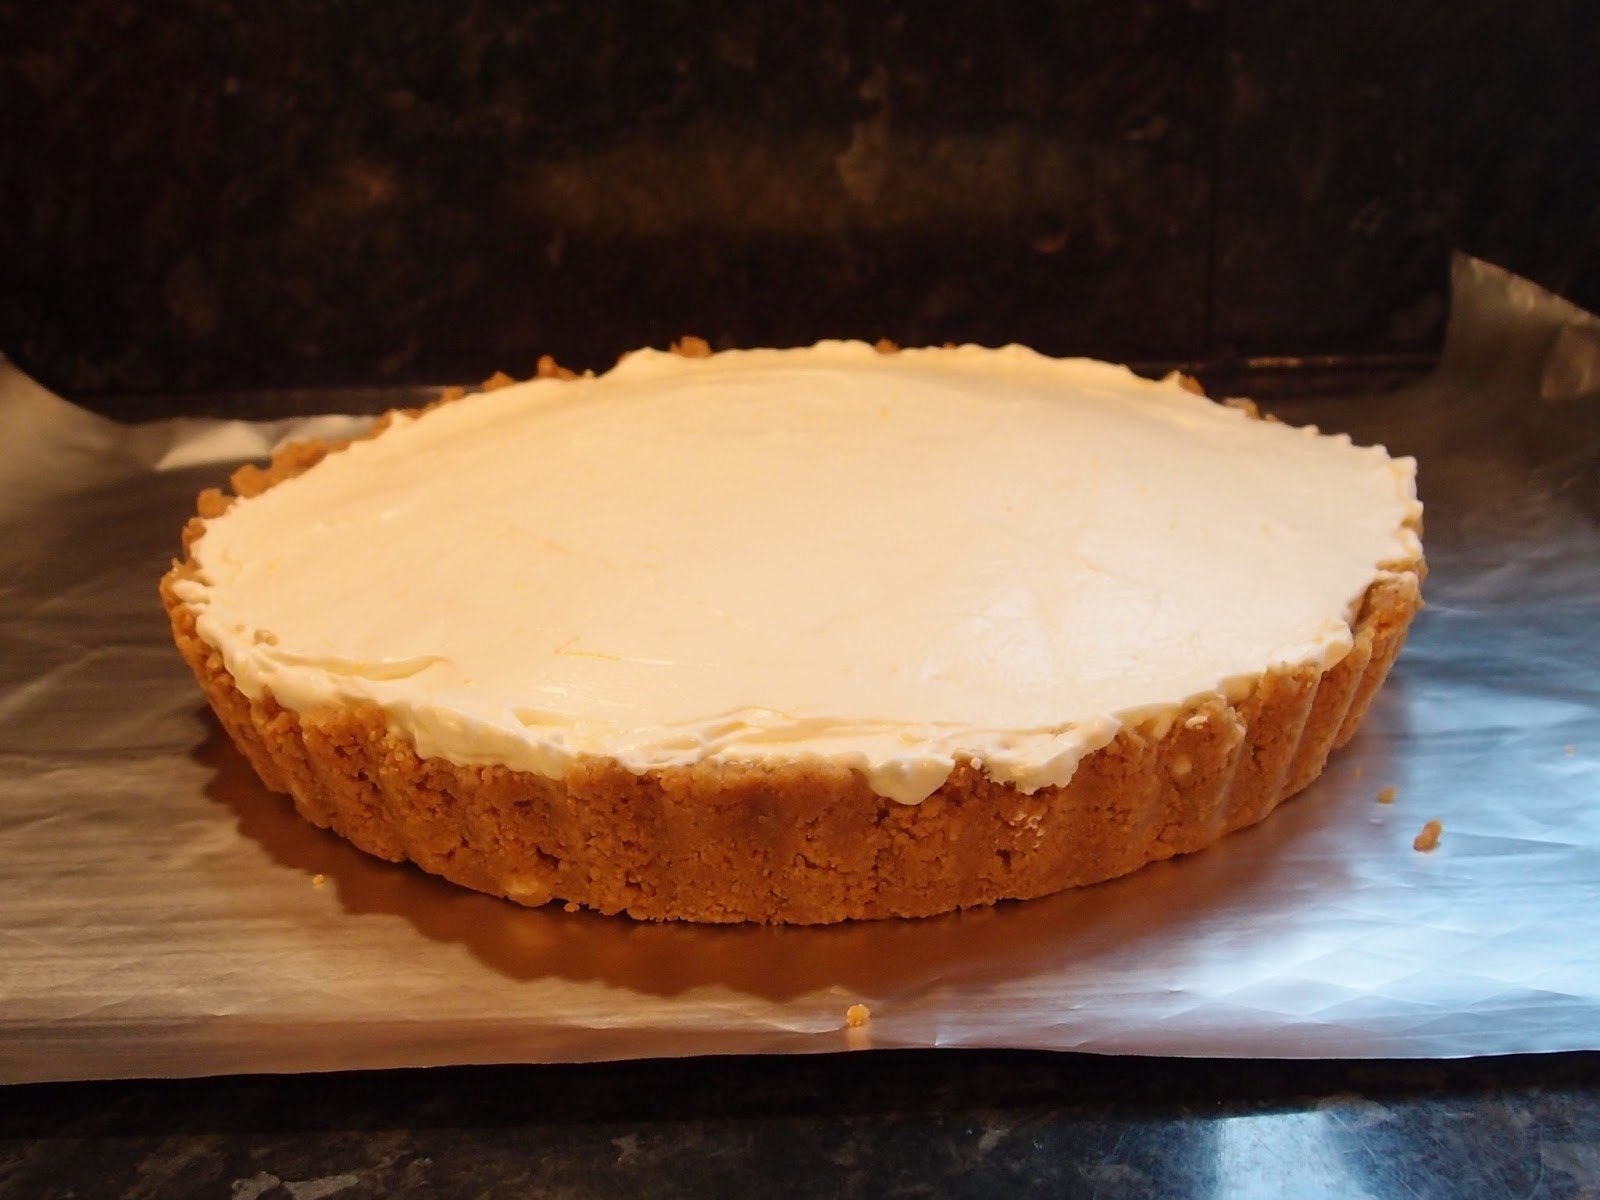
Lemon cream pie


Sometimes, I can be sceptical about recipes if they look too simple.  This was such a recipe and gosh was I wrong!  Firstly, it’s no bake so is super quick to make; secondly, it has few ingredients and thirdly, it requires no skill or techniques whatsoever.  Win-win-win!
The texture of this is amazing – it is the softest, lightest, smoothest texture I can recall.  Imagine a whipped mousse crossed with a cloud and you’d be getting there!  The lightness of texture offsets the richness so it’s actually deceptive; I could quite easily have been on my second slice before I realised how creamy it was!


The basic method could be adapted to any citrus fruit – it’s the acid from the fruit you need to set the cream.  It worked very well with lemon because the fresh zing balanced the richness of the cream.  The gingernut base gives an extra flavour too.


Just about the perfect dessert for a lazy holiday weekend.  It keeps for 2-3 days in the fridge so you can just cut slices as they’re required (makes a refreshing change from all the chocolate!).  I know that I will also adapt this recipe to build it in a glass too – the creamy filling was light enough to work with that style presentation.


Ingredients

225g gingernut biscuits
115ml unsalted butter, at room temperature
300ml double cream
265g condensed milk
Juice of 2 lemons
zest of 1 lemon


Method

Blitz the gingernuts in a food processor.

Add the butter (no need to melt it if you’re using a processor) and blitz again until you have the texture of clumpy damp sand.

Press into the bottom of a 20cm loose bottomed flan dish and press a little up the sides too.

Refrigerate while you make the filling.

Whip the cream until it reaches the soft peaks stage.

Fold in the condensed milk, lemon juice and zest.

Spoon into the biscuit base and spread out.

Refrigerate for at least 2 hours before serving.

Bask in the glory of the wonderful thing you have created.


Eat. 

Sunday, 28 September 2014

No-bake oat, chocolate and peanut butter bars


Mr CC’s workplace is hosting a big coffee morning for Macmillan Cancer on Monday in order to give everyone time to bake over the weekend rather than have to do it when they got home from work.  I’ve been beavering away making sponge cake and cupcakes and needed something very quick and easy for us to enjoy.  Cake for charity is an extremely worthwhile and noble thing but there’s also the saying that charity begins at home so I knew our own cake tin had to be well stocked too!


This really couldn’t be any quicker or easier.  Or any more delicious which, after all, is obviously the most important thing.  I am always partial to anything oaty – I’ve never met a flapjack I didn’t like, but the addition here of chocolate and peanut butter raises the bar and adds that salty-sweet element that everybody seems to adore.  The molten chocolate peanut butter mix was so glossy and beautiful that I had to photograph it:


The only tricky thing here is not to eat all the warm, buttery oat mix before it finds its way to the pan to chill.  Warning: do not taste a bit ‘just to see what it’s like’.  You will end up eating a pan full of warm oats and wondering if you have enough ingredients left to make a second batch!  I tasted a bit (which I realise makes me fall into the ‘do as I say, not as I do’ camp) and a second bit just to prove the first bit wasn’t misrepresentative of the whole...and after that had to dig deep into my self control reserve (not known for its depth) to leave it alone.  The smell was torturous to resist!


I think from this next picture you could guess that I’m left handed!


Ingredients

225g unsalted butter
100g soft brown sugar
1 teaspoon vanilla extract
375g oats
200g milk chocolate
125g smooth peanut butter


Method

Line a rectangular pan measuring approximately 24cm v 17cm with baking paper or non-stick foil.  Anything close to these dimensions will work so don’t worry if your pan is different.

Melt the butter in a large saucepan over a gentle heat; don’t rush this – you don’t want the butter to take on any colour.

Stir in the sugar and vanilla.

Add the oats and stir well to combine.

Cook over the heat for about 5 minutes.

Divide the mixture in half and press one half evenly into the bottom of the prepared tin.

Put the remaining half to one side.

In a separate pan, gently melt the chocolate and peanut butter, stirring occasionally so the ingredients combine.

Pour over the oaty base in the tin and spread out so the base is completely covered.

Crumble the remaining half of oat mixture over the chocolate taking care to achieve an even distribution.

Lightly press the oats into the chocolate.

Cover with clingfilm and refrigerate for at least three hours, ideally overnight.

Let come to room temperature before cutting into bars.

Bask in the glory of the wonderful thing you have created.


Eat.

Sunday, 25 May 2014

Peanut butter chocolate truffles


These delicious truffles could not be simpler to make but they do require a bit of planning as the ganache needs time to chill properly in the fridge.  I was inspired to make these after Mr CC and I were served them with our tea/coffee at the end of very nice dinner to celebrate Mr CC’s birthday. 


The ones we were served in the restaurant had been rolled in cocoa powder, which I’m not a fan of in its raw form, so I used digestive crumbs instead.  Curses!  I am typing this post at mid point in the process – my ganache is cooling in the fridge.  Unusually, Mr CC is sitting next to me while I’m typing and has noticed that I’ve chosen not to roll them in cocoa....long story short, half will now be in biscuit crumbs, half in cocoa!


I have noticed a curious thing about digestive biscuits: when I buy them to put in my biscuit tin and wish them to stay whole I will open the packet and find several broken, even though I have carefully laid them in the top of one of my bags of shopping and treated them as though they were made of glass.  When I buy digestive biscuits to turn into a cheesecake base or any other recipe that involves smashing them into crumbs I will casually toss them into any of my bags of shopping – in with the potatoes and milk?  Why not? They will be doing the work for me! – and they will come home with not so much as a crumb chipped away. 


Peanut butter and chocolate is a lovely combination for anyone who enjoys that salty/sweet flavour mix.  I challenge anyone to stop at one truffle!  I tried cutting one in half to try and convey the rich, dense texture but it looked a bit crumbly because I cut it straight from the fridge thinking it would give a cleaner cut.  Moral of this story?  When in doubt, bite it in half:


Ganache making is a wonderful process; I never quite trust that the chocolate will mix in but it’s wonderful how it does!


I used a small melon baller to scoop the ganache into individual truffles.  You can tidy the balls up by rolling them in your hands but don’t waste a lot of time on this because, once they are rolled in cocoa or crumbs they look smooth and round anyway.  I made mine quite small – I like a truffle that you pop into your mouth whole and treat like a shot!  This mixture made me over 60 truffles....hurray!  Don't limit yourself to serving them as chocolates - how about using them as decadent cupcake toppers, or cheesecake decorations....in fact, any chocolate dessert?


Ingredients

300ml double cream
6-8 tablespoons smooth peanut butter – depending how peanutty you want it
200g dark chocolate, broken into squares
100g milk chocolate, broken into squares
8 digestive biscuits
6 tablespoons cocoa powder, you may need more


Method

Place the cream and peanut butter in a saucepan and bring slowly to the boil.

Remove from the heat and add both the dark and milk chocolate.

Leave to stand for a couple of minutes before gently stirring to combine into a thick, glossy ganache.

Pour into a heat proof dish and leave to cool before refrigerating until set (at least 4 hours – I left it overnight).

Blitz the digestive biscuits to crumbs either in the food processor or by placing in a bag and bashing with a rolling pin.

Take a melon baller scoop (or a  teaspoon if you don’t have a melon baller) of ganache and roll into a ball.

Repeat until all the ganache is used up.  If the ganache in the dish or the rolled balls start to get too soft return to the fridge for 10 minutes before resuming.

When all the balls are rolled, roll them individually in the biscuit crumbs or the cocoa powder.

Place in a petit four paper case and refrigerate until you wish to serve.  I got over 60 truffles...which made me very popular with everyone!

Bask in the glory of the wonderful thing you have created.


Eat.

Wednesday, 1 January 2014

Snowy rocky road


Now for something that requires no baking and very little prep, this was one of the stand-out hits of my Christmas goodies!  This is the perfect treat for having on standby in the fridge whenever a cup of tea needs a little bit of something tasty to accompany it.


You could reinvent this and change the ingredients, for example switching sultanas for the cranberries, or almonds for the pistachio, but the combination set out below really worked well – whatever you do, make sure you keep the mix of chewy and crunchy.


The pistachio and cranberry also looked festive sitting in the white chocolate.  I struggled to get good photos as it must have been one of the greyest, wettest, darkest Christmases ever...and, of course, I only remembered to photograph it when I was sitting with my cup of tea waiting to eat a square.  Impatience and greed does not make for good photos!


Happy New Year everyone – here’s to a year of wonderful bakes and may you never have a soggy bottom!


Ingredients

400g white chocolate, chopped
25g mini marshmallows
50g desiccated coconut, plus extra for sprinkling
50g dried sweetened cranberries
40g pistachios, roughly chopped
50g ginger nut biscuits, broken into small chunks but not crumbs
To decorate: sprinkles of your choice


Method

Line a tin approximately 15cm x 20cm with clingfilm.

Melt the chocolate, either in the microwave or in a bowl above a saucepan of steaming water (making sure the bowl doesn’t touch the water).  Be gentle and don’t rush as white chocolate is more sensitive than other chocolate.

Stir in all the ingredients and spoon into the prepared tin, leveling the surface.

Sprinkle over the additional coconut and decoration of your choice; I used bronze sugar pieces.

Refrigerate until set and then remove from the tin and cut into squares.

Keep in the fridge until wanted – it keeps for days.

Bask in the glory of the wonderful thing you have created.


Eat.

Thursday, 26 December 2013

Trifle cheesecake


Trifle or cheesecake?  Surely, one of the toughest decisions the dessert menu can pose.  Well, fret no more because nature has found a solution: trifle cheesecake.  All the flavour and texture of cheesecake with all the bells and whistles of trifle.


As soon as I saw this recipe in the BBC Good Food Christmas magazine I knew it was what we’d be eating after Christmas lunch.  If I was in a romcom, I could tell the BBC they had me at “trifle cheesecake”.


Christmas would be much more drab without sprinkles:


When you think about it, some cheesecakes already have a thick fruity layer on top but more of a set coulis than jelly.  The jelly works really well and lightens the whole dessert.  It was definitely a crowd pleaser.


I thought I had lined my tin pretty thoroughly, and also thought I had spread out the cheesecake layer to close off any holes.  Wrong.  That liquid jelly is a terror and I say this to prepare you for the likelihood of leakage.  Take precautions in advance – lots of kitchen paper under the tin will prevent it looking like a jelly massacre took place shortly before you opened the fridge door.  Also have a spare packet of jelly to make up for the jelly lost in leakage; it looks a bit weird if your raspberries are left poking out the top! (Not a sentence I ever thought I’d type)


Apologies for the poor quality photos; the light wasn’t great and, by this point in events, I had roast potato-fuelled inertia.  In other words....a typical Christmas!  Hope you all had a good one!


Ingredients

For the base:
250g digestive biscuits
100g unsalted butter

For the cheesecake layer:
3 gelatine leaves
3 tablespoons Bird’s custard powder
200ml milk
100ml double cream
900g cream cheese – I used Philadelphia
200g golden caster sugar
1 teaspoon vanilla extract

For the jelly:
1 x 135g pack raspberry jelly cubes (You might want a spare pack on standby, should you lose jelly to leakages – I did!)
175g raspberries

For the cream:
300ml double cream
Cadbury’s Flake
Sprinkles of your choice


Method

Line a 23cm round springform tin with foil or clingfilm.  It needs to be completely lined.  Also wrap the outside of the tin with foil – because the chances are the jelly will leak!  If you’re a pessimist (I am) then place some kitchen paper under the tin inside the foil as it soaks up any leaks.

In a food processor blitz together the digestive biscuits and butter (no need to melt) until it resembles wet sand.

Press the biscuits crumbs into the base of the prepared tin and refrigerate.

Now make the custard for the cheesecake layer: place the gelatine leaves into a bowl of cold water.  Put to one side.

Spoon the custard powder into a bowl.

Pour the milk and cream into a saucepan and then take three or four tablespoons of this to stir into the custard powder and make a thick paste.

Heat the milk and cream in the saucepan until almost at boiling point.

Pour over the custard paste and stir to ensure no lumps.

Return to the saucepan and heat, stirring all the time, until the custard thickens.

Remove from the heat.

Squeeze all the water from the gelatine leaves and whisk into the warm custard.

Pour into a bowl and press clingfilm onto the surface to stop a skin forming.

Leave to cool.

When it is cool, you can make the cheesecake layer: beat together the cream cheese, sugar and vanilla until smooth and well combined.

Stir the custard to loosen it a bit, and then beat into the cheesecake mix.

Spoon over the biscuit base and return to the refrigerator for 4 hours.

Now make the jelly layer: Make half the packet of jelly and leave, in the jug to cool for 30 minutes or so.

Pour over the cheesecake and place the raspberries in the jelly.  At this point, they won’t be covered.  There might be some jelly leakage at this point but if you have prepared your tin adequately it shouldn’t cause any fridge-carnage!

Refrigerate for an hour.

Make up the remaining half pack of jelly and pour over the raspberries.

Refrigerate for an hour or until the jelly is totally set.

Whip up the cream and pipe over the jelly on top of the trifle.

Sprinkle over crushed Flake or almonds, or any sugar decoration you have.

Remove from the refrigerator about 10 minutes before you wish to serve.

Bask in the glory of the wonderful thing you have created.


Eat.
Sunday, 21 October 2012

Famous Faces’ Favourite Fancies - Chocolate and ginger tiffin


If you’ve turned on the television before 9.30am at any point in time since 1984, the chances are you will have come across LorraineKelly.  I did an almost comic double take when I read that – 1984!  Lorraine Kelly has been getting up before the crack of dawn for 28 years to present live breakfast telly...and somehow looks younger now than when she started!


Fast approaching national treasure status (if not indeed already there) and famed for her infectious giggle, what I love about Lorraine is her ability to do funny and serious with equal success and her warmth – something that is often lacking in television.  Of course, the fact that she selected her favourite fancy as anything including chocolate and ginger didn’t hurt either...a woman after my own heart!


I chose a no-bake tiffin as it seemed the best of all worlds – biscuity, fruity, nutty, gingery and chocolaty.  I think that’s enough of words ending in ‘y’!  I mixed milk and dark chocolate for the topping but you can use whichever blend you choose.  Here it is before the chocolate:


The chocolate sets nice and thickly on the top and requires a satisfying amount of pressure to bite through it, at which point you are rewarded with a biscuity mixture of fruit and nuts.  Using ginger nut biscuits adds an extra punch of flavour but you could use plainer biscuits if you preferred.  You have to love something that you can leave a set of teeth marks in:


Ingredients

For the base:
225g ginger nut biscuits
125g unsalted butter
2 tablespoons golden syrup
25g cocoa powder
80g raisins
75g toasted flaked almonds

For the topping:
200g chocolate – I used half dark, half milk, but you can use all dark or all milk if you prefer


Method

Have ready a 20cm x 13cm disposable foil tin.  I bought mine in the local supermarket – there were three in the pack and it came with a cardboard lid.

Crush the ginger nut biscuits in the food processor or using a bag and a rolling pin.  If using the processor, pulse, because you want a mixture of crumbs and lumps of biscuit – don’t treat it like you’re making a biscuit base for a cheesecake.

Place the butter and golden syrup in a large saucepan and melt together, stirring occasionally so that the mixture doesn’t catch on the bottom of the pan.

NB. When weighing out the flaked almonds give them a squeeze in your clenched hand to crush them a little – it will make the finished tiffin easier to cut.

Tip the biscuits into the melted butter along with the cocoa, raisins and almonds.

Stir until well combined then press into the foil tray.  Press down so the mixture feels compact.

Cover and refrigerate.

When cold and hard, make the topping: melt the chocolate either in short bursts in the microwave (my preferred method) or in a bowl over a pan of simmering water – take care that the bowl doesn’t touch the water.

Pour the melted chocolate over the set base and spread to ensure an even covering.
Leave to set (no need to refrigerate but it won’t do it any harm – just might take the gloss off the chocolate).

Cut into bars and enjoy with a cup of tea.

Bask in the glory of the wonderful thing you have created.

Eat.
