Showing posts with label dessert. Show all posts

Sunday, 19 June 2016

Coconut brownies


I had virtually no time to bake this weekend but, nonetheless, wanted some home baking.  This is the perfect recipe to have up your sleeve – the work of minutes to get in the oven, very few ingredients, and utterly delicious. 


If I had to pick my favourite things to pair with chocolate coconut would be right at the top of the list, perhaps having to slug it out with pear for who actually had the top spot.  There is just something about coconut that brings out the best in chocolate and vice versa.  I love the damp grainy texture of baked desiccated coconut and that you can find bits of it in your teeth for a while after eating – it’s the ingredient that keeps on giving!


One thing I think it’s important to point out – this recipe didn’t behave like a normal brownie recipe; usually, when you’ve done the melting of the chocolate and butter you end up with quite a liquid mixture right until you add the flour, and even then it’s a runny mix.  This was thicker and only started to loosen when I added the eggs – here’s what it looked like after the initial melting stage (just so you don’t panic that it’s gone wrong if yours looks similar!):


Possibly the only difficult thing about baking brownies is judging when to remove them from the oven.  I work on the assumption that things firm up/set/dry out a little on cooling so try and take them out before they look ‘done’.  This goes against my prudent nature and I feel a bit of a risk-taking daredevil in removing something from the oven before it looks ready, but I force myself, and the momentary stress is worth it!  In my opinion a brownie is better a little underdone, than a little over.


Ingredients

100g cocoa powder
250g unsalted butter
500g golden caster sugar
4 eggs
100g self raising flour
100g desiccated coconut, plus 2 tablespoons extra to sprinkle on top


Method

Preheat the oven to 180C/fan oven 160C/350F/gas mark 4.

Line a 20cm square tin with baking paper or non stick foil.

Place the cocoa powder, butter and sugar into a large pan (large enough to accommodate all the additional ingredients) and melt over a gentle heat, stirring all the time so nothing catches on the bottom of the pan.

When everything has combined remove from the heat and leave to cool for about 10 minutes.

Beat in the eggs, one at a time.

Fold in the flour and coconut.

Pour into the prepared tin and sprinkle the extra coconut over the top.

Bake for approximately 45 minutes or until the brownie is set but not firm.  Best to start checking after about 30 minutes as ovens vary.  If the top is getting too dark and crusty, cover loosely with foil and continue to bake.

Leave to cool in the tin and, when cool, cut into chunky sized squares.

Serve with a cup of tea, or warm and serve with ice cream for dessert.

Bask in the glory of the wonderful thing you have created.


Eat.

Sunday, 29 May 2016

White chocolate cheesecake


There is something about a bank holiday weekend that just makes you feel like you have more time for everything, including baking.  I wanted to bake something that was rich and indulgent, and would also be a fancy treat across the whole three days.  I don’t usually make baked cheesecakes but the minute I laid eyes on this one, on the BBC Good Food website, I knew it had to be!


Just reading the ingredients list indicated that this was going to be rich, rich, rich!  I tried to balance it by serving with fresh raspberries. Any acidic fruit would work well such as rhubarb or citrus.


The texture of this cheesecake is beautiful – I often find that baked cheesecakes can be a bit dense and heavy, resulting in that squeaky tooth feeling.  This one is light and almost mousse-like, but unmistakably a cheesecake.  Surprisingly, it isn’t too sweet either.


It’s possibly the first time I’ve made a baked cheesecake where I avoided a split on the top as it cooled.  I think I’ve had this in the past because I’ve overbaked it and not trusted that it would firm up enough during cooling; this time I made a conscious effort to turn the oven off after an hour even though the cheesecake looked barely set.


This makes a big cheesecake but don’t worry if you don’t want it all at once.  Cut it into slices and freeze for future treats! Or eat it all up in a couple of days – I won’t judge you.


Ingredients

For the base:
200g digestive biscuits, or Hobnobs
85g unsalted butter

For the topping:
400g white chocolate
300ml double cream
400g cream cheese – I used Philadelphia
4 eggs
1 teaspoon vanilla extract

To serve: raspberries


Method

Preheat the oven to 180C/fan 160C/350F/gas mark 4.

Blitz the biscuits in a food processor and then add the butter (no need to melt if you’re using a food processor) and blitz again until combined.

Press into the base of a 23cm round springform tin.

Bake for 10 minutes, then leave to cool.

Reduce the oven to 140C/fan 120C/280F/gas mark 1.

Wrap the outside of the cake tin tightly in 2-3 layers of foil – this is to make it waterproof for its water bath later!

Now make the topping: Place the chocolate and the cream into a saucepan and melt together over a gentle heat.

Leave to cool for 5 minutes.

Beat together the cream cheese, eggs and vanilla.

Add the cooled chocolate cream mix and beat until smooth.

Place the tin (wrapped in foil) in a deep roasting tin and pour the filling into it.

Pour boiling water, from the kettle, into the roasting tin so that it comes about halfway up the side of the cake tin.

Bake for 1 hour, then turn the oven off.

Leave the cheesecake to cool in the oven for 1 hour with the door closed, then for about another hour with the door slightly ajar. 

Remove the tin from the water bath and remove the foil.

Cover the top with clingfilm and refrigerate until about 10 minutes before you wish to serve it.

Serve either on its own, or with some fruit for a fancy dessert.

Bask in the glory of the wonderful thing you have created.


Eat.

Sunday, 1 May 2016

Chocolate pecan tart


I suspect this may be the same as a Mississippi mud pie but haven’t called it that in case, like key lime pie, there’s a specific ingredient/aspect that defines it and I’m not aware of it!  These things can be a minefield so I thought I’d avoid causing any offence – in all honesty it was the inclusion of pecan nuts that made me just think, ‘hmm, best not go there!’


It’s a bank holiday weekend so that means the glorious euphoria that only an extra day off work can bring!  I wanted to make something that would last all weekend and provide dessert.  This met the brief and was also a tart that I knew we wouldn’t get bored of – seriously, how you could you ever tire of chocolate tart?


The tart souffled up whilst cooking and sank when cooling.  Don’t panic when this happens; although my outer ring of pecan nuts stood up like sentries and meant the edge couldn’t sink back down giving an ‘interesting’ final look!  Here it is souffled….


….and sunken:


I do admire the design of pecan nuts – they look like shrivelled brains.  Walnuts and pecans have it sewn up regarding ‘interesting looking nuts’.  Most nuts are a bit dull looking – smooth and pale, but these two have raised the bar and always make me pause to look whenever I bake with them.  The complexity in shape that nature can produce is fascinating.  I’ve re-read what I’ve just written and concede that some people may find it weird.  I can assure you that it’s when I say I’ve started talking to the nuts that you should worry (or when I claim that they answer back!)


Ingredients

For the tart base:
225g biscuits – I used hobnobs, but digestives or ginger biscuits would also work
100g unsalted butter, at room temperature

For the filling:
170g plain chocolate
170g unsalted butter
4 eggs
170g dark muscovado sugar
150ml whipping cream
100g pecan nuts

To serve: whipped cream


Method

Start by making the base: blitz the biscuits to crumbs in a food processor, then add the butter and blitz again until you have clumpy wet sand.  NB. If you use the food processor there is no need to melt the butter, unlike it you use the old ‘bash the biscuits with a rolling pin’ method!

Press the crumbs into a 20cm loose bottomed flan tin taking care to come right up the sides.

Place in the refrigerator while you make the filling.

Preheat the oven to 190C/fan oven 170C/375F/gas mark 5.

Melt the chocolate and butter together over a gentle heat.

Leave to cool for about 10 minutes – if the mix is too hot the eggs will scramble when you add them causing a lumpy final texture.

Whisk in the eggs and sugar until smooth and well combined.

Whisk in the cream.

Pour into the chilled biscuit base and place the pecan nuts on top, arranged however you wish.

Bake for 30-40 minutes or until the chocolate filling looks set.

Leave to cool before de-tinning.  Don’t worry that your tart will settle as it cools – this is normal.

Serve in generous slices with cream.

Bask in the glory of the wonderful thing you have created.


Eat

Monday, 28 March 2016

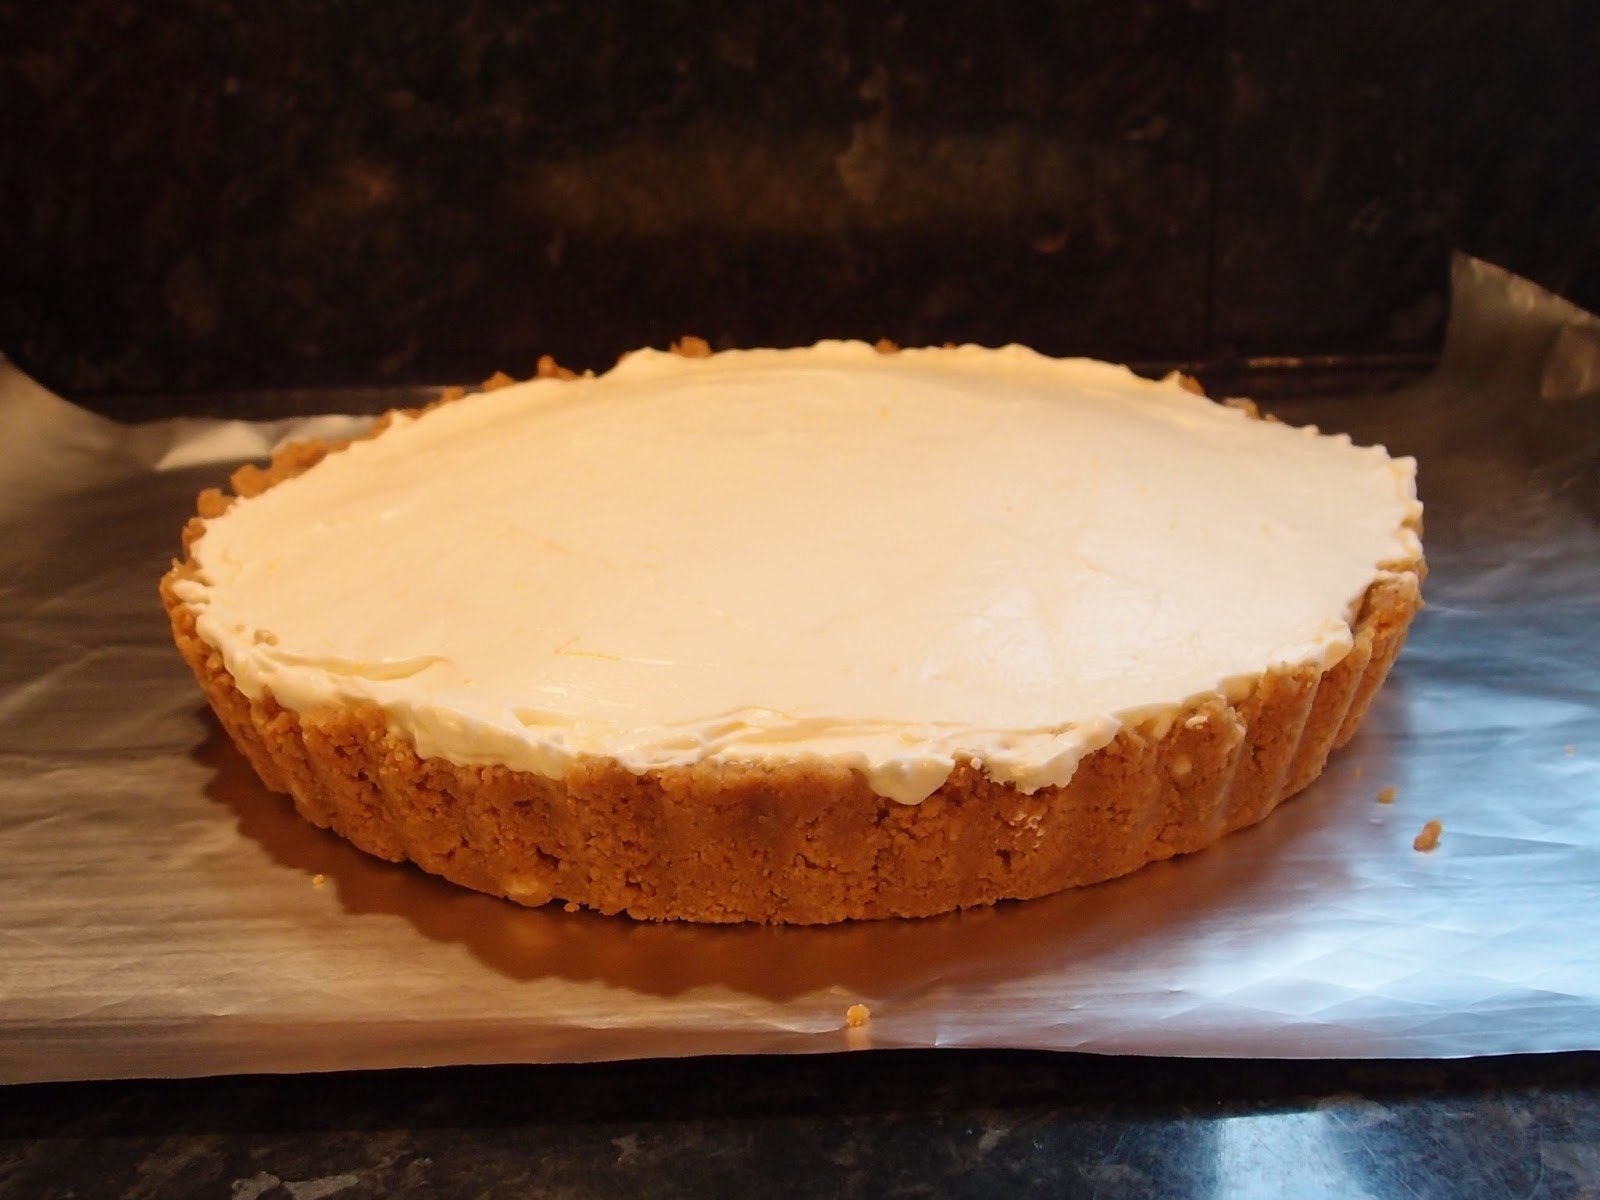
Lemon cream pie


Sometimes, I can be sceptical about recipes if they look too simple.  This was such a recipe and gosh was I wrong!  Firstly, it’s no bake so is super quick to make; secondly, it has few ingredients and thirdly, it requires no skill or techniques whatsoever.  Win-win-win!
The texture of this is amazing – it is the softest, lightest, smoothest texture I can recall.  Imagine a whipped mousse crossed with a cloud and you’d be getting there!  The lightness of texture offsets the richness so it’s actually deceptive; I could quite easily have been on my second slice before I realised how creamy it was!


The basic method could be adapted to any citrus fruit – it’s the acid from the fruit you need to set the cream.  It worked very well with lemon because the fresh zing balanced the richness of the cream.  The gingernut base gives an extra flavour too.


Just about the perfect dessert for a lazy holiday weekend.  It keeps for 2-3 days in the fridge so you can just cut slices as they’re required (makes a refreshing change from all the chocolate!).  I know that I will also adapt this recipe to build it in a glass too – the creamy filling was light enough to work with that style presentation.


Ingredients

225g gingernut biscuits
115ml unsalted butter, at room temperature
300ml double cream
265g condensed milk
Juice of 2 lemons
zest of 1 lemon


Method

Blitz the gingernuts in a food processor.

Add the butter (no need to melt it if you’re using a processor) and blitz again until you have the texture of clumpy damp sand.

Press into the bottom of a 20cm loose bottomed flan dish and press a little up the sides too.

Refrigerate while you make the filling.

Whip the cream until it reaches the soft peaks stage.

Fold in the condensed milk, lemon juice and zest.

Spoon into the biscuit base and spread out.

Refrigerate for at least 2 hours before serving.

Bask in the glory of the wonderful thing you have created.


Eat. 

Sunday, 6 March 2016

Banana and ginger cake


I had four bananas, slowly turning black on the kitchen counter, giving me that judgemental look as if to say, ‘yes, you manage to eat all the biscuits well before they go off, but look at us – unwanted and unloved’ and realised it was time to find a good banana cake recipe.


This cake is adapted from a Dan Lepard recipe and caught my attention because I have never seen banana and ginger combined and they are two of my favourite flavours.  I only made one minor tweak – changing his glace ginger for stem.


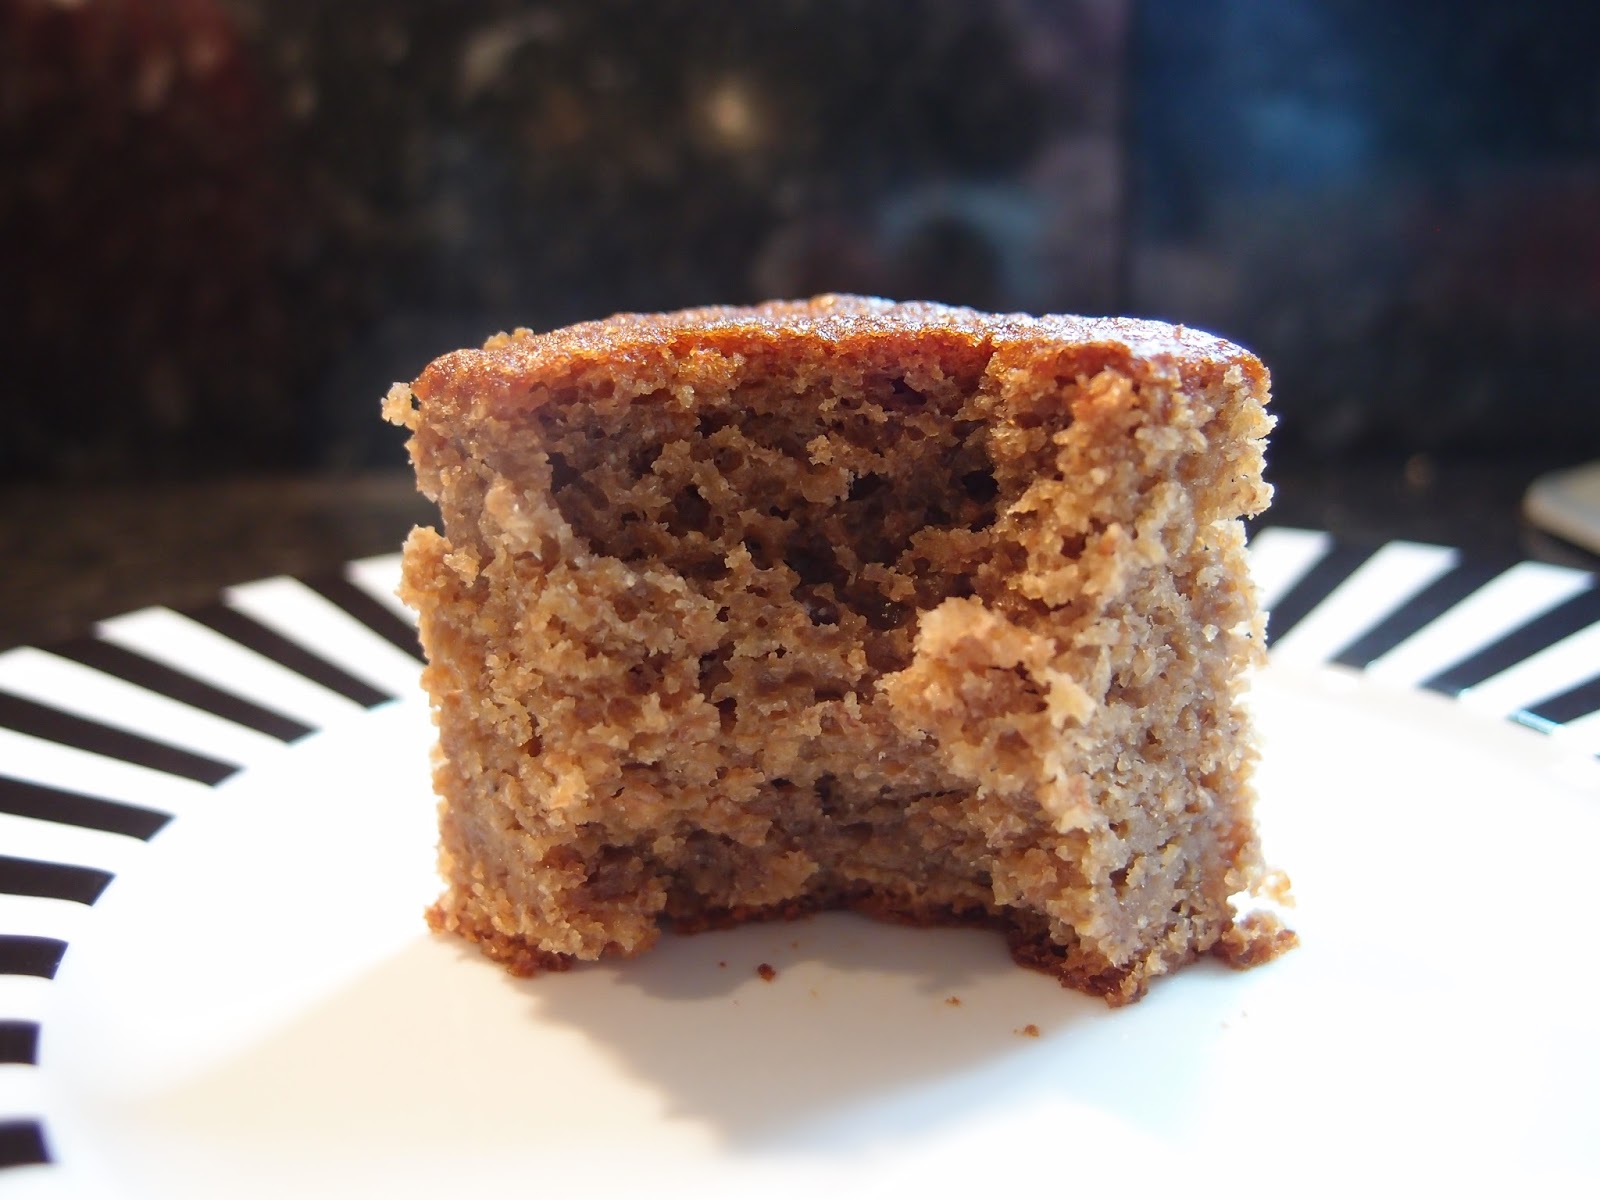
The flavour of this cake is rich and indulgent and gets better with age – the dark sugar seems to get stickier and more treacly.  It works well as a companion to a mug of tea, but is also great warm with custard for dessert.  The smell of it baking drove me half insane – sugar and spice; if there are happier kitchen smells I can’t think what they are!


The sponge is soft and lighter than you might expect.  The ginger is subtle and doesn’t overpower the banana.  Personally, being a ginger fiend, next time I make this cake I would up the ginger – probably with a teaspoon or two of ground ginger.


Don’t let the plain looks 
fool you; this is actually a glossy beauty and has become my go-to banana cake recipe.


Ingredients

For the cake:
200g dark muscovado sugar
300g ripe bananas – this is approx. 2 large bananas
125ml flavourless oil suitable for baking – I used light olive oil
4 eggs
75g stem ginger – finely chopped
200g wholemeal flour
3 tsp baking powder


Method

Preheat the oven to 180C/fan oven 160C/350F/gas mark 4.

Line a 20cm square cake tin with baking paper.

Put the sugar and bananas in a bowl and mash until almost smooth – as long as there are no big lumps it will be fine.

Beat in the oil and eggs.

Stir in the ginger.

Add the flour and baking powder, stir well, then pour into the tin.

Bake for 50-60 minutes, or until a skewer inserted into the cake comes out clean.

Leave to cool in the tin for 30 minutes or so before de-tinning and leaving to cool completely on a wire rack.

Serve in generous slices.

Bask in the glory of the wonderful thing you have created.


Eat.

Sunday, 22 November 2015

Jam steamed sponge pudding


Today is my birthday but, as I’ve been really busy the last few days (lunches, cocktails, even the opera daaaaaaahling), I find myself in the position of having precisely zero birthday cakes. I know!!! I will rectify this shameful situation when I have time (an interesting ginger concoction has caught my eye) but for now all I really fancied was a steamed sponge pudding.


Whenever I post a steamed sponge I get requests for a step by step in pictures.  My method is considered old fashioned now, in that I place a steamer above a pan of simmering water; the modern method seems to be to place an upturned bowl or saucer in the bottom of the pan containing the water to elevate the pudding.  This is not the way I do it but, if you’re interested, the BBC Goodfood website has two tutorials:


I have metal pudding bowls with clip on lids.  I bought them from Amazon almost 10 years ago and find them so much less faff than glass pyrex dishes where you have to make a pleated lid out of baking paper and foil, and then tie it up with string making a handle at the same time.  I have never been dextrous with knots.  The second tutorial link above covers the paper and string method. (NB.  Amazon don’t seem to stock them anymore but they do have a different range of lidded pudding basins if you search the site)


Compared to making a sponge mix, spooning it into a cake tin and baking in the oven for 30 minutes or so steaming could look like a lot of time and effort but please, please, please give it a try.  Firstly, it’s no more time to prep the pudding for steaming than it is a cake for the oven, and while the cooking time is a lot longer you don’t really need to do anything during that time.  Nothing that comes out of the oven will ever match a steamed sponge in terms of lightness.  It’s like eating spongey air.


I grease my pudding bowl and place the jam in the bottom:


Spoon in the batter:


Clip on the lid.  Place in the steamer, over a pan of simmering water:


Leave for 1.5 – 2 hours.  It’s not precise like a baking time and the pudding won’t suffer for being left to steam longer than actually needed to cook it so don’t feel pressured by the cooking time or guess when it’s ready.  I always give it two hours.


Turn out and enjoy!


NB. Do not adjust your monitor – I did serve rather large portions.  In my defence it was my birthday and freezing cold; I feel either of these facts alone would excuse me but - together - form a rock solid argument.  A pudding this size will serve 6 people easily....just because I cut it into quarters doesn’t mean you have to!


Ingredients

4 tablespoons jam – whichever flavour you prefer
115g unsalted butter, at room temperature
115g caster sugar
2 eggs
115g self raising flour
1-2 tablespoons milk

To serve: custard


Method

Place a large saucepan on the hob and fill 3/4s with water – test that the steamer basket will not touch the water.  Bring the water to a gentle simmer while you are making the pudding.

Grease, with butter, an 850ml pudding bowl (either metal, ceramic or heatproof glass).  If it has a lid, grease that too.

Spoon the jam into the bottom of the pudding bowl.

Now make the sponge: beat together the butter and sugar until light and whippy.

Beat in the eggs one at a time.

Stir in the flour.

Beat in enough milk to ensure a light dropping consistency.

Spoon into the pudding bowl and level the surface.

Clip on the lid or, if your bowl doesn’t have a lid, cover the bowl with a piece of baking paper and a piece of foil, pleated across the middle to allow for expansion.  If you are using the paper/foil option tie string around the bowl to keep it in place and then loop the string over the top to make a handle, which will help you lift the pudding out of the steamer.

Place the steamer basket over the pan of simmering water.

Place the pudding bowl in the steamer basket and place the lid on top to ensure the pudding is enclosed in it’s own personal sauna!

Leave to steam for anywhere between 1.5-2 hours; I always leave it for two hours.

The water level may need topping up after the first hour – it depends on the size of the saucepan.  Simply boil a kettle of water and then lift the steamer basket off of the pan, top up the water lever, and replace the steamer basket – this will not hurt your pudding at all.

Run a knife around the edge of the pudding and turn out onto a plate.

Serve with custard.

Wrap any left over pudding in foil and enjoy the next day – it reheats like a dream in either the oven or the microwave.

Bask in the glory of the wonderful thing you have created.

Eat.


Sunday, 11 October 2015

Five hour rice pudding


Four ingredients.  Five hours.  This dish changed me from a person who screwed up their nose at the thought of rice pudding, to a person who will now happily devour a large bowl of the stuff!  I still find most rice puddings pretty yuck but this one is so utterly divine that I will now admit that not all rice pudding is horrible.  If you knew how much I hate(d) rice pudding you would realise that this is a massive concession for me to make!


The oven does all the work; if you can weigh ingredients out and pour them into a dish, you can make this dessert.  The five hour bake filled the house with such a warming, comforting smell that I felt happy the whole time it was baking!  The long slow bake makes the rice so soft and creamy that it’s hard to believe the pudding is made with milk rather than cream.  Forget any hard, lumpy rice pudding you may have had inflicted on you in your youth; this is not in the same league!


Mr CC and I have very different views on rice pudding skin.  To me it is something that should be peeled away and disposed of as quickly as possible; for Mr CC is it manna from the gods!  This situation makes us both happy: I don’t waste anything, and Mr CC gets double the amount of rice pudding skin – that’s the key to a happy marriage, right there!


As the dark nights and colder weather take hold this is the ultimate comfort food.  It’s like eating central heating.  Don’t be tempted to halve the quantities; you’ll only kick yourself once you taste it!  Any leftovers reheat like a dream.  I read an article over the weekend about the Danish concept of hygge; it has no easy translation but means something akin to creating a warm, cosy atmosphere in your home and enjoying the good things in life with good people.  This dessert would very much help to bring some hygge into your life!


Ingredients

125g short grain rice
125g golden caster sugar
1.5 litres whole milk
2 teaspoons vanilla extract
To serve: jam of your choice


Method

Preheat the oven to 140C/fan oven 120C/280F/gas mark 1.

Have ready a 2 litre deep ovenproof dish.

Place the rice and sugar in the dish and mix together.

Measure out the milk and add the vanilla to it.

Slowly pour the milk mixture over the rice and stir.

Bake for five hours – you need do nothing during this time.

During baking a thick brown skin will form – don’t worry!

Serve hot from the oven with some jam, or at room temperature.  Personally, warm wins every time for me!

The leftovers will keep in the fridge for a couple of days and reheat in either the microwave or oven.

Bask in the glory of the wonderful thing you have created.

Eat.


Sunday, 9 August 2015

Pistachio and almond cake


Sometimes, a cake comes about simply because you have an ingredient that you are desperate to use.  My wonderful friend Jasmin has recently been on holiday to Sicily and, amongst other foodie goodies, kindly bought me back some intriguingly green pistachio marzipan.  It has sat on my baking shelf for almost a month as I mused how best to use it…and now I’m ready!


The marzipan wasn’t enough to use around a battenburg-style cake so I decided on baking it into a nutty sponge cake.  I rather like the idea of the cake looking like a normal sponge only to reveal a layer of marzipan when cut into.  Enclosing it entirely in the batter also meant that it retained its bold colour.


No icing needed for this rich fragrant sponge; the topping is simply some chopped pistachios mixed with honey.  I put this on top of the sponge while it was still warm so any excess honey would be absorbed into the sponge making it even more soft and moist.  Cakes like this age so well too as the nuts release their oils over time and the flavour and texture is enhanced.


If you don’t have (or indeed, don’t like) marzipan, the cake would still be lovely without it.  You could have it as a plain sponge, or cut the sponge through on baking and fill with buttercream.  What I hadn’t banked on (this is my last attempt to sway you to use marzipan!), was that the sponge under the marzipan absorbed the oils from it as it baked and ended up crisp and delicious.


Personally, I see this as more of a dessert cake simply because of the rich nuttiness of the sponge.  It isn’t a dry crumbed sponge.  Serve either warm or at room temperature with ice cream, whipped cream or even some natural yoghurt.

Thanks for the gift Jasmin - wish I could send you a slice!


Ingredients

For the cake:
250g unsalted butter, at room temperature
200g caster sugar
4 eggs
120g ground almonds
100g ground pistachios – make this yourself by grinding pistachios to fine powder in a food processor
50g plain flour
1 teaspoon baking powder
150g pistachio or almond marzipan

For the topping:
60g pistachios, roughly chopped
1 tablespoon runny honey – just enough to coat the nuts


Method

Preheat the oven to 180C/fan oven 160C/350F/gas mark 4.

Line a 20cm round springform tin with baking paper.

Beat together the butter and sugar until light and whippy.  Do not skimp on this stage – keep going until the mix is pale and fluffy.

Beat in the eggs one at a time.

Beat in the ground almonds and ground pistachios.

Beat in the flour and baking powder.

Spoon just over half the batter into the prepared tin and level the surface.

Roll the marzipan out into a disc slightly smaller than the size of the tin – you want the batter to completely engulf it, so it’s a surprise when you cut into the cake.

Lay the marzipan on the batter.

Spoon the remaining batter into the tin and level the surface.

Bake for approximately 45 minutes or until a skewer inserted into the cake comes out clean – don’t worry if it takes longer; mine took almost an hour.

NB. When you bake the cake, especially if you use a springform tin, you will see the nut oils dripping from the tin – we’re only talking a little, not a flood, but it’s a good idea to either stand the cake tin on a baking sheet, or place a baking sheet on the shelf below with some kitchen paper to catch any drips.

Now make the topping: roughly chop the pistachios.

Mix with enough honey to coat the nuts but not pool in the bowl.

Spoon onto the top of the cake.

Leave to cool for 20 minutes in the tin, before de-tinning and leaving to cool completely on a wire rack.

Serve in generous slices.

Bask in the glory of the wonderful thing you have created.

Eat.