Showing posts with label vanilla. Show all posts

Sunday, 11 October 2015

Five hour rice pudding


Four ingredients.  Five hours.  This dish changed me from a person who screwed up their nose at the thought of rice pudding, to a person who will now happily devour a large bowl of the stuff!  I still find most rice puddings pretty yuck but this one is so utterly divine that I will now admit that not all rice pudding is horrible.  If you knew how much I hate(d) rice pudding you would realise that this is a massive concession for me to make!


The oven does all the work; if you can weigh ingredients out and pour them into a dish, you can make this dessert.  The five hour bake filled the house with such a warming, comforting smell that I felt happy the whole time it was baking!  The long slow bake makes the rice so soft and creamy that it’s hard to believe the pudding is made with milk rather than cream.  Forget any hard, lumpy rice pudding you may have had inflicted on you in your youth; this is not in the same league!


Mr CC and I have very different views on rice pudding skin.  To me it is something that should be peeled away and disposed of as quickly as possible; for Mr CC is it manna from the gods!  This situation makes us both happy: I don’t waste anything, and Mr CC gets double the amount of rice pudding skin – that’s the key to a happy marriage, right there!


As the dark nights and colder weather take hold this is the ultimate comfort food.  It’s like eating central heating.  Don’t be tempted to halve the quantities; you’ll only kick yourself once you taste it!  Any leftovers reheat like a dream.  I read an article over the weekend about the Danish concept of hygge; it has no easy translation but means something akin to creating a warm, cosy atmosphere in your home and enjoying the good things in life with good people.  This dessert would very much help to bring some hygge into your life!


Ingredients

125g short grain rice
125g golden caster sugar
1.5 litres whole milk
2 teaspoons vanilla extract
To serve: jam of your choice


Method

Preheat the oven to 140C/fan oven 120C/280F/gas mark 1.

Have ready a 2 litre deep ovenproof dish.

Place the rice and sugar in the dish and mix together.

Measure out the milk and add the vanilla to it.

Slowly pour the milk mixture over the rice and stir.

Bake for five hours – you need do nothing during this time.

During baking a thick brown skin will form – don’t worry!

Serve hot from the oven with some jam, or at room temperature.  Personally, warm wins every time for me!

The leftovers will keep in the fridge for a couple of days and reheat in either the microwave or oven.

Bask in the glory of the wonderful thing you have created.

Eat.


Sunday, 16 August 2015

Chocolate and vanilla marble madeira bundt


I’ve had my square bundt tin for a while now and have frequently stopped to admire it, even giving it an appreciative pat every now and then (you think I’m joking……!).  What I haven’t done with it is bake.  Realising that this could not continue I decided to pick a simple cake that required no icing as I wanted to showcase the beauty of the tin.


The cake is based on the madeira cake recipe on the BBC Good Food website.  I find denser crumbed sponges work better in bundt tins than lighter ones and also retain better definition when baked, which is important when using a finely detailed tin.


Like a more domesticated Sir Mix-A-Lot, I like big bundts and I cannot lie (I may have made this joke before, apologies if I have, but it still made me laugh).  This is a 10 cup capacity bundt...it’s a big one!


I decided to make the sponges separately as it’s a big cake and wanted to avoid worrying about whether I’d divided the creamed mixture evenly; I know you can weigh it to ensure evenness but I couldn’t be bothered.  When the batter is quick to make like this one, there is no detriment to one batter sitting to one side and waiting for its compadre to be born.


For those who watch the Great British Bake Off, I am pleased to report that I got a crack on the top of my Madeira.  Sadly, being a bundt, this became the bottom on turning out so the world at large never got to see my glorious crack!


Ingredients

For the chocolate sponge:
175g unsalted butter, at room temperature
175g golden caster sugar
3 eggs
1 teaspoon chocolate extract - optional
170g self raising flour
30g cocoa powder
50g ground almonds

For the vanilla sponge:
175g unsalted butter, at room temperature
175g golden caster sugar
3 eggs
2 teaspoons vanilla extract
200g self raising flour
50g ground almonds


Method

Preheat the oven to 170C/fan oven 150C/340F/gas mark 3.

Generously grease a large bundt tin – I used cake release spray.

Start by making the chocolate sponge: beat together the butter and sugar until light and whippy.  Don’t skimp on this stage.

Beat in the eggs, one at a time.

Beat in the chocolate extract, if using.

Beat in the flour, cocoa powder and ground almonds.

Put to one side.

Now make the vanilla sponge following the same method but using vanilla extract instead of chocolate, and the adjusted amount of flour (it will be more in the vanilla cake – per the ingredients above – as there is no cocoa).

Spoon the batters alternately into the tin, then use a skewer to swirl them together.

Bake for approximately 1 hour, or until a skewer inserted into the cake comes out clean.

Leave to cool in the tin for 20 minutes before taking a bread knife (or other big knife) and levelling the top – I use the tin as a guide. This will ensure the base will be level when you turn it out.

Turn out and leave to cool completely on a wire rack.

Serve in generous slices.

Bask in the glory of the wonderful thing you have created.


Eat.

Sunday, 12 July 2015

Cornflake biscuits


I am always a fan of a biscuit that can be baking in the oven within 10 minutes of starting the creative process.  I am not a huge fan of cookies – I don’t like the softness and therefore favour a biscuit with crispness and bite.  These have a double crunch in that you get the crunch of the crisp buttery biscuit on your first bite, and then the cornflake crunch when you start chewing.  It is an extremely pleasurable sensation!


I wasn’t too sure on using self raising flour for a biscuit, but it works well – the biscuits puff up while baking and then become thin and crisp on cooling.


In theory any cereal would work with this recipe; I am tempted to make another batch with Rice Krispies, or Cheerios.  If your cereal tastes are a little more grown up than ours then I’m sure muesli or granola would work well too!  Regular readers will know that I favour the 2-for-1 approach with biscuits so I think I need to sandwich them with some jam next time!


Cornflakes work well in biscuits; previously I have made cornflake oaty biscuits which were delicious.  I’d say this recipe produces a lighter biscuit e.g. you can put more of them away in a single sitting.  What I’m saying really is: make a double batch!


Ingredients

125g unsalted butter, at room temperature
100g caster sugar
1 teaspoon vanilla
1 egg yolk
175g self raising flour
50g Frosties – you can use classic cornflakes but increase the quantity of sugar to 125g)


Method

Preheat the oven to 180C/fan oven 160C/350F/gas mark 4.

Line two baking sheets with baking paper or non stick foil.

Beat together the butter and sugar until light and whippy.

Beat in the vanilla and egg yolk.

Beat in the flour – you will end up with a dough similar in firmness/texture to sweet pastry.

Tip in the Frosties and gently work them into the dough using your hand.  Try not to crush them too much.

Cut the dough into 16 pieces; you can do this by weighing the dough and working out the weight that each biscuit needs to do, or be less exact and cut it into halves, halves again etc to get the 16 pieces. (I did this).

Roll each piece of dough into a ball and place on the baking sheet – 8 pieces per sheet.

Flatten the balls.

Bake for approximately 16 minutes and rotate the trays halfway through cooking time to ensure an even bake.  Don’t be afraid to pat the biscuits down at the halfway mark if they haven’t spread thinly enough.

They are baked when they are an even golden colour.

Leave to cool on the baking sheet before moving to a wire rack to cool completely.

They will store well in an airtight tin for at least two days.

Bask in the glory of the wonderful thing you have created.


Eat.

Sunday, 30 November 2014

Classic oat biscuits


This week I needed something that was quick to make and would keep nicely in a tin for several days.  We are in the final throes of boxing everything up for moving and this is my last bake in our current home.  I have mixed feelings about leaving; on the one hand this is the kitchen my blog started in and it’s the only oven I have ever seriously baked in.  On the other hand...hello big kitchen, range cooker and more counter space than I could dream of!


You can’t go wrong with an oat biscuit.  If ever I needed a slogan that would be it.  When they’re crisp they’re great, when they age and go a bit flapjack-y they’re great.  I love the smell, the substantial texture and the way the vanilla just pops against them and makes the flavour almost creamy.


Due to my kitchen being in boxes this will be my last blog post for a couple of weeks.  I’m aiming to be back before Christmas with at least one seasonal bake but for now this is The Caked Crusader, over and out!  See you on the other side!


Ingredients

175g unsalted butter, at room temperature
275g Demerara sugar
1 egg
4 tablespoons water
1 teaspoon vanilla extract
140g plain flour
½ teaspoon bicarbonate of soda
pinch of salt
375g rolled oats


Method

Preheat the oven to 180C/fan oven 160C/350F/gas mark 4.

Line three baking sheets with baking paper or non stick foil.

Beat together the butter and sugar until smooth and well combined; because of the ratios and the grittiness of the sugar it won’t go really light and whippy.

Beat in the egg, water and vanilla.

Beat in the flour, bicarbonate of soda and salt.

Stir in the oats – at first it will seem that they will never mix in, but they will!

Take tablespoons of mix, roll into balls, place on baking sheets and flatten the tops.  Leave a reasonable gap around them – I put 8 on a standard baking sheet (I got 25 biscuits in total).

Bake for 15-18 minutes or until golden.

Leave to cool and firm up on the baking sheet before storing in an airtight container.

Bask in the glory of the wonderful thing you have created.


Eat.

Sunday, 31 August 2014

Blueberry sponge cake with cream cheese frosting


It’s all very well being selfless and baking to please others but sometimes you just need to be selfish and bake something to please yourself!  This week I had a hankering for blueberries baked in a simple sponge with cream cheese frosting.  Et voila!  I think blueberries are my favourite fruit to bake in a sponge – I love the way they break down, bleeding their juice into the sponge and also the magnificent pop of colour you get when cutting a slice.  It’s particularly effective when the outside of the cake is so plain and pale.


The cream cheese frosting is my favourite as it’s so smooth and creamy.  It’s great to team with a crumbly sponge because you can take some on the fork and use it to pick up all the crumbs.  This is one of my tests as to whether someone is a true cake lover or not.  (It may also double as a test for greedy guts! If so, I am guilty!)  A true cake lover will always gather their crumbs and eat them – after all, they are just smaller versions of the slice of cake.  An occasional cake eater will eat the slice and leave all the debris on the plate – it’s a total giveaway that this is not my kind of person!


I think this cake looks really good and could easily take pride of place on the afternoon tea table; don’t however assume that means it is difficult or time consuming to make – it is neither.  The sponge recipe and method is as basic as possible, as is the frosting.  It’s an example of great flavours and ingredients producing something simple but delightful.


Foolishly, I made double the amount of frosting.  I cannot explain what possessed me other than a greedy stupidity that the amounts set out in the recipe below didn’t look enough.  Hence, I was left with a large amount of cream cheese frosting.  We always joke that cream cheese frosting is so lovely we could just eat it by the spoonful so, eyeing the strawberries and left over blueberries I had sitting in a colander I threw together an impromptu dessert.  Serve it with some crisp biscuits if you want to look fancy.  Bonus dessert....the best kind!


Ingredients

For the sponge:
200g unsalted butter, at room temperature
200g caster sugar
4 eggs
1 teaspoon vanilla extract
200g self raising flour
150g blueberries

For the frosting (this is enough to cover the top and sides of the cake):
100g unsalted butter, at room temperature
225g icing sugar
1 teaspoon vanilla extract
100g cream cheese, at room temperature – I used Philadelphia

To decorate: 50g blueberries


Method

Preheat the oven to 180°C/fan oven 160°C/350°F/gas mark 4.

Line a 20cm round springform tin with baking paper.

Start by making the sponge: beat together the butter and sugar until pale and whippy.  Don’t be tempted to skimp on this stage – it needs a lot of beating.

Beat in the eggs one at a time, adding some of the flour if it looks like it’s curdling.  (NB. If you have beaten the butter and sugar for long enough it will not curdle – so if your mix does make sure you beat for longer next time)

Beat in the vanilla.

Stir in the flour.

Gently stir in the blueberries taking care not to burst them.

Spoon the batter into the prepared tin and level the surface.

Bake for approximately 45 minutes or until a skewer inserted into the cake comes out clean.

Leave to cool in the tin for about 20 minutes before de-tinning and leaving to cool completely on a wire rack.

Now make the frosting: start by beating the butter until it is pale and whippy.

Add the icing sugar and vanilla and beat until smooth and well combined.

Add the cream cheese and beat until the frosting is smooth, thick and fluffy looking.  I like to take a small amount, place it on my tongue and then press it up against the roof of my mouth – if I cannot feel any sugar crystals and the texture feels smooth and uniform i.e. no blobs of cheese in there, then I know it’s ready.  If the beating has made the frosting too soft to comfortably spread refrigerate for 20 minutes or so.

Spread the frosting over the top and sides of the sponge cake.

Bask in the glory of the wonderful thing you have created.

Eat.


Sunday, 13 July 2014

White chocolate sponge cake


Now don’t get me wrong, I have love for all baked goods (even those I don’t personally like) but given the choice of fancy patisserie or a nice simple sponge I will ALWAYS choose the sponge.  What can I say?  I’m clearly low-rent.  Just saying the word ‘sponge’ pleases me.  Low-rent and easily pleased?  Who can say….


I needed sponge cake this week; it’s the cake equivalent of a security blanket.  Have a slice of sponge and all is right with the world.  This sponge recipe is soft and fluffy with a lovely crumb and little pockets of white chocolate baked into it.  The thick, sticky frosting is smooth and perfect for picking up any crumbs that try and escape!  The cream cheese/white chocolate combination worked well as the tang balanced out the sweetness – it was a big hit!


You can decorate it how you please; it truly is a blank canvas.  You could jazz it up with fruit dipped in white chocolate or opt for colourful with smarties.  I chose Aero balls simply because they were big and I liked the two-tone look of them.  I cut the cake into 15 pieces...of varying sizes.  I cannot cut straight to save my life.  Here's the proof:


Recently I have made a discovery.  I always found melting chocolate on the hob a bit stressful because, even though I made all efforts to melt it slowly,  it did occasionally seize on me (go grainy) and it would always be at a high pressure moment when I didn’t have any spare chocolate (in truth, does anyone ever have spare chocolate?  But maybe this is just semantics).  So I switched to the microwave but that can be hit and miss too if it overheats.  My discovery is this: a heat diffuser.  Unfortunately it only works on gas hobs. You place it on the gas ring and put your pan of chocolate directly on top of it.  I have never had any issues since I’ve started using this.  And it only costs around £6!


Ingredients

For the sponge:
250g unsalted butter, at room temperature
250g golden caster sugar
2 teaspoons vanilla extract
4 eggs
300g self raising flour
½ teaspoon baking powder
150ml natural yoghurt
3 tablespoons milk
100g white chocolate, finely chopped – or you could use white chocolate chips if you prefer

For the frosting:
100g white chocolate
300g cream cheese – I used Philadelphia
100g icing sugar

Optional: sweets of your choice to decorate, or chopped white chocolate


Method

Preheat the oven to 180°C/ fan oven 160°C/ 350°F/ gas mark 4.

Line a 20cm x 30cm tin with baking paper.  You can, if you prefer, use a 20cm square tin or a 23cm round tin but this will alter the depth of the cake and therefore also the cooking time.

Beat the butter until it is soft and creamy.

Add the sugar and beat until the mixture is light and whippy – do not skimp on this!

Beat in the vanilla.

Beat in the eggs, one at a time, adding some of the flour if it looks like it might curdle.  (Use this as a learning opportunity – if it curdles you didn’t spend long enough beating together the butter and sugar – increase the time next time)

Stir in the flour, baking powder, yoghurt and milk – ensure they are well incorporated into the batter.

Finally, stir in the chopped chocolate.

Spoon the mixture into the prepared tin and bake for approximately 25-30 minutes or until a skewer inserted into the cake comes out cleanly.

Leave to cool in the tin.

Now make the frosting: melt the white chocolate either in the microwave (in short 30 second bursts) or in a bowl over a pan of simmering water (ensuring the bowl does not touch the water).

Put the chocolate to one side to cool a little.

Beat together the cream cheese and icing sugar.

Stir in the melted chocolate.

Chill in the fridge until it reaches a spreadable consistency.

Spread over the cake and decorate with the sweets of your choice.

Cut into chunky squares.

Bask in the glory of the wonderful thing you have created.


Eat.

Sunday, 29 June 2014

Strawberry and almond cheesecake sponge

  
It’s Wimbledon time so my thoughts have turned towards strawberries - I am a predictable creature!  This cake was the cover star of Good Food magazine a month or so back and I stored it away for when the strawberry season was at its best.


You will often hear people complaining that strawberries don’t taste like they used to…and that is true for many strawberries but I think that, if you’re choosy about the variety of strawberry you buy, there are some crackers still available.  If you cannot grow your own, and don’t have a pick-your-own nearby, here are my tips for buying strawberries:
  1. Avoid any imported strawberries – I don’t want to eat a strawberry that’s seen more of the world than I have!
  2. Buy strawberries grown as locally to where you live as possible – it surely means they’ve not been sitting around for long?
  3. Take note of the variety of strawberry you like – I would rather go without than buy the tasteless Sonata variety, but a Jubilee strawberry is pretty much a guarantee of flavour.
  4. Smell them.  A strawberry with no smell is a strawberry with no taste.


This recipe pretty much ticks all my boxes for what I like in a cake: it’s made with yoghurt, it contains almonds, it uses cheesecake, and it has big chunks of fruit.  It would work with many different fruits.  The CCD’s damson tree is looking like it’s going to have a bumper harvest so I might make the cake again using damson plums.


The soft almond sponge provides a lovely texture for holding the pockets of cheesecake and strawberries.  This really was one of the best cakes I’ve tasted in a long time...and I’ve tasted a lot of cakes!


Ingredients

For the cheesecake:
200g cream cheese – I used Philadelphia
25g caster sugar
1 egg

For the cake:
175g unsalted butter, at room temperature
250g caster sugar
2 teaspoons vanilla extract
4 eggs
200g self raising flour
50g ground almonds
75g natural yoghurt
250g strawberries – washed, hulled and chopped
Handful of flaked almonds


Method

Start by making the cheesecake: beat together the cream cheese, caster sugar and egg until combined.  Don’t overbeat or it will turn runny – I would actually recommend doing this stage with a bowl and a spoon to control the texture of the mix better.  (Mine did turn runny so I popped it into the freezer for an hour before making the cake – this turned it back to a more spoonable consistency).


If – unlike me – you haven’t turned the cheesecake mix runny, spoon into a bowl and refrigerate until needed.


Preheat the oven to 180°C/fan oven 160°C/ 350°F/ Gas mark 4.


Line a 20cm round springform tin with baking paper.


Beat together the butter and sugar until pale and whippy.  Don’t skimp on this stage – it should look almost like whipped cream.


Beat in the vanilla.


Beat in the eggs one at a time, adding some of the flour if it looks like the mixture will curdle.


Stir in the flour, almonds and yoghurt.


Spoon half of the cake batter into the prepared tin and level the surface.

Spoon blobs of the chilled cheesecake mixture onto the cake.  Use about half at this stage.

Scatter over half the strawberries.


Spoon the remaining cake batter over the top and level the surface.  Be gentle so the strawberries stay in place.


Use your finger or the end of a wooden spoon handle to make divots in the sponge.  Blob the remaining cheesecake into these spaces.

Scatter over the remaining strawberries.

Scatter over the flaked almonds.


Bake for approximately 50 minutes or until a skewer inserted into the cake comes out clean.  It is best to check after 45 minutes to see if the cake is browning too quickly; if it is cover loosely with foil and continue baking.  Don’t worry if your cake takes longer – mine took almost 1 hour 30 minutes, and I did need to cover it with foil.


Leave to cool in the tin for at least 20 minutes before de-tinning and leaving to cool completely on a wire rack.


Refrigerate the cake until 20-30 minutes before serving.


Bask in the glory of the wonderful thing you have created.


Eat.

Sunday, 18 May 2014

Custard creams


If I’m offered a selection tin of biscuits to choose from my first thought will always be to look for the custard creams and the pink wafers.  OK, that’s a lie; my first thought is actually ‘how many can I take without it looking greedy/weird/unusual/rude?’  I’m always glad if someone else has gone first and set the bar high!


What I’m trying to say is that I love custard creams.  Unless you’re rocking some serious high end chocolate biscuits in your tin, these babies are top of the tree.  Some of you will recoil in horror, others will frantically nod in agreement, but I love dunking them in a mug of tea just long enough so that the creamy filling becomes softer and the biscuit is on the cusp of soggy.  It is a reckless person who ‘over dunks’ and loses their biscuit to the sad resting place at the bottom of the mug.  Mushy biscuit at the bottom of a mug is a sign of bad biscuit management.


I will freely admit that the homemade version lacks the ornate squiggles so loved on the commercially farmed version, but what’s the point in a homemade version looking the same?  Isn’t the point of homemade that it does look different?  The big benefit of making them at home is that you get to control the size of the biscuit.  I have used the, ‘I only had one biscuit’ line many times failing to explain that the biscuit was the size of a dinner plate.  I’m exaggerating (honestly) but you get my drift!


To aim for some sort of uniformity I used my kitchen ruler to determine the biscuit size.  I may sound a bit OCD but I have a ruler in my kitchen which is handy for so many things, most commonly measuring cake tins because I often forget their dimensions.  This ruler has been my trusted culinary companion for years now; to save you straining to see what it is, it’s got all the cantons of Switzerland on it.


Ingredients

For the biscuits:
175g unsalted butter, at room temperature
50g golden caster sugar
50g icing sugar
2 egg yolks
2 teaspoons vanilla extract
300g plain flour

For the custard filling:
100 unsalted butter, at room temperature
140g icing sugar
2 tablespoons custard powder
3 teaspoons vanilla extract
Optional: a few drops of yellow food colouring – I used Dr Oetker natural gel colouring


Method

Preheat the oven to 200°C/fan oven 180°C/390°F/gas mark 6.

Line three baking sheets (if you only have two line those but be prepared to rotate the sheets for the second batch) with either baking paper or non stick foil.

Start with the biscuit dough: Beat together the butter, both sugars, egg yolks and vanilla until they are well combined and creamy looking.

Add half the flour and mix well.

Add the remaining flour and mix well; use your hand to bring the dough together.

Roll the dough out between two lightly floured sheets of clingfilm – aim for the thickness of a £1 coin.

Use the cutter of your choice to cut the dough then place the biscuits on the prepared trays.  Leave a little room for expansion although they do not spread much during baking.  (NB. If, like me, you’re using a ruler lightly flour it so it doesn’t stick to the dough).

Bake for approximately 8-10 minutes or until golden in colour.  Don’t worry if they take longer – trust your eyes more than your timer!

Leave the biscuits on the baking sheet to crisp up before you move them to a wire rack to cool completely.  If you try and move them too soon they can crumble.

Now make the filling: Beat all the ingredients together until smooth and whippy looking.

Either pipe or spread some of the filling onto one biscuit, and use another biscuit to sandwich.

Repeat until all the biscuits are paired up.

Bask in the glory of the wonderful thing you have created.


Eat.

Sunday, 27 April 2014

Baileys custard tart


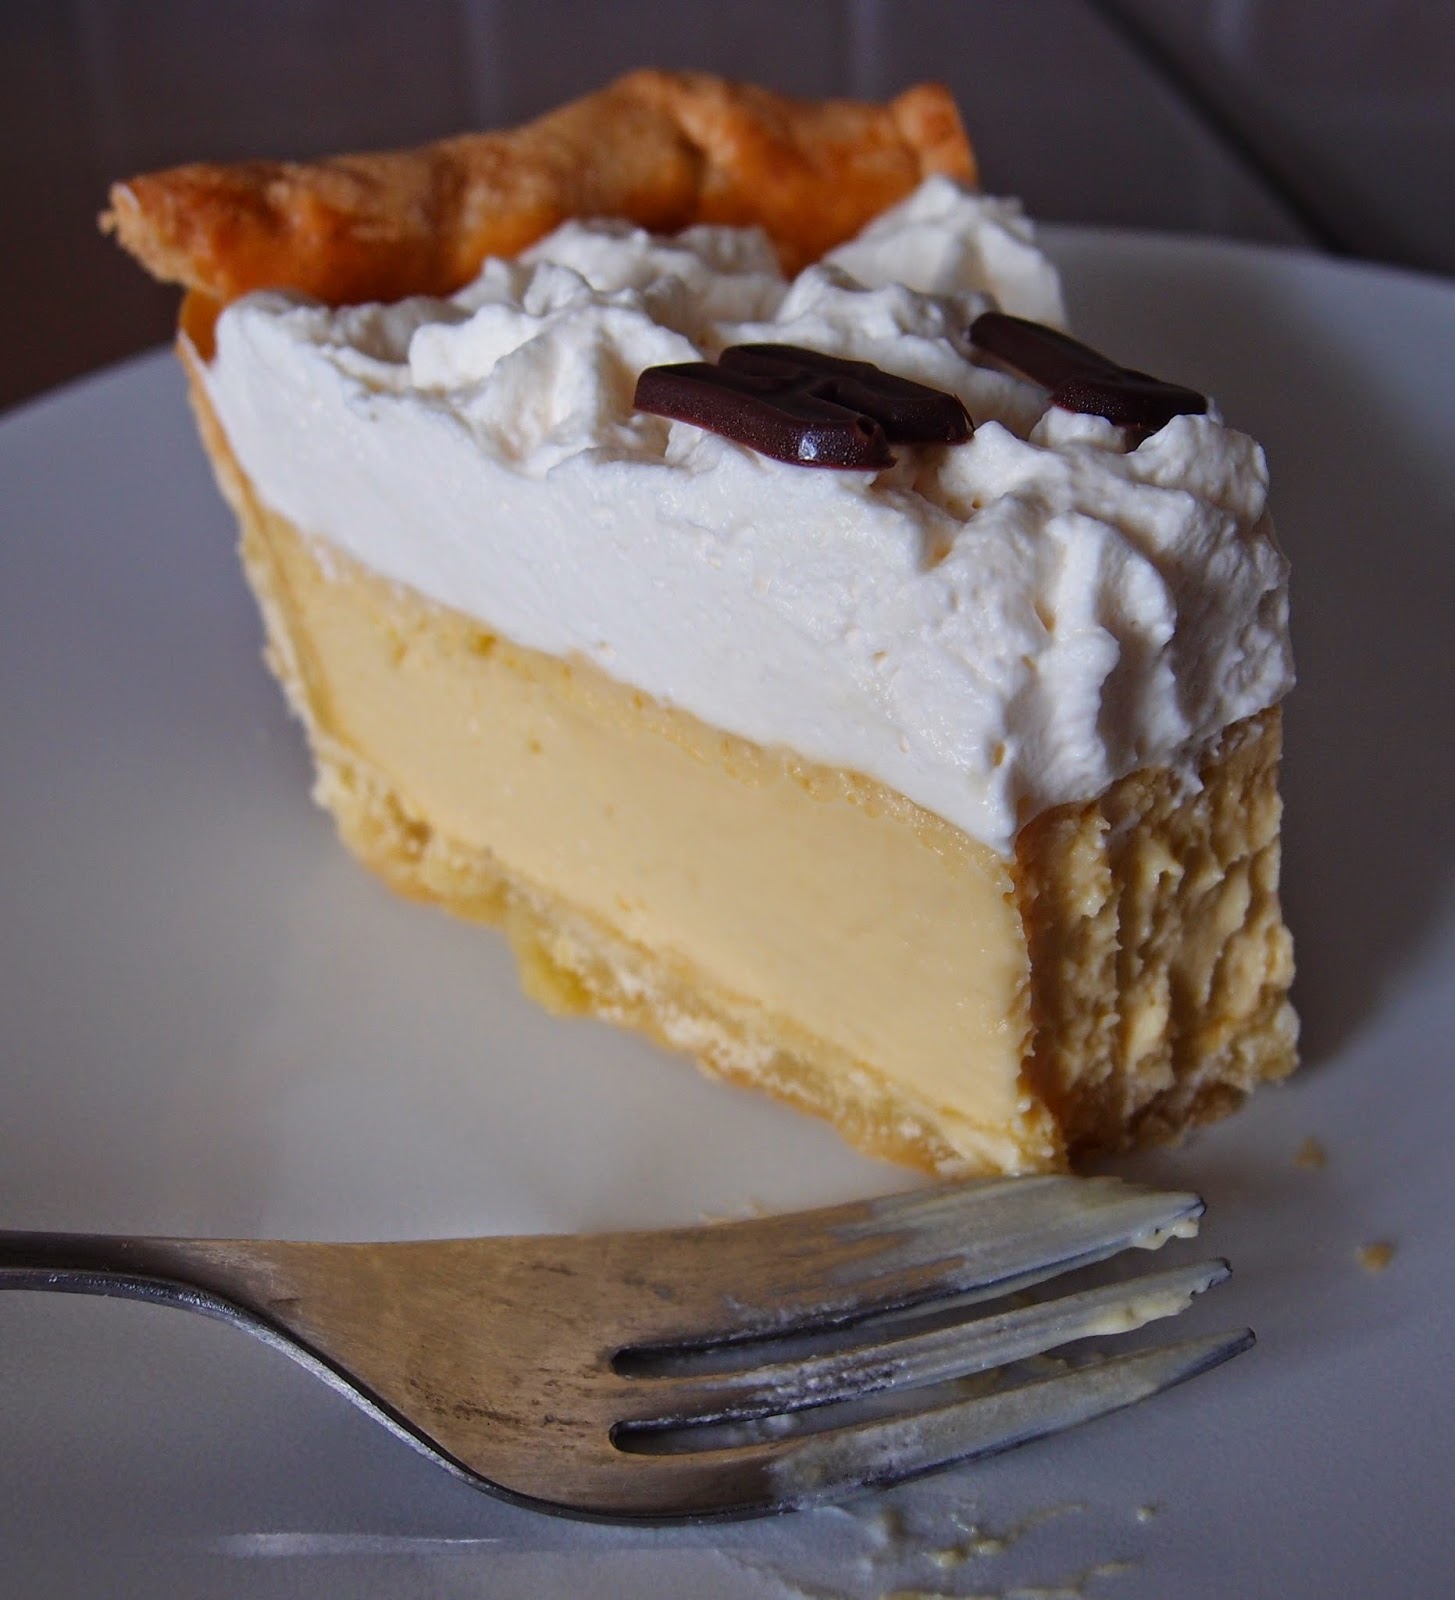
It is the CCD’s (Caked Crusader’s Da) birthday and, as I’ve noted before, he is rather partial to a custard tart.  He’s also fond of booze.  So why not combine the two?  You'll see in the picture below that a bit of pastry got knocked off in transit. Mr CC tried to advise me to be more careful and started explaining about G force and roundabouts but it didn’t make a lot of sense to me (I've never been scientific); all I remember from his teachings is that Formula 1 drivers have thick necks.


In case you’re in any doubt let me confirm: Baileys custard tastes awesome!  It smelled lovely cooking and tasted just as good.  It’s not overpowering but adds some ‘oomph’ to the custard in a more gutsy way than vanilla does.  You could vary the amount of Baileys you add: as long as the cream + Baileys = 500ml I think you’d be alright, as Baileys is very creamy.


I noticed that the filling cooked quicker than a standard vanilla custard tart and must therefore assume that the Baileys was responsible for this as it was the only difference to my standard recipe.


Don’t nine egg yolks look glorious?


Seeing as this was a custard tart for a special occasion I went all out and whipped up some more cream (because let’s face it, what this lacked was cream!) with more Baileys (ditto!) for a flavoursome and decorative addition.


Happy birthday CCD!


Ingredients

For the shortcrust pastry:
175g plain flour
120g unsalted butter, cold
3 tablespoons icing sugar
2 egg yolks
2 teaspoons vanilla extract

To glaze: 1 egg yolk, beaten

For the filling:
9 egg yolks
75g caster sugar
350ml whipping cream
150ml Baileys

Optional to decorate:
300ml whipping cream
50ml Baileys


Method

Start by making the pastry: put the flour, butter and icing sugar into the food processor and blitz until you get fine breadcrumbs.

Add the egg yolks and vanilla and blitz until the pastry just starts to come together.

Turn out onto a lightly floured surface and bring together into a ball of dough, handling no more than is absolutely necessary.

Chill the dough for 30 minutes so it is firmer to work with when you roll it out.

Line a baking tray with baking paper. Have to hand a 20cm round deep ring, or use a foil disposal pie tin (I did and makes leakage less of a worry). Whatever ring or tin you use, try to find a deep one (ideally 3.5cm) as this will give a lovely deep tart and a luscious thick layer of baked custard.

Roll out the pastry between two sheets of clingfilm and use to line the flan ring/pie tin.
Don’t worry if you have some tears, the pastry is good-natured and patches easily.

Let the pastry overhang the edges. Take some of the surplus pastry off and put to one side – you may need this for patching later on.

Chill the pastry for a further 30 minutes once the tin is lined to minimise shrinkage when baked.

Preheat the oven to 190°C/fan oven 170°C/375°F/Gas mark 5.

Line the chilled pastry with a sheet of baking paper and cover with baking beans.

Bake in the oven for 10 minutes.

Beat the egg yolk and when the 10 minutes is up, remove the pastry from the oven and remove the paper and beads. Have a look at the pastry and use the spare that you put to one side to patch any little holes or cracks that you can see. When happy, brush all of the egg yolk over the interior of the pastry case and return to the oven for 5 minutes. This seals the pastry so that it won’t go soggy when you add the custard.

Remove the pastry from the oven and leave to cool. When it is cool enough to handle trim the excess pastry away using a serrated knife. Leave the pastry in the ring/tin.

Reduce the oven temperature to 150°C/fan oven 130°C/300°F/Gas mark 2.

From now on it’s all easy! Make the custard by whisking together the egg yolks and sugar. Add the cream and Baileys and whisk again.

Pour through a sieve into a heavy saucepan. Don’t skip this stage as there’s lots of eggy bits that will get caught by the sieve and would make the custard lumpy in texture if not removed.

Heat the custard over a low heat stirring all the time. When it gets to 37°C remove it from the heat.

Pouring through a sieve, pour as much of the custard into the pastry case as possible. I got all of mine in but it will depend on how deep your ring/tin is. If you’re not confident that you’ll get the tart into the oven without spilling the custard, put the tray (with the tart case on it) onto the oven shelf and then pour the custard in. I would’ve done this but when I pull my oven shelf out it dips slightly so I could not have got all the custard in.

Bake for 35-40 minutes or until the custard looks set but still wobbles slightly when the tray is moved. NB. This is less time than I would normally recommend for a custard tart but the Baileys seemed to speed up the cooking process.

Leave to cool on a wire rack.

Refrigerate until you are ready to serve.

Shortly before serving whip up the cream and Baileys and pipe onto the top for some extra decadence.

Bask in glory at the wonderful thing you have made.

Eat.