Showing posts with label blackberry. Show all posts

Saturday, 7 July 2012

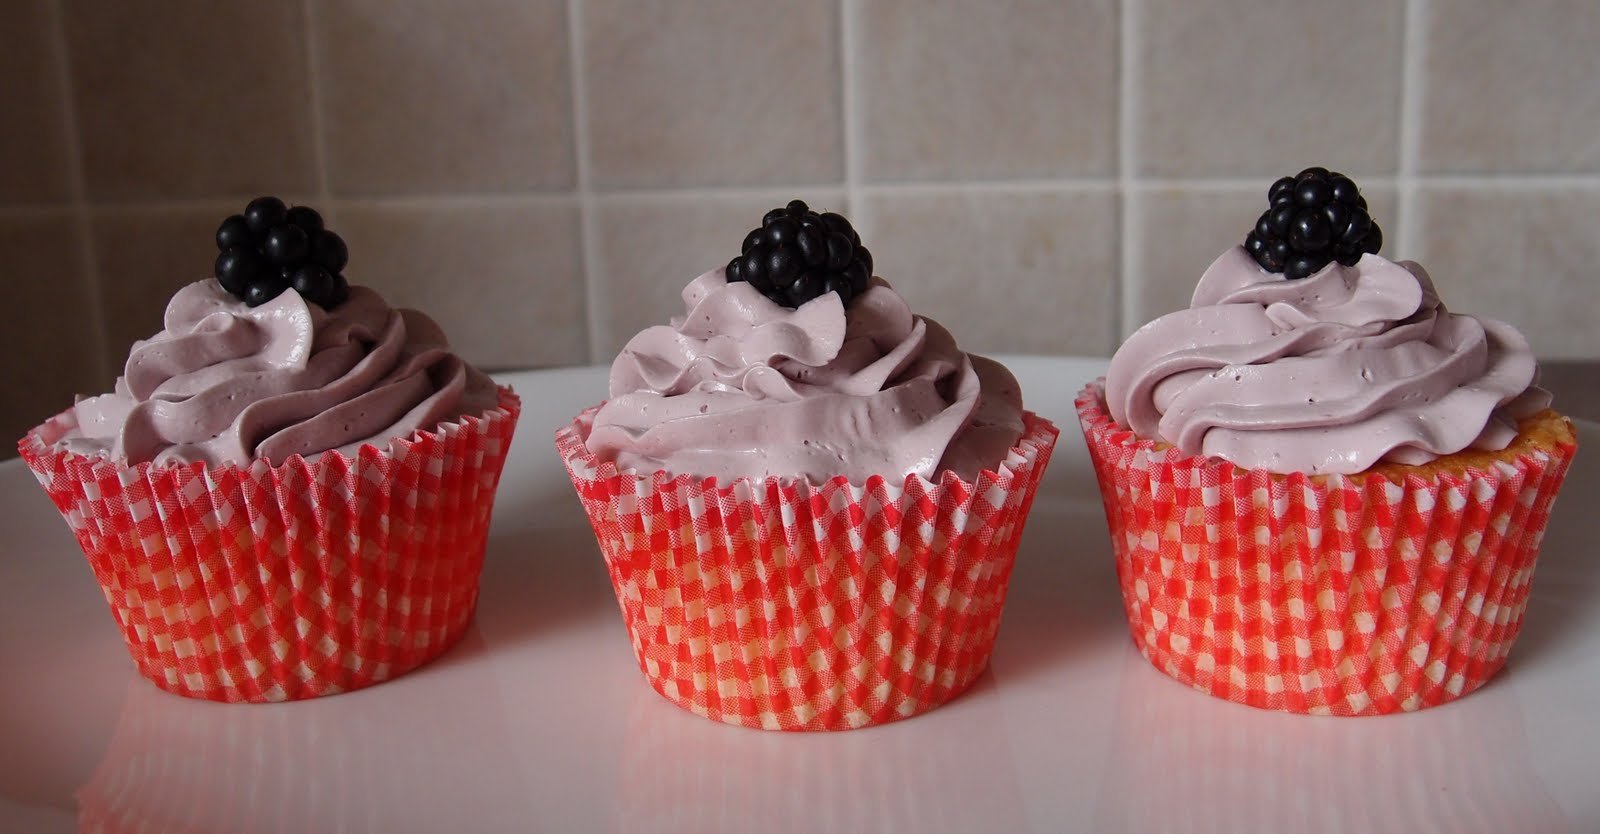
Blackberry cupcakes


Blackberries work so well in baking, as do most berries.  They have a strong flavour and I love it when they break down during cooking and ooze their colourful juice into the sponge batter.


I was drawn to this recipe for two reasons: firstly, the unusual (to me) sponge recipe and secondly, for the buttercream using more cream than butter.  It sounded light and whippy and delicious...and oh how it was!


These are big cupcakes so don’t expect a dainty bite; personally, that doesn’t present a problem! The yoghurt added a tang to the sponge which I really liked; it worked so well with the blackberries.


The buttercream, if I can call it that when it contains so little butter, is a revelation – so light and soft.  It melts in your mouth like ice cream leaving behind an aromatic hint of vanilla creaminess.  When I made it and tasted it I was disappointed as it was very sweet, however when eaten with the cake it is perfect.


The other odd thing about this buttercream is that it’s a man pleaser...every single man who tried it said (without knowing the other men had said it) how much they preferred it to the more usual buttercream.  I guess men really are a different species!


Ingredients

For the cupcakes:
225g self raising flour
175g caster sugar
3 eggs
100ml plain yoghurt
175g unsalted butter – melted
150g blackberries

For the buttercream:
50g unsalted butter, at room temperature
100ml double cream, plus extra if needed
½ teaspoon vanilla extract
350g icing sugar
12 blackberries

Method

Preheat the oven to 180°C/fan oven 160°C/350°F/gas mark 4.

Line a 12 hole cupcake pan with paper cases.

Mix together the flour and caster sugar in a large bowl.

In a separate bowl, beat together the eggs and yoghurt (I used the bowl on my scales to cut down on washing up!)

Pour the eggs and yoghurt, along with the melted butter, into the dry mix and stir together.  Don’t over work it.

Stir in the blackberries – it’s best if some break up and ooze their juice.

Spoon into the paper cases.  Don’t panic that the cases look full.

Bake for 20-25 minutes (they will need this long – they are big cakes), or until a skewer inserted into the cake comes out clean.  Mine took almost 30 minutes.

Remove from the oven and leave to cool for a few minutes in the tin.

When cool enough to safely handle, de-tin and leave to cool completely on a wire rack.

Now make the buttercream: beat the butter until soft and whippy.

Beat in the cream and vanilla.

Sift in the icing sugar and beat until smooth.

If the icing is too thick, add more cream – a tablespoon at a time.

Spoon into a piping bag (if it’s a bit soft refrigerate for 5 minutes or so) and pipe generous swirls on top of each cake.

Place a blackberry on the top of each cake.

Bask in the glory of the wonderful thing you have created.

Eat.

Sunday, 18 September 2011

Cheesecake fortress – a birthday cake


As my nephew, The Boy Wonder, is what I admiringly term ‘a cheesecake hoover’, he warmly received my idea of a cheesecake fortress for his 14th birthday cake. This idea developed from his initial request of “the biggest cheesecake you have ever made”.


Raspberry:


These cheesecakes are all made from the same “no bake” cheesecake recipe. It’s quick and easy to make and you end up with a light, delicious cheesecake that can hold its own alongside any fancier recipes.


Blackberry:


The recipe below sets out the basic quantities to make a 20cm cheesecake, but I doubled those to make the base, a 27cm beast! I then made a double batch and divided it up before adding different flavours to make the turrets – I simply made foil rings to keep them in shape. I toyed with using food rings but couldn’t face all the washing up when the cheesecakes were freed!


I am very lucky to have a fab foodie friend, the wonderful Miz Ratti
who brought me back a most welcome gift from Germany – Philadelphia cream cheese mixed with Milka chocolate. Why isn’t this available in the UK? Why????? The task of making a chocolate cheesecake suddenly becomes laughably easy!


Chocolate:


Along with the chocolate ‘turret’ cheesecakes, I also made smooth peanut butter flavoured (with chocolate covered peanuts mixed in), blackberry, pineapple (simply a small tin of crushed pineapple) and raspberry flavours. The base (aka the 27cm beast) was a classic vanilla.


Peanut butter:


Pineapple:


You never have to worry about making too much cheesecake (is that even possible? I almost hate myself for typing that!) as it freezes well. To make it even easier, cut the slices and wrap them individually then you only need defrost what you want and the rest is safe for another day.


Happy 14th birthday Boy Wonder!

Ingredients

For the basic cheesecake mixture (this will make a 20cm round cheesecake, or 5 of the mini's I've made here):

250g digestive biscuits
100g unsalted butter
600g cream cheese – I used Philadelphia
100g icing sugar
284ml double cream

Suggested flavourings: Seeds scraped from 1 vanilla pod, 3 tablespoons smooth peanut butter, 3 tablespoons fruit puree, small tin of strained crushed pineapple.

Method

Place the ring from a 20cm round springform tin on the plate you’ll server the cheesecake from. Wrap the ring in either clingfilm or greaseproof paper to ensure that you can free the cheesecake easily.

Butter and bics in the food processor - pulse it until the butter is distributed.

Use the crumbs to line the base of the cheesecake. Press them down onto the plate but not so hard that you create biscuity concrete!

Refrigerate while making the cheesecake.

Slice the vanilla pod in half and remove the seeds. (if you are using any other flavourings this is the time to add them)

Place seeds in a bowl along with the cream cheese and icing sugar and beat until smooth and well combined.

Pour in the cream and beat until the mixture is completely combined.

Spoon over the biscuit base and level.

Leave to set overnight in the refrigerator.

Sunday, 14 August 2011

Apple and blackberry frangipane tarts


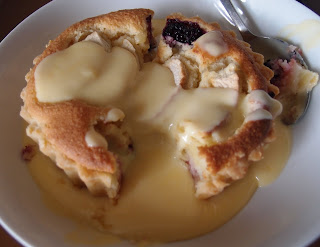
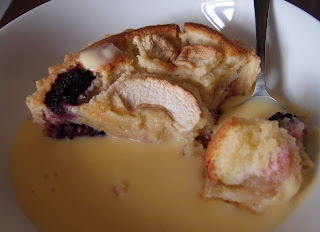
About three weeks back (maybe further) Mr CC requested something with pastry that could be served hot with custard. Inattentive wife that I am, I’ve only just got round to it. He requested apple and blackberry so the recent fruity theme of the blog continues for another week!


By placing some of the blackberries underneath the frangipane sponge, the finished tart is similar to a bakewell i.e. almond sponge hiding fruitiness beneath; however, the apple slices on top differentiate it. I left my apple slices quite chunky so that they contributed texture as well as flavour.


Here’s what lies beneath the frangipane, apple puree and blackberries:


Initially, I planned on placing only blackberries under the sponge, but when Mr CC came home with a huge bucket full of Bramley apples grown by a work colleague, I made apple puree and put some of that in too:


I made a huge batch and only used some of it in these tarts. The leftover puree went in the freezer and will be used in a future apple crumble! My method for apple puree uses more water than those I found online; having followed these in the past I find them too dry. Using more water seems to make a lighter, fluffier puree.


I decided to revisit the pastry from Raymond Blanc’s apple tart. It worked so well with apples and had the time saving bonus of not needing to be blind baked in advance of baking the filling.


My flan tins were called “mini flan tins”, but as you’ve probably noticed they were actually quite large – about 10cm across. Anything called ‘mini’ instantly means a single serving to me...I don’t tend to use my eyes in such situations. In truth, half a tart would’ve been plenty!


Pastry, fruit and custard together are the holy trinity of puddings, as far as I’m concerned; add almond sponge into the mix and I’m in heaven! Whisper it softly, but I actually prefer the thicker, darker…dare I say, lower end, type of custard, the kind that coats the back of the spoon with a viscous layer of yellow goodness. The soft vanilla aroma that wafts up from a jugful of custard surely contains endorphins (or something, I’m not a scientist) as it makes everyone happy!

I end with a confession. Having admitted half a tart would’ve been a generous portion I still dished up a whole tart each. The following is photographic proof of why I am The Caked Crusader G.G. Hons (Greedy Guts) – my bowl is on the left; a mortal’s is on the right:


Ingredients

For the pastry:
250g plain flour
125g unsalted butter, diced
1 teaspoon milk or water (I used milk)
1 egg


For the apple puree (puree is never an exact science so make whatever quantity you wish – it freezes brilliantly):
Bramley apples
Sugar – to taste
Water


For the filling:
200g blackberries
140g unsalted butter, at room temperature
100g caster sugar
2 eggs
1400g ground almonds
50g plain flour
1 teaspoon almond extract (optional)
2 apples, peeled, cored and cut into 1/8s – I used Granny Smith apples

Method

Start by making the pastry: pulse the flour and butter in a food processor until you have crumbs.

Add the egg and milk and pulse again until the pastry clumps but does not form a ball – be careful not to overwork it.

Tip the dough onto a sheet of clingfilm and kneed it just enough to form a ball. Flatten, wrap in clingfilm and refrigerate for 30 minutes.

Meanwhile, make the apple puree. Take a saucepan of appropriate size – roughly so that the apples will half fill the pan.

Cover the bottom of the pan with water – ideally about 2cm deep.

Peel, core and thinly slice the cooking apples.

Slowly simmer until the apples break down and you have a puree; if the pan looks dry add some more water. You can speed this up placing the pan lid 3/4s over the pan.

Personally, I like my puree with some apple chunks still in it; if you don’t cook until smooth.

Add the sugar right at the end – this is totally to taste so add gradually until you have the right sweetness for you.

Roll out the chilled dough between two sheets of clingfilm. I didn’t need to add any extra flour. Use one sheet of the clingfilm to lift the pastry to line a 20cm loose bottomed flan tin or 4 individual tart tins (mine measured 10cm across). Press the pastry into the tin and use the rolling pin to roll over the top and cut of any excess pastry.

Preheat the oven to 200˚C/fan oven 180˚C/390˚F/Gas mark 6

Spoon 2 tablespoons of the apple puree into the pastry case and arrange the blackberries on top.

Place back in the fridge to chill while you make the filling.

Beat together the butter and sugar until it’s pale and smooth.

Beat in the eggs one at a time, if it looks like it might curdle add some of the flour.

Stir in the almonds, flour and, if using, the extract.

Spoon into the pastry case and level the surface; take care not to disturb the blackberries too much as they need to be evenly distributed.

Arrange the apple slices on the top.

Bake for 30-40 minutes until the almond sponge is cooked – test with a skewer, the same way you would for a cake. If the skewer comes out clean it’s ready.

Leave to cool, in the tins, on a wire rack.

Serve either at room temperature with thick cream, or warm with custard.

Bask in the glory of the wonderful thing you have created.

Eat.

Sunday, 7 August 2011

Blackberry curd cupcakes


It’s that time of year when Mr CC and I don sensible shoes, dig out our ‘fruit harvesting tupperware’ and venture into the wilds of the Lea Valley park to go blackberrying.


It’s also that time of year when we enthusiastically discuss how we need to learn more about the fruits, berries and leaves surrounding us and how we must go foraging as there’s so much free food on our doorstep. Upshot of this conversation? Nothing (maybe that’s harsh, sometimes I buy a book from Amazon on foraging and identifying plants), until blackberry season comes round again and then we repeat the conversation perhaps with a little more earnestness about how we “really mean it this time”.


Anyhow, we gathered our blackberries and I have used them to make a blackberry curd. Until recently, I didn’t realise you could make curd from most fruits and thought it was solely for lemons. This blackberry curd has a thick curdy texture and comforting sweet edge. To showcase it, I placed some in the cupcake and then beat some more into the Swiss meringue buttercream. I think you could beat it into any type of buttercream; I just like the silkiness of Swiss meringue buttercream…mmm butter!


My bain-marie pan doesn’t get much use but, as I use it for making lemon curd, I gave it an outing for this recipe. The pan is double walled and has a small hole on top of the handle; you fill it with water then use it as a normal pan – a bain-marie in one pan! No more balancing bowls on simmering saucepans!


Something I have learned whilst writing this post: I find “curd” a tricky word to type, not sure why as it only has four letters. I have read and re-read this post as blackberry crud cupcakes do not sound appealing!


Ingredients:


For the blackberry curd (this made enough for the cupcakes, and to spread on one slice of toast!):
225g blackberries
2 tablespoons water
140g caster sugar
2 eggs, beaten
35g unsalted butter

For the cupcakes:
125g unsalted butter
125g caster sugar – I used vanilla infused caster sugar
2 eggs
125g self raising flour
2 tablespoons milk (whole or semi skimmed)
3 teaspoons vanilla extract


For the swiss meringue buttercream:
4 egg whites
250g caster sugar – I used vanilla infused caster sugar
250g unsalted butter, at room temperature
3 teaspoons blackberry curd


Method:

Start by making the blackberry curd: place the blackberries in a saucepan with the water, bring to the boil, then reduce the heat and simmer for 10-15 mins.

Pass through a sieve – use a spoon to push through as much of the puree as possible.

Discard the pulp and put the puree either in a bain marie saucepan, or in a heatproof bowl over a saucepan of simmering water (making sure the bowl doesn’t touch the water).

Add the caster sugar, stirring to melt and slowly whisk in the beaten eggs.

Add the unsalted butter and continue to stir until it is melted.

Keep the curd on the heat and continue to stir. Gradually it will thicken, although this can take a while. Mine took at least 15 minutes.

Once the curd leaves a trail on its surface, it is ready. Another test is whether it falls from the spoon in a gloopy blob rather than as a liquid. It will firm up on cooling so take it off the heat just before it reaches the firmness you’d like the finished curd to have.

Spoon into a bowl and leave to cool, when cool store in the fridge.


Preheat the oven to 190°C/fan oven 170°C/375°F/Gas mark 5.

Line a 12 hole muffin pan with paper cases.

To make the cupcake sponge beat the butter and sugar together until light and fluffy.

Add the eggs, flour, milk and vanilla to the bowl and beat until the mixture is well combined and smooth.

Spoon the mixture into the paper cases.

Bake for approximately 15 minutes or until a skewer comes out clean. Mine took 17 minutes.

Remove from the oven and leave to cool on a wire rack. The cupcakes can be made a day in advance and stored, when cool, in an airtight container. I made the buttercream on the day I wanted it.

Core the cupcakes and spoon enough blackberry curd into the well to fill it.

Eat the discarded cores of sponge – cook’s perks!

Now make the buttercream: Place the egg whites and sugar in a bowl over a pan of simmering water (making sure the bowl doesn’t touch the water) and stir constantly to stop the egg from cooking.

After 5-10 minutes the sugar should have dissolved. You will know whether this has happened by looking at the back of the spoon – if you can see any sugar crystals the mix needs more heating and stirring.

When no crystals are visible, remove the bowl from the heat and whisk the meringue mixture until it has puffed up and cooled.

Add the butter and vanilla to the meringue and continue to whisk. The mixture will collapse initially but don’t panic; keep whisking and it will form a smooth, fluffy buttercream. This may take a while so, I repeat, don’t panic and don’t give up! This buttercream will only fail if you skimp on this stage – however sloppy it seems, keep whisking and it will come good. The time it takes varies hugely with the weather (I find) so there are no hard and fast guidelines.

When the buttercream is plump and fluffy, beat in the blackberry curd.

Spoon the buttercream into a piping bag. If it feels very soft refrigerate for 5 mins or so to firm up a little – don’t leave it for too long as piping hard buttercream is not fun!

Pipe on to the cupcakes and decorate as you wish. I went for the simplicity of a blackberry on top of each one.

The finished cupcakes will keep for a couple of days at room temperature. Not that they’ll have the chance!

Bask in glory at the wonderful thing you have made.

Eat.


Sunday, 19 September 2010

Blackberry panna cotta birthday cake


Since he saw me make it for the CCM back in May, my nephew (The Boy Wonder) had only one request for his birthday cake – a
panna cotta filled sponge … but with a twist; the panna cotta had to be blackberry.


The
recipe and method is the same as the cake I made in May but with added blackberries (200g punnet of blackberries pureed and sieved, then heated until reduced by half to make a thick syrup with intense flavour; add sugar to taste – I added 2 tablespoons). I made the panna cotta as usual then added the blackberry syrup just after whisking in the gelatine.


The idea with this cake is that you carve out the sponge to make a bowl and then fill it with panna cotta – it’s simpler than it sounds (as you will see if you click on the link to the method, given above).
From the outside, the cake doesn't look all that, but I think this photo gives you a visual idea of the magic within:


Now you might be thinking that this would be a nightmare to cut but – surprisingly – it isn’t and you can get beautifully crisp slices:


The colour of the panna cotta was a delicate lilac and the fruitiness worked very well.
At first I thought I hadn’t added enough fruit to the panna cotta as the initial taste was creamy and rich; then the fruit came through and was unmistakable. I’ve tried to capture how the sponge turned lilac as it soaked up the panna cotta before it set:


Happy birthday Boy Wonder!


Sunday, 22 August 2010

Cupcake kebabs


I’d seen cupcake kebabs on the internet but they were full size and interspersed, on the skewer, with marshmallows and other bits and bobs. I fancied ‘all killer, no filler’ so decided to make four different mini cupcakes and skewer them so they remained horizontal i.e. the right way up – the ones Id seen skewered them vertically. I think they ended up looking like the little figures in table football.


Everyone loved these skewers because you got a wide range of flavours on each one. The mini cupcakes equate to a quarter of a normal sized cupcake so each skewer is only actually one cupcake! Oh yes, I’m a master at justifying eating lots of cake!


I balanced it so there were two light, and two dark cupcakes. I chose vanilla sponge with vanilla Swiss meringue buttercream, butterscotch sponge with butterscotch Swiss meringue buttercream, blackberry sponge with blackberry Swiss meringue buttercream and chocolate sponge with....chocolate ganache. You lose a mark if you thought it was going to be chocolate Swiss meringue buttercream!


Although this sounds like a lot of work it wasn’t because the sponge cooks very quickly and I made one batch of Swiss meringue buttercream and split it into separate bowls before adding the flavours.


The blackberry Swiss meringue buttercream was amazing. I know many of you find Swiss meringue buttercream too sweet so I recommend you try this version – the slightly tart, acidic blackberries calmed down the sweetness and created a fresh, fruity tasting sticky buttercream. It’s one of my favourite buttercreams I’ve ever made...and to think it only came about by chance, because Tesco didn’t have any raspberries!


The butterscotch chips came from a supplier of US food stuffs and were very popular – I used them whole in the sponge and melted them to add to the buttercream:


Special thanks must go to my new best friends at Tate and Lyle for sending me a selection of all their lovely sugars. I think there are certain brands where you just know you’ll get a great product every time, and Tate and Lyle are such a brand. For this recipe I used the caster sugar. Those of you on facebook might want to check out Tate & Lyle’s “
We love baking” page and also the “Taste & Smile” website.


Ingredients
For the plain cupcake sponge:
62g unsalted butter, at room temperature
62g caster sugar
1 egg
62g self raising flour
1 tablespoon milk

Then add either vanilla extract (to taste), 80g mashed blackberries or 80g butterscotch chips

For the chocolate cupcake sponge:
62g unsalted butter, at room temperature
62g caster sugar
1 egg
50g self raising flour
1 ½ tablespoons cocoa powder
1 tablespoon milk

For the swiss meringue buttercream – this will make enough for the vanilla, blackberry and butterscotch cupcakes:
4 egg whites
250g caster sugar
250g unsalted butter, at room temperature

Then add either vanilla extract (to taste), 80g mashed and sieved blackberries, heated until reduced by half or 80g melted butterscotch chips

For the chocolate ganache:
142ml whipping cream
½ tablespoon liquid glucose
100g plain chocolate, roughly chopped

Method

The method for all the cupcakes is the same, so please follow this method for both. Each recipe makes between 18-24 mini cupcakes.

Preheat the oven to 190°C/fan oven 170°C/375°F/Gas mark 5.

Line a mini cupcake pan with paper cases (each recipe makes between 18-24 cupcakes).

Beat together the butter and sugar until light and fluffy.

Beat in the eggs, flour and milk – then add your flavouring/cocoa/fruit of choice.

When the mixture is smooth and well combined, spoon into the paper cases.

Bake for 10-12 minutes or until a skewer inserted into the cupcakes comes out clean. Mine took 12 minutes.

Leave to cool on a wire rack and remove from the tin when cool enough to handle.

When the cupcakes are cool, you can make the Swiss meringue buttercream. Place the egg whites and sugar in a bowl over a pan of simmering water. Stir pretty much constantly to prevent the egg from cooking.

After 5-10 minutes, when the sugar has dissolved (when you cannot see any crystals on the back of the spoon), remove the bowl from the pan of simmering water and whisk until the meringue has puffed up and the mix is cool.

Add the butter to the meringue and whisk until the butter has been completely incorporated into the meringue. At first it will look a disaster – it will collapse and look curdled but don’t worry! Stop when the mixture is smooth, light and fluffy.

Separate the Swiss meringue buttercream into three bowls and add you flavouring/fruit to each. Beat again until whipped and light.

Spoon into a piping bag and pipe over cupcakes.

To make the chocolate ganache: Bring the cream to the boil in a saucepan.

Remove from the heat and stir in the liquid glucose.

Place the chocolate in the cream and stir until the chocolate melts.

Leave to cool and then whisk to lighten the texture. If it isn’t thick enough to pipe, refrigerate for 30 mins and try again – it was an extremely damp humid day the day I made it and I found it needed refrigeration.

Pipe or spread over the chocolate cupcakes.

Slide one of each type of cupcake onto a wooden skewer.

Bask in the glory of the wonderful thing you have made.

Eat.