Showing posts with label celebration. Show all posts

Sunday, 4 January 2015

Pandoro cake


Every Christmas I buy a Pandoro cake, sometimes two.  For those of you who haven’t tried it, it’s basically Panettone with none of the ‘bits’ in it.  I buy mine from Tesco and they come with a sachet of icing sugar to sprinkle over the cake; it has a citrus taste to it that is simply lovely.  I’ll often slice up the Pandoro and make it into a posh bread and butter pudding, but this recipe takes that principle and creates a massive cake instead.


The recipe set out below is a blank canvas.  If you so wished you could soak the fruit in rum or brandy.  You could change the mix of fruit.  You could add some nuts.  The world is your oyster....but don’t add oysters; that wouldn’t work.


My personal preference in serving this cake is slightly warmed with some pouring cream.  It’s such a rich, custardy, indulgent cake.  It’s also huge, so make sure you’ve got a big eatership on hand to tackle it!  Here it is ready for the oven; it looks lovely even at this point when it’s uncooked:


This recipe is a cross between a really good bread and butter pudding, and a really good bread pudding.  I believe one should start the year as one means to go on....hence why I picked a recipe that used butter and over half a litre of cream!  Happy new year!


Ingredients

600g pandoro, panettone or brioche – thickly sliced
150g unsalted butter, at room temperature
350g sultanas – or a mix of sultanas, raisins and dried cranberries
8 eggs
600ml double cream
250ml milk
150g caster sugar
1 teaspoon vanilla extract

To serve: icing sugar and thick pouring cream


Method

Preheat the oven to 150C/fan oven 130C/300F/gas mark 2.

Line a 23cm cake tin with foil, and line the outside with foil too to catch any leakage.  If you have one large enough, use a deep pie dish instead (still line it with foil as it will help you lift it out) as this will mean the liquid cannot leak.

Butter the pandoro and cut it into chunks so that you can pack it into the dish. 

When you have a complete layer, scatter over handfuls of sultanas.

Continue until the buttered pandoro and sultanas are all used up – try to avoid having too many sultanas sitting exposed on the top as, due to the long cooking time, they may burn (I learned this through bitter experience!).

In a large bowl whisk together the eggs, cream, milk, sugar and vanilla.  Only whisk until they are combined – you don’t want it to thicken.

Ladle it over the pandoro and sultanas and take your time, so that the pandoro can absorb the liquid.  At first you will not believe all the liquid can be accommodated but patience will prove you wrong!

Leave to sit for 30 minutes.

Place the cake on a baking sheet and bake for approximately 1 ½ hours or until the top is golden and crisp, and there’s a wobble to the cake but no visible liquid.

Completely cool before de-tinning.

Lightly dust with icing sugar.

Serve either warm for dessert with custard, or at room temperature with pouring cream.

Bask in the glory of the wonderful thing you have created.


Eat.

Wednesday, 24 December 2014

Chocolate mint cake


Our new house has emerged from the “total chaos” stage of unpacking to the far more acceptable “annoyingly disordered”.  I think this is progress and it felt a good time to get back to some baking, particularly with Christmas fast approaching.  I’d been cooking dinners every night so felt confident that I understood my new oven enough to tackle a new recipe, totally ignoring Mr CC’s recommendation of baking something I knew inside out like a Victoria sponge.  I could see his logic but I fancied something that reflected the festive season, and what could be more festive than After Eight mints?


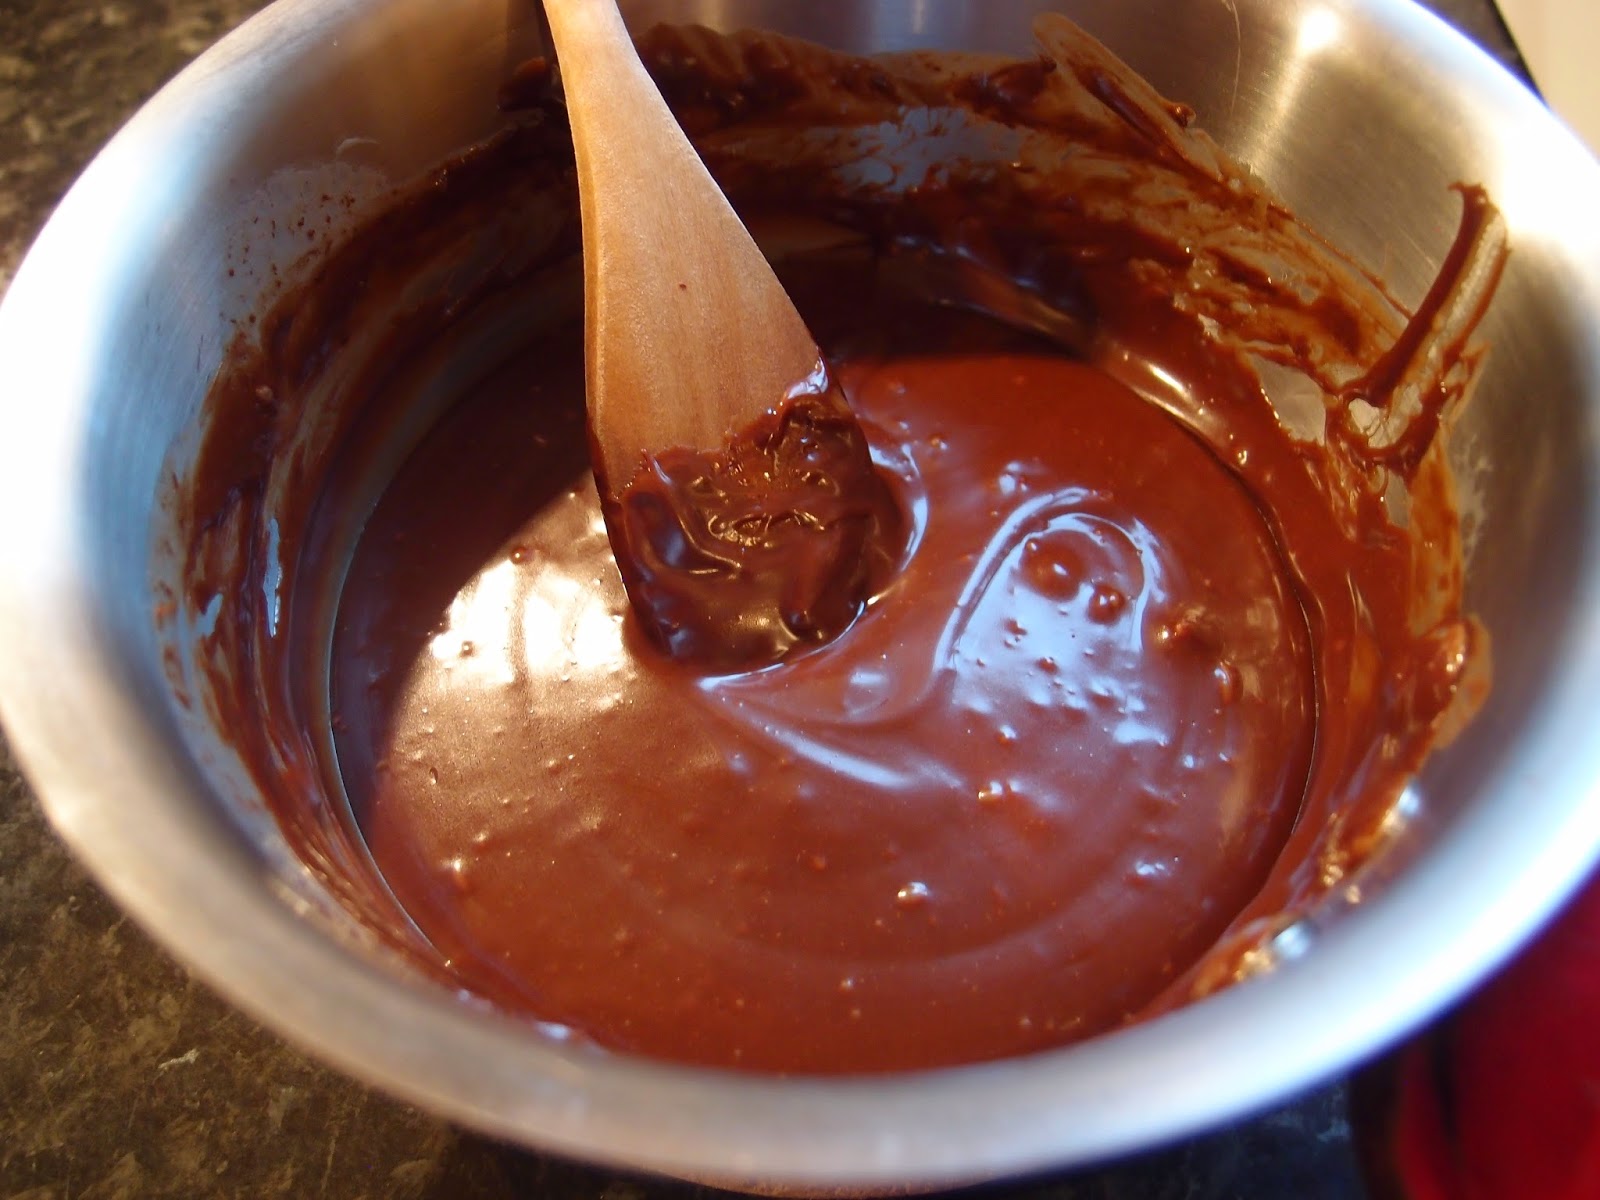
Now don’t get me wrong; I like After Eight mints, I truly do.  But would I like them half as much if they didn’t each come snugly filed away in their own little paper sleeve like chocolate records? (Translation for anyone under 40: Records were the iTunes of their day but took up actual rather than virtual storage space and only held about 12 tracks at most).  And is there another chocolate with greater rules of etiquette?  Only a complete bounder takes the chocolate out and leaves the paper sleeve in the box, leaving some poor unfortunate sap to ‘draw a blank’.  This ganache uses a whole box of chocolates:


And here they are melted:


This is a rich, decadent cake and would work as either a cake or a dessert.  If I was serving it as a dessert I might have some extra whipped cream to serve alongside because everyone knows that it cuts through richness….right?  Work with me here, it is Christmas after all…the time of year when all bets are off and it’s perfectly acceptable to drink alcohol before 9am and eat tons of chocolate straight after the biggest meal of the year whilst complaining how full you feel (or at least it is if you’re doing right).


Thanks for everyone who’s stopped by my site this year, and extra thanks to those of you who have left such lovely comments.  Hope you all get the Christmas you wish for and a wonderful 2015!


Ingredients

For the sponges:
170g unsalted butter
100g dark chocolate
240g plain flour
280g golden caster sugar
6 tablespoons cocoa powder
1 teaspoon bicarbonate of soda
2 eggs
284ml buttermilk
200ml boiling water

For the icing:
300g After Eight mints, plus extra for decoration if you wish
50ml double cream


Method

Preheat the oven to 180C/ fan oven 160C/ 350F/ gas mark 4.

Line two 20cm round loose bottomed sandwich tins with baking paper.

Place the butter and chocolate in a saucepan and melt over a gentle heat.  Put to one side to cool a little.

Place the flour, sugar, cocoa powder and bicarbonate of soda in a large mixing bowl and stir together.

To the dry mix, add the melted chocolate and butter, the eggs, buttermilk and boiling water.

Beat until the mixture is smooth – you don’t want any lumps left in the batter!

Spoon into the two prepared tins and level the surface.

Bake for approximately 30 minutes or until a skewer inserted into the cake comes out clean.  Mine took a little longer so don’t worry if yours does too.

Leave to cool in the tins for 30 minutes before de-tinning and leaving to cool completely on a wire rack.

The sponges can be made a day in advance and stored in airtight containers.

Now make the icing: place the After Eights and cream in a saucepan and melt together over a gentle heat.

Leave to cool until you have a nice spreadable consistency – depending on the weather (or your heating!) you might need to pop it in the fridge for a bit.

Place one sponge on the serving plate.

Spread just over half the icing over it and place the second sponge on top.

Spread the remaining icing over the top and decorate as you choose.


Bask in the glory of the wonderful thing you have created.

Eat.

Sunday, 23 November 2014

Chocolate and chestnut tart – happy birthday to me!


It was some time ago that I ate the “best cake ever” (in my opinion).  It was a ‘maronischnitte’ from CafĂ© Sacher in Salzburg; a creamy chestnut delight.  My thoughts turned to it recently and I decided to take elements of it for my birthday cake…or birthday tart as it became.


Last weekend Mr CC and I had a spiritual experience: we visited Whole Foods on Kensington High Street.  Never before have we so wanted to dislike a shop yet fallen in love with it so quickly.  I was convinced it would be overpriced hydroponic mung beans being sold to yummy mummies but it wasn’t; it was glorious.  I could’ve spent a grotesque amount of money but limited myself to what I could hold in my hands, which turned out to be a pot of couverture chocolate, a pot of red onion and horseradish stuffing, and three bars of chocolate.  Not to be used in the same dish, I’m sure you’ll appreciate.


I used my couverture in the making of the ganache.  Apart from the pebble shaped pieces looking professional in the pan I didn’t honestly notice much difference in the way it handled. It may have melted a bit quicker, and for milk chocolate had a very strong rich cocoa taste but nothing really stood out as different.


For the chestnut element I used a tin of Clement Faugier chestnut spread as it was sweet and had vanilla added to it.  Ok, and I love the tin it comes in.  The tin has a lot of ribbing to it and a really busy, vintage-y design; I particularly love the fuzzy looking chestnuts.


A biscuit base (I wasn’t in the mood for pastry), chocolate ganache, sweet chestnuts and lashings of whipped cream.  Happy birthday to me!


Ingredients

For the biscuit base:
200g biscuits – hobnobs, digestives or shortbreads will all work
100g unsalted butter
1 tablespoon golden syrup or honey
For the ganache:
200ml whipping cream
1 teaspoon vanilla extract
200g milk chocolate – or dark if you prefer

For the topping:
250g sweetened chestnut puree
300ml whipping cream

To decorate: chocolate flake


Method

Place the biscuits, butter and golden syrup in a food processor and blitz until you have moist crumbs.  If you don’t have a food processor, place the biscuits in a bag and beat to crumbs with a rolling pin.  Then put in a bowl and add the butter (melted) and golden syrup.
Press the crumbs into a 23cm round loose bottomed tart tin (I used a disposable foil tin as we’re in the process of packing up the house for moving – it did make it harder to get out, so use a loose bottomed tin if you can).  Alternatively, you could use a 36cm x 12cm rectangular loose bottomed tart tin.
Refrigerate for at least an hour.
Now make the filling: Place the cream in a saucepan and add the vanilla.
Bring the cream to up to boiling point, without actually letting it boil, and then remove from the heat.
Break up the chocolate and add to the cream.
Let it stand for a couple of minutes before going in with your whisk and ensuring that the cream and chocolate are fully combined.
Leave to cool for 15-20 minutes.  Whisk occasionally to thicken up the ganache.
Remove the tart base from the fridge and pour the ganache into it.
Return to the fridge and leave to firm up – once it is firm, wrap it in clingfilm (if you try and do this straightaway you will get a mess and the clingfilm won’t pull away easily).
Spread the chestnut puree over the ganache.
Whip the cream and pipe over the chestnut layer.
Finish with some flaked chocolate.
Remove from the fridge 30 minutes before you wish to serve.
Serve in slices.
Bask in the glory of the wonderful thing you have created.

Eat.


Sunday, 27 July 2014

Light ginger fruit cake


If you find traditional celebration fruit cakes too rich and heavy this may well be the cake for you.  Once baked it will store just like its heavier counterparts, and can also be decorated.


There are two options with this recipe – you can soak the fruit in 200ml of ginger wine and bake a spongy, light fruit cake; or you can take the route I did and use 400ml of ginger wine resulting in a cross between a fruit cake and bread pudding.  My cake came out dark and squidgy but was still light.


On my travels I came across Gran Stead’s ginger wine
.  I’m glad I went for the “dark and mellow” rather than the fiery one as it still had some sting to it!  It’s also non-alcoholic so the finished cake doesn’t have that burn of booze that some cakes have.


This cake keeps for ages –just like its more traditional cousins...but, you might also want to bear in mind how awesome it is warmed up and served with custard or ice cream (my nod to summer!) as a dessert.


Ingredients

350g raisins
125g sultanas
125g currants
200ml or 400ml ginger wine – depending on whether you want a spongy or a pudding-y cake, plus 4 tablespoons extra
200g unsalted butter, at room temperature
200g dark muscovado sugar
4 eggs
200g plain flour
50g ground almonds
1 teaspoon mixed spice
2-3 teaspoons ground ginger, depending how hot you want it!
1 tablespoon black treacle


Method

The night before you make the cake place the dried fruits and ginger wine in a bowl to soak.  Stir occasionally.

Preheat the oven to 160°C/fan oven 140°C/320°F/gas mark 3.

Line a 20cm round springform tin with baking paper ensuring that the paper comes up about 2cm above the height of the tin.

Beat together the butter and sugar until smooth and well combined.  The mixture will lighten a bit in colour.

Beat in the eggs one at a time, adding some of the flour if it looks like it might curdle.
Mix in the flour, almonds, spices and treacle.

Stir in the soaked fruits along with any liquid left in the bowl.

Spoon into the tin (it will come up almost to the top) and level the surface.

Bake for 30 minutes then lower the temperature to 150°/fan oven 130°C/300°F/gas mark 2 and bake for a further 1 ½ - 2 hours, but definitely check after 1 ½ hours as mine was almost done.

As soon as the cake comes out of the oven, pierce all over with a skewer and brush on the 4 tablespoons ginger wine.

Leave the cake to cool completely in its tin before removing and wrapping in baking paper and foil.  Once wrapped the cake will keep for up to 3 months.  If however, like me, you wish to eat the cake straight away, simply de-tin it and put it on a serving plate!

Bask in the glory of the wonderful thing you have created.

Eat.


Sunday, 15 June 2014

Rum and coffee cake


Father’s day always forces me to bake altruistically as one of the CCD’s (Caked Crusader’s Da) favourite cake flavours is coffee, which I cannot abide in any shape or form.  This cake also uses one of his other favourite things: rum.


Sticking with my theme of altruism, I jettisoned any ideas for buttercreams or whipped cream because that is not at all the CCD’s style.  Serve him a wedge of sponge he can just pick up and eat and he’s happy.  Serve him something he needs a pastry fork to navigate around and he sees it as unnecessary fuss.


Given that the cake needed to absorb a lot of liquid without turning to mush I opted for a firmer, closer crumbed sponge and it held up well.  The inclusion of sour cream balances the sugar; I always think the inclusion of buttermilk/sour cream/yoghurt gives a velvety softness to a sponge.  Definitely plan ahead with this bake as it is best made the day before and left to absorb the coffee overnight. 


The liquid does make the sponge depress a little, so don’t worry.  I’m finding it hard to know what to say about this cake because I am so not the target audience for it!  Sometimes, though, the right cake doesn’t need to be flash nor a showstopper - all I can say is that the CCD enjoyed it so, job done!

Happy father's day!


Ingredients

For the cake:
190g unsalted butter, at room temperature
270g caster sugar
2 teaspoons vanilla extract
3 eggs
270g plain flour
1 ½ teaspoons baking powder
Pinch of salt
225g sour cream

For the rum coffee syrup:
3 tablespoons caster sugar
4 tablespoons rum
100ml hot, strong black coffee


Method


Preheat the oven to 200°C/fan oven 180°C/400°F/gas mark 6.

Line a 20cm round springform tin with baking paper.

Start by beating together the butter and sugar.  Take time over this and beat until it is pale, light and fluffy.

Beat in the vanilla.

Beat in the eggs one at a time, adding some of the flour if it looks like it might curdle.

Beat in half the flour.

Beat in half the sour cream.

Beat in the remaining flour, along with the baking powder and salt.

Beat in the remaining sour cream.

Spoon the mix into the prepared tin and bake for approximately 50 minutes, or until a skewer inserted into the cake comes out clean; check after 40 minutes to ensure the cake isn’t browning too quickly – if it is, loosely cover the top with foil and continue baking.

Leave in the tin and wrap the base and sides of the outside of the tin in foil- this will stop any leakage from the syrup and prevents a sticky cleaning up job!  N.B if you’ve used a liner for the tin there’s no need to do this.

Now make the syrup: mix together the sugar, rum and hot coffee until you can feel that the sugar has dissolved.  If you do this in a glass bowl you will be able to see when this has happened; I usually rely on dragging the spoon along the bottom of the dish – if it seems smooth everything has dissolved!

Poke some holes in the top of the cake and brush the hot syrup onto the warm cake – I find this gives the best absorption.  You can pour but I prefer the control over distribution that a brush gives.

If you feel that the cake is getting too wet, let it rest for 10 minutes then resume brushing on the liquid.

Leave to cool completely in the tin on a wire rack.

It is best to make the cake a day in advance to let the coffee and cake settle down overnight.

Serve in generous slices with some whipped cream.

Bask in the glory of the wonderful thing you have made.

Eat.

Sunday, 25 May 2014

Peanut butter chocolate truffles


These delicious truffles could not be simpler to make but they do require a bit of planning as the ganache needs time to chill properly in the fridge.  I was inspired to make these after Mr CC and I were served them with our tea/coffee at the end of very nice dinner to celebrate Mr CC’s birthday. 


The ones we were served in the restaurant had been rolled in cocoa powder, which I’m not a fan of in its raw form, so I used digestive crumbs instead.  Curses!  I am typing this post at mid point in the process – my ganache is cooling in the fridge.  Unusually, Mr CC is sitting next to me while I’m typing and has noticed that I’ve chosen not to roll them in cocoa....long story short, half will now be in biscuit crumbs, half in cocoa!


I have noticed a curious thing about digestive biscuits: when I buy them to put in my biscuit tin and wish them to stay whole I will open the packet and find several broken, even though I have carefully laid them in the top of one of my bags of shopping and treated them as though they were made of glass.  When I buy digestive biscuits to turn into a cheesecake base or any other recipe that involves smashing them into crumbs I will casually toss them into any of my bags of shopping – in with the potatoes and milk?  Why not? They will be doing the work for me! – and they will come home with not so much as a crumb chipped away. 


Peanut butter and chocolate is a lovely combination for anyone who enjoys that salty/sweet flavour mix.  I challenge anyone to stop at one truffle!  I tried cutting one in half to try and convey the rich, dense texture but it looked a bit crumbly because I cut it straight from the fridge thinking it would give a cleaner cut.  Moral of this story?  When in doubt, bite it in half:


Ganache making is a wonderful process; I never quite trust that the chocolate will mix in but it’s wonderful how it does!


I used a small melon baller to scoop the ganache into individual truffles.  You can tidy the balls up by rolling them in your hands but don’t waste a lot of time on this because, once they are rolled in cocoa or crumbs they look smooth and round anyway.  I made mine quite small – I like a truffle that you pop into your mouth whole and treat like a shot!  This mixture made me over 60 truffles....hurray!  Don't limit yourself to serving them as chocolates - how about using them as decadent cupcake toppers, or cheesecake decorations....in fact, any chocolate dessert?


Ingredients

300ml double cream
6-8 tablespoons smooth peanut butter – depending how peanutty you want it
200g dark chocolate, broken into squares
100g milk chocolate, broken into squares
8 digestive biscuits
6 tablespoons cocoa powder, you may need more


Method

Place the cream and peanut butter in a saucepan and bring slowly to the boil.

Remove from the heat and add both the dark and milk chocolate.

Leave to stand for a couple of minutes before gently stirring to combine into a thick, glossy ganache.

Pour into a heat proof dish and leave to cool before refrigerating until set (at least 4 hours – I left it overnight).

Blitz the digestive biscuits to crumbs either in the food processor or by placing in a bag and bashing with a rolling pin.

Take a melon baller scoop (or a  teaspoon if you don’t have a melon baller) of ganache and roll into a ball.

Repeat until all the ganache is used up.  If the ganache in the dish or the rolled balls start to get too soft return to the fridge for 10 minutes before resuming.

When all the balls are rolled, roll them individually in the biscuit crumbs or the cocoa powder.

Place in a petit four paper case and refrigerate until you wish to serve.  I got over 60 truffles...which made me very popular with everyone!

Bask in the glory of the wonderful thing you have created.


Eat.
Sunday, 27 April 2014

Baileys custard tart


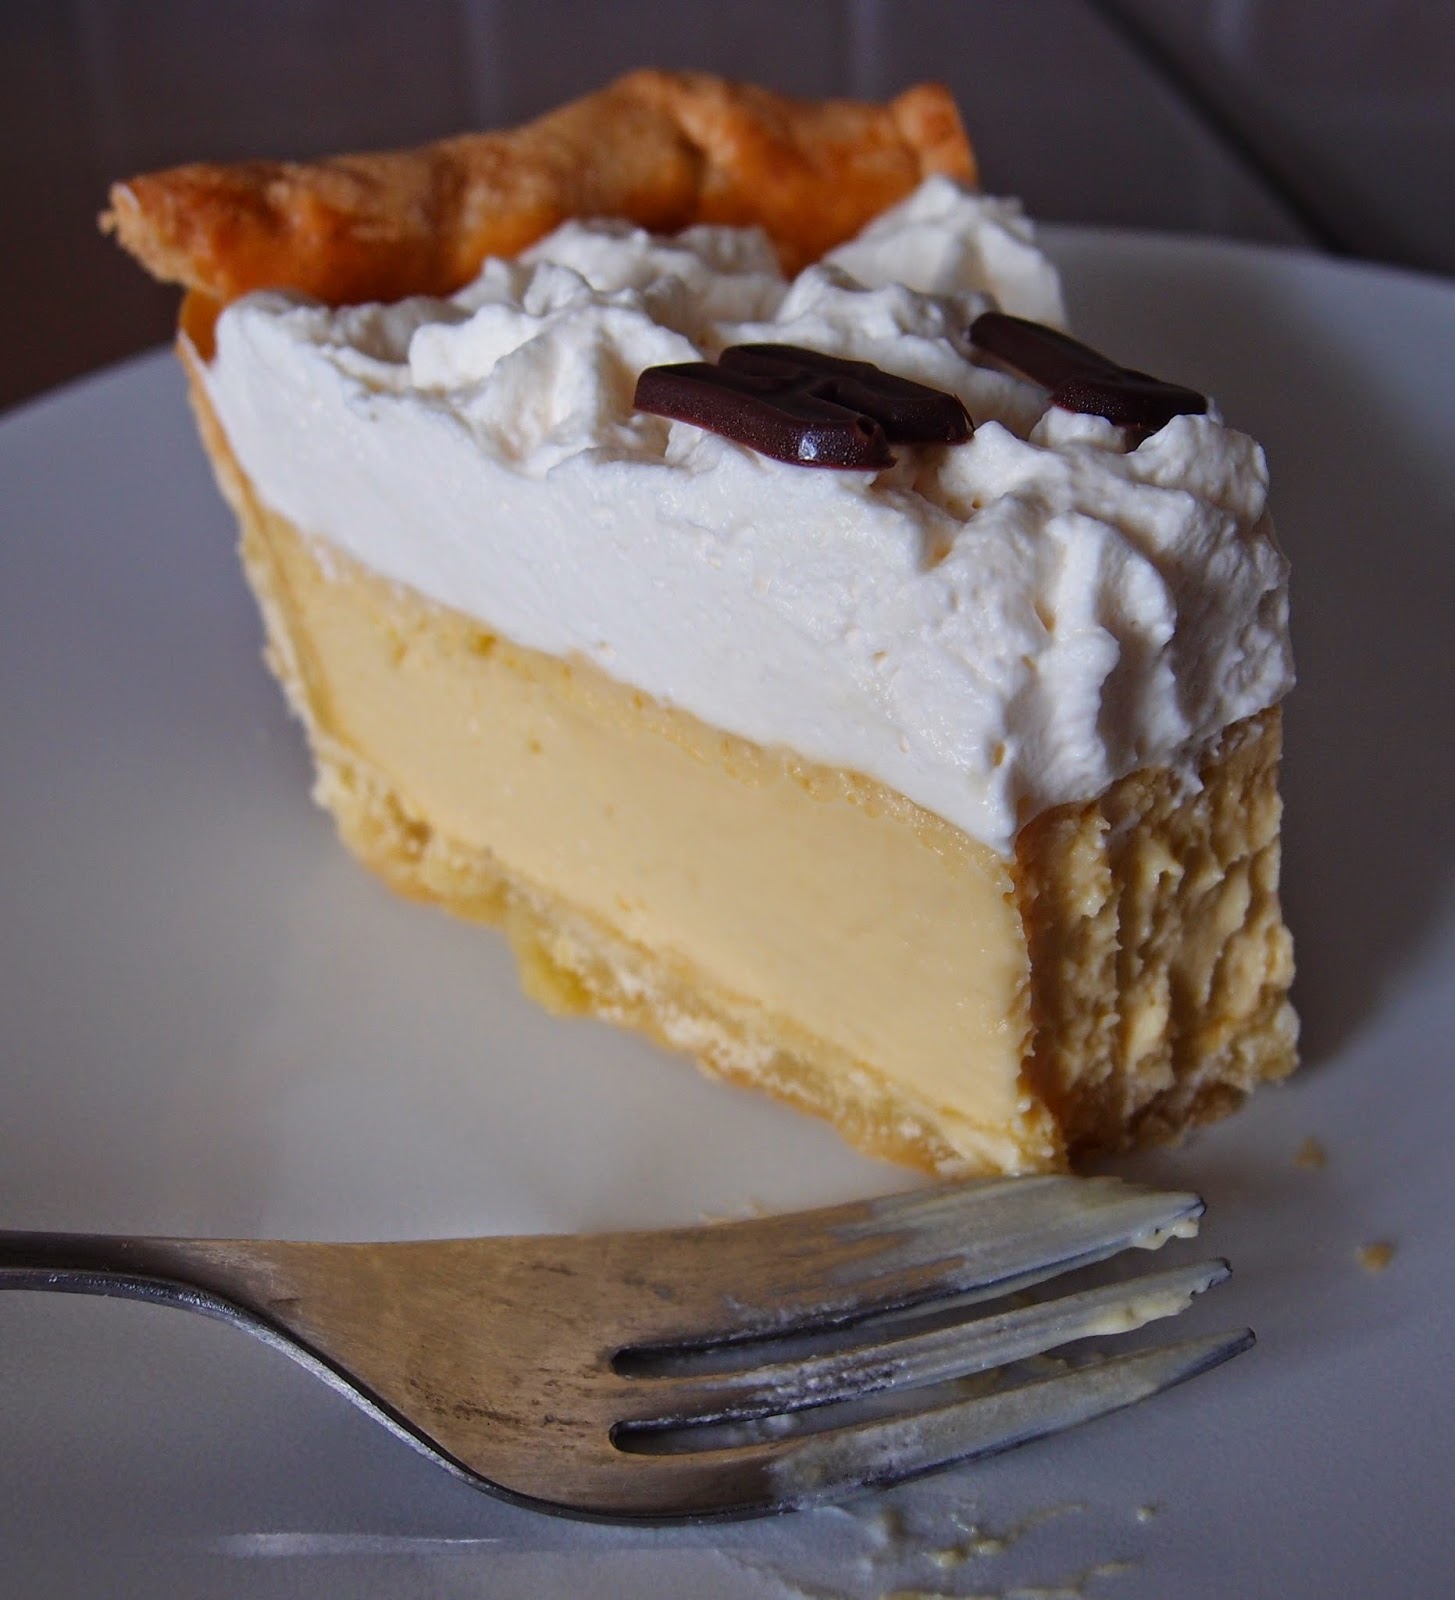
It is the CCD’s (Caked Crusader’s Da) birthday and, as I’ve noted before, he is rather partial to a custard tart.  He’s also fond of booze.  So why not combine the two?  You'll see in the picture below that a bit of pastry got knocked off in transit. Mr CC tried to advise me to be more careful and started explaining about G force and roundabouts but it didn’t make a lot of sense to me (I've never been scientific); all I remember from his teachings is that Formula 1 drivers have thick necks.


In case you’re in any doubt let me confirm: Baileys custard tastes awesome!  It smelled lovely cooking and tasted just as good.  It’s not overpowering but adds some ‘oomph’ to the custard in a more gutsy way than vanilla does.  You could vary the amount of Baileys you add: as long as the cream + Baileys = 500ml I think you’d be alright, as Baileys is very creamy.


I noticed that the filling cooked quicker than a standard vanilla custard tart and must therefore assume that the Baileys was responsible for this as it was the only difference to my standard recipe.


Don’t nine egg yolks look glorious?


Seeing as this was a custard tart for a special occasion I went all out and whipped up some more cream (because let’s face it, what this lacked was cream!) with more Baileys (ditto!) for a flavoursome and decorative addition.


Happy birthday CCD!


Ingredients

For the shortcrust pastry:
175g plain flour
120g unsalted butter, cold
3 tablespoons icing sugar
2 egg yolks
2 teaspoons vanilla extract

To glaze: 1 egg yolk, beaten

For the filling:
9 egg yolks
75g caster sugar
350ml whipping cream
150ml Baileys

Optional to decorate:
300ml whipping cream
50ml Baileys


Method

Start by making the pastry: put the flour, butter and icing sugar into the food processor and blitz until you get fine breadcrumbs.

Add the egg yolks and vanilla and blitz until the pastry just starts to come together.

Turn out onto a lightly floured surface and bring together into a ball of dough, handling no more than is absolutely necessary.

Chill the dough for 30 minutes so it is firmer to work with when you roll it out.

Line a baking tray with baking paper. Have to hand a 20cm round deep ring, or use a foil disposal pie tin (I did and makes leakage less of a worry). Whatever ring or tin you use, try to find a deep one (ideally 3.5cm) as this will give a lovely deep tart and a luscious thick layer of baked custard.

Roll out the pastry between two sheets of clingfilm and use to line the flan ring/pie tin.
Don’t worry if you have some tears, the pastry is good-natured and patches easily.

Let the pastry overhang the edges. Take some of the surplus pastry off and put to one side – you may need this for patching later on.

Chill the pastry for a further 30 minutes once the tin is lined to minimise shrinkage when baked.

Preheat the oven to 190°C/fan oven 170°C/375°F/Gas mark 5.

Line the chilled pastry with a sheet of baking paper and cover with baking beans.

Bake in the oven for 10 minutes.

Beat the egg yolk and when the 10 minutes is up, remove the pastry from the oven and remove the paper and beads. Have a look at the pastry and use the spare that you put to one side to patch any little holes or cracks that you can see. When happy, brush all of the egg yolk over the interior of the pastry case and return to the oven for 5 minutes. This seals the pastry so that it won’t go soggy when you add the custard.

Remove the pastry from the oven and leave to cool. When it is cool enough to handle trim the excess pastry away using a serrated knife. Leave the pastry in the ring/tin.

Reduce the oven temperature to 150°C/fan oven 130°C/300°F/Gas mark 2.

From now on it’s all easy! Make the custard by whisking together the egg yolks and sugar. Add the cream and Baileys and whisk again.

Pour through a sieve into a heavy saucepan. Don’t skip this stage as there’s lots of eggy bits that will get caught by the sieve and would make the custard lumpy in texture if not removed.

Heat the custard over a low heat stirring all the time. When it gets to 37°C remove it from the heat.

Pouring through a sieve, pour as much of the custard into the pastry case as possible. I got all of mine in but it will depend on how deep your ring/tin is. If you’re not confident that you’ll get the tart into the oven without spilling the custard, put the tray (with the tart case on it) onto the oven shelf and then pour the custard in. I would’ve done this but when I pull my oven shelf out it dips slightly so I could not have got all the custard in.

Bake for 35-40 minutes or until the custard looks set but still wobbles slightly when the tray is moved. NB. This is less time than I would normally recommend for a custard tart but the Baileys seemed to speed up the cooking process.

Leave to cool on a wire rack.

Refrigerate until you are ready to serve.

Shortly before serving whip up the cream and Baileys and pipe onto the top for some extra decadence.

Bask in glory at the wonderful thing you have made.

Eat.
Thursday, 26 December 2013

Trifle cheesecake


Trifle or cheesecake?  Surely, one of the toughest decisions the dessert menu can pose.  Well, fret no more because nature has found a solution: trifle cheesecake.  All the flavour and texture of cheesecake with all the bells and whistles of trifle.


As soon as I saw this recipe in the BBC Good Food Christmas magazine I knew it was what we’d be eating after Christmas lunch.  If I was in a romcom, I could tell the BBC they had me at “trifle cheesecake”.


Christmas would be much more drab without sprinkles:


When you think about it, some cheesecakes already have a thick fruity layer on top but more of a set coulis than jelly.  The jelly works really well and lightens the whole dessert.  It was definitely a crowd pleaser.


I thought I had lined my tin pretty thoroughly, and also thought I had spread out the cheesecake layer to close off any holes.  Wrong.  That liquid jelly is a terror and I say this to prepare you for the likelihood of leakage.  Take precautions in advance – lots of kitchen paper under the tin will prevent it looking like a jelly massacre took place shortly before you opened the fridge door.  Also have a spare packet of jelly to make up for the jelly lost in leakage; it looks a bit weird if your raspberries are left poking out the top! (Not a sentence I ever thought I’d type)


Apologies for the poor quality photos; the light wasn’t great and, by this point in events, I had roast potato-fuelled inertia.  In other words....a typical Christmas!  Hope you all had a good one!


Ingredients

For the base:
250g digestive biscuits
100g unsalted butter

For the cheesecake layer:
3 gelatine leaves
3 tablespoons Bird’s custard powder
200ml milk
100ml double cream
900g cream cheese – I used Philadelphia
200g golden caster sugar
1 teaspoon vanilla extract

For the jelly:
1 x 135g pack raspberry jelly cubes (You might want a spare pack on standby, should you lose jelly to leakages – I did!)
175g raspberries

For the cream:
300ml double cream
Cadbury’s Flake
Sprinkles of your choice


Method

Line a 23cm round springform tin with foil or clingfilm.  It needs to be completely lined.  Also wrap the outside of the tin with foil – because the chances are the jelly will leak!  If you’re a pessimist (I am) then place some kitchen paper under the tin inside the foil as it soaks up any leaks.

In a food processor blitz together the digestive biscuits and butter (no need to melt) until it resembles wet sand.

Press the biscuits crumbs into the base of the prepared tin and refrigerate.

Now make the custard for the cheesecake layer: place the gelatine leaves into a bowl of cold water.  Put to one side.

Spoon the custard powder into a bowl.

Pour the milk and cream into a saucepan and then take three or four tablespoons of this to stir into the custard powder and make a thick paste.

Heat the milk and cream in the saucepan until almost at boiling point.

Pour over the custard paste and stir to ensure no lumps.

Return to the saucepan and heat, stirring all the time, until the custard thickens.

Remove from the heat.

Squeeze all the water from the gelatine leaves and whisk into the warm custard.

Pour into a bowl and press clingfilm onto the surface to stop a skin forming.

Leave to cool.

When it is cool, you can make the cheesecake layer: beat together the cream cheese, sugar and vanilla until smooth and well combined.

Stir the custard to loosen it a bit, and then beat into the cheesecake mix.

Spoon over the biscuit base and return to the refrigerator for 4 hours.

Now make the jelly layer: Make half the packet of jelly and leave, in the jug to cool for 30 minutes or so.

Pour over the cheesecake and place the raspberries in the jelly.  At this point, they won’t be covered.  There might be some jelly leakage at this point but if you have prepared your tin adequately it shouldn’t cause any fridge-carnage!

Refrigerate for an hour.

Make up the remaining half pack of jelly and pour over the raspberries.

Refrigerate for an hour or until the jelly is totally set.

Whip up the cream and pipe over the jelly on top of the trifle.

Sprinkle over crushed Flake or almonds, or any sugar decoration you have.

Remove from the refrigerator about 10 minutes before you wish to serve.

Bask in the glory of the wonderful thing you have created.


Eat.

