Showing posts with label hazelnuts. Show all posts

Sunday, 15 November 2015

Florentine biscuit bars


This recipe is adapted from the one in the BBC Good Food 25th birthday edition.  As soon as I saw the combination of florentines and shortbread I was sold!  I always associate florentines with Christmas as that’s the only time of year we ever used to have them; I don’t know whether they have any particular association with Christmas but, growing up, I remember they always used to form part of M&S’s confection/biscuit range.  M&S used to make a mixed box i.e. milk, dark and white chocolate.  Tactically I would always eat the milk first as I was the only one in my family to like white chocolate so I didn’t have to rush with those!


This is a good recipe to use up all the odds and ends of nuts a baker always seems to have in their cupboard; I buy a bag of nuts for a particular recipe and then don’t use them all.  I seem to have endless bags with about 20-30g of nuts left in them – this is where they get to step into the spotlight!


The cherries and pistachios look so pretty in amongst the nuts and chocolate.  You could make it look extremely festive by using red and green cherries…although I try not to think too hard about what they do to turn those poor cherries such a vivid green.  Some questions are best left unanswered.


Ingredients
For the base:
200g unsalted butter, at room temperature
100g golden caster sugar
200g plain flour
100g ground rice flour


For the topping:
25g unsalted butter
75g golden caster sugar
1 tablespoon plain flour
75ml double cream
50g flaked almonds
25g whole blanched almonds
75g chopped nuts of your choice – I used a mix of pistachios and chopped hazelnuts
75g glace cherries, halved
100g chocolate chips


Method
Line a 20cm square tin with baking papermaking sure the paper comes up high enough that you can use it to lift the finished bake up out of the tin.

Use a food processor to blitz together the butter and sugar.

Add the flour and rice flour and pulse until it starts to come together – don’t overwork it or your biscuit will be tough rather than crumbly.

Press into the base of the tin taking care to distribute the mix evenly.

Prick all over with a fork, cover with clingfilm and refrigerate for at least 30 minutes (or up to 2 days).

Preheat the oven to 180°C/fan oven 160°C/350°F/gas mark 4.

Bake the biscuit base for 25 minutes.

While the base is cooking start work on the topping: place the butter, sugar and flour in a pan large enough to take all the other topping ingredients and gently melt together stirring all the time.

When all the sugar crystals have dissolved add the cream and stir until smooth.

Stir in all the nuts and cherries.

Stir in the chocolate chips.   If you prefer, you can omit the chocolate chips and instead melt the chocolate and drizzle over the baked bars.

Spoon the hot nut mixture over the just-baked base and ensure it is well spread out.  Be gentle – a spatula or the back of a spoon works well.

Return to the oven and bake until the top is firm but retains a little squidge; this will take anywhere between 10-20 minutes but it can catch quickly so check every 5 minutes.

Leave to cool, in the tin, on a wire rack.

Cut into fingers.

If you didn’t add chocolate chips, decorate by melting 100g chocolate by your preferred method i.e. microwave or hob, and drizzle over the cold bake. (I like to do this after I’ve cut the fingers as then the chocolate isn’t disturbed with cutting)

Bask in the glory of the wonderful thing you have created.


Eat.

Sunday, 9 October 2011

History Corner – Empress cakes


Miss Tuxford’s “Cookery for the Middle Classes” was – despite its rather exclusive title – a big hit. Originally published in 1902, my copy is the 11th edition dating from 1930. That’s quite a lifespan for one cook book.


The subtitles of this book highlight how far food and food preparation has come in a short period of time. The full title is “Cookery for the Middle Classes (including a few vegetarian dishes) and Useful hints on Gas Stove Cooking Including the New Automatic Control”. This book is set in the time when having a temperature control on your oven was cutting edge innovation. There is a section at the back of the book instructing you how to set the oven properly depending on what you’re cooking. Sponge cakes need to be baked at 5E, if you’re interested.


One wonders what Miss Tuxford would’ve done had any of the lower classes dared bake from this book? It seems a crazy thing to limit your market in such a way especially when Miss Tuxford had an entrepreneurial streak. At the back of the book she has a page of items for sale included food essences such as vanilla, and also “useful and inexpensive utensils”, my favourite of which is the “Straining grid for use in deep fat frying or boiling fish and cauliflowers whole (designed by myself)”. A whole boiled cauliflower. Imagine it. Are you imagining it? Well, you don’t have to – here is the least appetising illustration of a cauliflower ever (with a strange looking thumb thrown in for free) :


And a close up:


I chose the Empress Cakes recipe as they were probably a well-known recipe at the time the book was originally published. Queen Victoria died in 1901, only a year before publication. No doubt these little cakes were named in honour of her, as one of her titles was Empress of India.


Lining the pan with nuts wasn’t as fiddly as I thought it might be. The recipe gave no indication as to the amount of nuts to use so I guessed (my guess is in the recipe below) – feel free to use less if this looks too nutty:


The cocoa is delicate; I wouldn’t call these a chocolate sponge, more sponge with a hint of cocoa. The idea of lining the pans with nuts so that they bake into the sponge works surprisingly well and creates a nice look. However, I wasn’t sure which way to serve them – nuts up or nuts down? On this blog post you’ll see a mix of both!


As you’ll notice my cakes came out a touch on the large side – that’s the problem with old recipes; they don’t tell you what size pans to use or guidelines. I know I should’ve trimmed the mushroom top off to make them look daintier but, let’s be honest, the mushroomy top is often the best bit of a cake!


They were also delicious warm with custard – a cake or a pud; what’s not to love? One thing I would say, they definitely dried out a couple of days after baking (tasted lovely though) – still fine to serve as pud with custard, but if you had them with a cup of tea if would be a good idea to add a dollop of cream.


Although Miss Tuxford wrote the preface well over 80 years ago it shows how nothing really every changes. Except for the old fashioned phrasing, this could’ve been written today:

“During recent years the cost of living has greatly increased and many ladies have sought a cookery book giving recipes which, whilst ensuring dainty, wholesome and nourishing dishes, are withal modest in cost.”


Ingredients

½ lb / 227g unsalted butter, plus extra to grease the pans
½ lb / 227g caster sugar
1 tablespoon cocoa powder
4 eggs
¾ lb / 340g plain flour
1 teaspoon vanilla extract
½ teaspoon baking powder
Milk, if needed
Chopped almonds to line the tins – I used a mixture of ground almonds and chopped hazelnuts totalling 120g

Method

Preheat the oven to 150°C/ fan oven 130°C/300°F/ Gas mark 2, or as the recipe calls it – “slow”.

Generously grease a cupcake pan – if you have a deeper, more ‘muffin-y’ pan that will be better. Take a second pan and grease half the holes – the mix will make 18 cakes. I made 12 from mine and they were too big!

Sprinkle the chopped almonds into the pans ensuring that they stick to the bottom and sides. This can be a bit fiddly but is worth the effort.

Place the butter, sugar and cocoa in a bowl and beat together until light and whipped.

Add two of the eggs and beat well.

Add half the flour and stir in.

Add the remaining two eggs and beat well.

Add the remaining flour, along with the vanilla and baking powder and stir well.

If the mix is dry i.e. not a dropping consistency, add a little milk – do this with caution so you don’t add too much.

Carefully spoon into your almond-lined cake pans and level the surface. Fill them more than you would a cupcake case because the low baking temperature means they won’t rise as much. I filled mine to the top because the recipe gave no guidance – I think the ideal would have been somewhere between 1/2 - ¾ full.

Bake for approximately 20 minutes or until a skewer inserted into the cakes comes out clean. Mine took much longer – just over 30 minutes, so don’t worry if yours take longer too!

Leave to cool – in the tins – until cool enough to handle and safely remove. Leave to cool completely on a wire rack.

The cakes will store for several days in an airtight container but note they will dry out – best to have some cream on hand!

Bask in the glory of the wonderful thing you have created.

Eat.

Sunday, 15 May 2011

Cheesecake balls on a stick


This week in birthday land it’s the turn of the CCB (Caked Crusader’s Brother). My choice of birthday cake for him was shaped by his incontrovertible “Two Food Truths”:

  1. Cheesecake is the best cake
  2. All food tastes better when eaten from a stick


My choice? Cheesecake on stick! Result? Happy brother!

I used my trusted no-bake cheesecake recipe and simply changed the order of doing things. I made the cheesecake topping and put it in a bowl to set, only making the biscuit base when I was ready to roll the cheesecake balls in it.


If the butter was added to the biscuits, as you’d normally do for a biscuit base, I feared that it would be difficult to get an even layer around the cheesecake. So I deconstructed the process – get me! – and melted the butter, dipped the cheesecake ball in it, then in the biscuit crumb. It was very easy and created the desired finish....although I admit they do look a bit like scotch eggs!


Some cheesecake balls skipped the biscuit crumb stage but were rolled in chopped nuts and finished off with some melted chocolate:


I also made some strawberry puree to dip the cheesecake balls into:


It was simply a matter of blending some strawberries, adding sugar to taste, and then sieving out the seeds. If it’s too runny, heat on the hob until it reduces by half.


The key to making cheesecake balls is to work quickly and keep the mixture cool. If at any point it becomes sticky or tricky to work with pop it all back in the fridge for 20 minutes. I’m not sure the stick element was a great success – the cheesecake was too soft to hold firmly to the lovely lolly sticks I’d purchased but I found that cocktail sticks worked; the remedy would’ve been to pop them in the freezer for 10-15 minutes but I hate freezing things unnecessarily (chalk it up as another item on the list of weird things I have strong feelings about).


Finally, a word of caution – when you roll the first heaped teaspoon spoon sized ball of cheesecake you will curse me. Your hands will get covered and you will suspect the whole venture will end in failure. However....once that first ball is out the way and you have a sheen of cheesecake on your hands, the subsequent balls are easy to roll. Just apply gently pressure and work quickly!

Happy birthday CCB!

Method

Make cheesecake topping as per this recipe

Put cheesecake topping into a bowl or Tupperware that you can cover i.e. with clingfilm or a lid, and refrigerate for several hours or, better still, overnight.

Take heaped teaspoonfuls of cheesecake and roll into balls.

Place on baking paper, on a tray, plate, tin etc and put back in the fridge.

Blitz the biscuits (quantity per the recipe link above) in a food processor and tip into a bowl.

Melt the butter (quantity per the recipe link above) and tip into a bowl.

Take the cheesecake balls from the fridge and dip quickly in the butter, then roll in the biscuit crumbs.

Place on a clean sheet of baking paper and, when all are done, put back in the fridge until you are ready to serve.

If you are making a strawberry dipping sauce clean and hull the strawberries then blitz in the food processor.

Add icing sugar to taste.

Sieve to remove the seeds.

If it’s too runny, heat on the hob until it has reduced to a thick sauce.

Chill until required.

So they hold their shape, cheesecake balls are best served straight from the fridge.

Bask in the glory of the wonderful thing you have created.

Eat.

Sunday, 1 May 2011

Mocha (chocolate coffee) torte


It is the CCD (Caked Crusader’s Da) and CCU’s (Caked Crusader’s Uncle) birthday; I have mentioned in the past they are twins...and they still are! Recently, the CCD has discovered a love of mocha coffee – the sort that’s more like a dessert with cream and chocolate and a small dash of coffee. So I thought I’d use those flavours for a dessert.


This is the type of recipe that looks intimidating; firstly because I always think tortes seem difficult – even though they’re not; maybe it’s because we’re used to seeing them in patisserie windows that we assume they must be hard work. Secondly, there are three distinct stages to making the dish and, while not remotely taxing, you do have to plan ahead to allow appropriate cooling/setting time between each stage. I broke the dish down into stages and made the biscuit base one evening, the chocolate baked mousse layer the next morning and the coffee cream layer that same evening.


I didn’t taste this one as my loathing for coffee is only equalled by my loathing for lemon, but the feedback was positive with one eater rating it as an all time great bake! A recurring comment was that it tasted like something you’d buy from a high end patisserie.


The hazelnut biscuit base was crisp and crumbly and surprised me by being reasonably easy to cut though: it didn’t shatter all over the work top and stayed in one piece!


The rich chocolate baked ganache middle layer was the most commented on for it’s intense flavour and smooth, velvety texture.


The top layer of set coffee cream was a big hit with the CCM (Caked Crusader’s Ma). It has a strong punch of coffee but is light and whippy in texture.


Happy birthday CCD and CCU!


Ingredients

For the biscuit base:
100g chopped hazelnuts – I bought ready chopped
125g unsalted butter, diced
25g light brown sugar
40g caster sugar
125g plain flour
1 ½ tablespoons cornflour

For the chocolate filling:
400ml double cream
100ml single cream
300g dark chocolate, broken up into squares – I used Green & Blacks
100g milk chocolate, broken up into squares – I used Green & Blacks
2 eggs
1 teaspoon vanilla extract
1 tablespoon very strong black coffee (I made up some espresso and used it for this stage and the coffee cream)

For the coffee cream:
2 leaves gelatine
250ml whipping cream
4 tablespoons icing sugar
5 tablespoons very strong black coffee

To decorate:
200ml double cream
75g chopped hazelnuts
Flaked chocolate – however much you choose!

Method

Preheat the oven to 170°C/fan oven 150°C/340°F/Gas mark 3.

Line the inside of a 23cm round springform tin with baking paper.

Place all the ingredients for the base into a food processor and blitz until combined into a crumbly texture.

Pat into the base of the cake tin and bake for 15-20 minutes or until the base is golden. Mine took 20 minutes.

Leave to cool on a wire rack. You can make this a day ahead of the other two stages.

Reduce the oven to 160°C/fan oven 140°C/320°F/Gas mark 2.5

Now make the chocolate filling: pour the double and single creams into a saucepan and bring just to the boil.

Remove from the heat and tip in the chocolate.

Stir until melted – I used a silicon whisk to do this as I find it is quicker and produces a lovely thick, glossy chocolate.

Whisk in the eggs, vanilla and coffee.

Pour the filling over the biscuit base and level.

Bake for at least 20 minutes or until the chocolate is set but still has a wobble in the centre. Mine took much longer – about 45 minutes so don’t worry if yours needs longer; once it’s had 30 minutes check it every 5-7 minutes.

Leave to cool completely, still in the tin, on a wire rack.

Now make the coffee cream: Place the gelatine leaves in a bowl of cold water.

Whip the cream until it forms soft peaks and fold in the icing sugar.

Heat the coffee until it feels hot but don’t let it boil. Remove from the heat.

Squeeze all the water out of the gelatine leaves and whisk into the coffee.

Whisk the coffee mixture into the cream.

Spread over the top of the chocolate layer and refrigerate to set, ideally overnight.

On the day you will be serving the torte, whip the cream and pipe a border around the top of the torte.

Scatter over the hazelnuts and chocolate.

Serve in generous slices.

Bask in the glory of the wonderful thing you have created.

Eat.

Sunday, 8 August 2010

Black and blue streusel cake


Why black and blue?
Because it contains blackberries and blueberries, of course! This cake has it all: fruit, sponge, crunch, squidge and spice – be very wary of someone who’d refuse a second slice!


The blackberries seem to like the hot, parched summer we’ve been having in the South East corner of England but I didn’t want to risk relying on them just yet, and ended up buying mine.
I should’ve been more of a gambler because there were plenty of ripe berries for the picking.


You don’t need me to point out that this isn’t the most perfectly beautiful cake you’ve ever seen; some of the batter fought its way up during cooking giving a splodgy crust around the edge – pretty it ain’t, delicious it is.
Mr CC commented that he wished the whole cake could be made of the crusty sponge around the edge proving that one person’s baking disaster is another’s delight!


This cake looks particularly attractive when cut; the fruit burrows a little into the sponge and is topped with a crunchy, nutty streusel.
Because of the batter eruption at the edges, the fruit pooled a bit in the middle – again, it doesn’t help the look much but tasted lovely.


The flavour combination of the black and blue berries worked very well and was a nice mix of tart and sweet.
I admit I was crestfallen when I took the cake from the oven and saw the batter balling up at the edges and the fruit sinking in the middle. It’s funny how we beat ourselves up because we all agreed this was one of the nicest cakes we’d eaten in ages – no one could resist picking the sponge from the edge!


Ingredients

For the streusel:
50g plain flour
50g unsalted butter
50g caster sugar
50g hazelnuts, roughly chopped

For the cake:
175g unsalted butter, at room temperature
175g caster sugar
3 eggs
175g self raising flour
50g hazelnuts, ground in a food processor until you have fine crumbs
1 teaspoon baking powder
200g blackberries
100g blueberries
1 teaspoon ground cinnamon

To serve: thick cream

Method

Preheat the oven to 180˚C/fan oven 160˚C/350˚F/Gas mark 4.

Line a 23cm round springform tin with baking paper.

Start by making the topping: Place the butter and flour into a bowl and rub the butter into the flour using your fingertips until the mixture resembles fine crumbs.

Stir in the sugar and nuts and set to one side for later.

Now make the cake: start by beating together the butter and sugar until it is light and creamy. Don’t skimp on this stage as it is key to achieving a light, soft sponge.

Beat in the eggs, one at a time, alternating with spoonfuls of the flour.

Stir in the remaining flour along with the ground hazelnuts and baking powder.

Spoon the batter into the prepared tin and level the surface.

Spread the berries over the top of the batter and sprinkle the cinnamon over them.

Scatter the streusel topping over the fruit – some fruit will still be visible.

Bake for approximately 1 hour or until a skewer inserted into the cake comes out clean.

Leave to cool in the tin, on a cooling rack until the tin is cool enough to remove.

Leave the cake to cool completely on a wire rack.

It will keep in an airtight container for at least 3 days.

Bask in the glory of the wonderful thing you have created.

Eat.

Sunday, 23 August 2009

Plum, chocolate and hazelnut cake

I’ve have made plum tarts before, and no doubt will again before the season is over, but this recipe struck me as something highly original – teaming plums with chocolate isn’t a combination that leaps to mind but goodness me, does it work!

I think the key is to go as bitter as you dare with the chocolate. The rich, dark bitterness compliments the juicy, sweet acidity of the plums to create deliciousness! The chocolate isn’t immediately obvious but gives an extra something to the flavours.


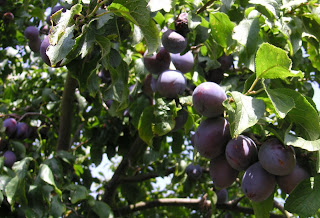
The plums I used are damson plums. Most people I talk to don’t realise that some damsons can be eaten like plums. Damsons seem to get a bad press as acidic, tart and inedible without turning into jam. My damsons came from the tree in my parents’ garden and are as sweet as any Victoria plum.


Perhaps it’s sentimental but I always think that the damson tree’s bounteous crop is its way of thanking us for saving it. Many, many years ago (possibly over 20) I went to garden centre and there, in the reduced-to-clear section, was a rather pathetic looking twig in a pot. The label stated it was a damson plum tree but such a grand declaration didn’t really match the look of it. It was the only tree in the bargain section and seemed rather forlorn; for reasons I can’t explain it tugged at my heartstrings so I bought it – even though it was in the sale it was expensive (to me, at the time) for a twig. The tree grew steadily but it took several years for any crop to appear, but when it did – oh wow! Year after year we are rewarded with pounds of delicious, juicy, sweet damsons – we give away bagfuls to friends and neighbours, we make jam, pies, cakes, we leave the high fruits for the birds and still we have pounds of damsons!


When I started telling you the story of the damson tree I didn’t realise I would reach anything like a moral ending, but I suppose the moral of this story is that just because you start out as a twig in a pot in the sale section needn’t mean you can’t turn into a beautiful tree producing wonderful fruit! Here endeth today’s lesson….normal flippant service will be resumed shortly….

Ingredients

500g plums (I used damsons)
175g light muscovado sugar, plus 2 tablespoons to sprinkle on top
175g unsalted butter
175g self raising flour
175g ground hazelnuts (if you can’t find these simply place chopped or whole hazelnuts into the food processor and blitz until ground)
3 eggs
1 tsp baking powder
50g dark chocolate (70 per cent cocoa), chopped
2 tbsp hazelnuts

To serve: thick cream

Method

- Preheat the oven to 180°C/fan oven 160°C/350°F/Gas mark 4.

- Line the base of a 20cm round springform cake tin with baking paper.

- Halve and stone 4-5 of the plums depending on their size and set aside for later.

- Chop the remaining plums – not too small, you want to know they’re there in the cake.

- Place the sugar, butter, flour, ground hazelnuts, eggs and baking powder into a bowl and beat until smooth and well combined. It will take a few minutes.

- Stir in the chopped plums and chocolate.

- Spoon into the prepared tin and level the surface.
Arrange the retained plum halves over the top and gently press them just into the cake mix.

- Scatter over the whole hazelnuts.

- Sprinkle over 2 tablespoons sugar.

- Bake for 40-50 minutes or until a skewer inserted into the cake comes out cleanly. Mine took 55 minutes

- Cool in the tin, on a wire rack, until you can handle the tin to turn the cake out. Leave to cool completely. Because this is a squidgy cake it might sink a little on cooling – don’t worry, it will still taste juicy and divine.

- Serve with thickly whipped cream or, if serving as a dessert, pouring cream or ice cream.

- Bask in the glory of the wonderful thing you have made.

- Eat.


Sunday, 16 August 2009

Bahamian-style rum cake


I have been extremely lucky to travel (for work) numerous times to the Cayman Islands and the Bahamas. You learn very quickly that the most appreciated gift you can bring back is a rum cake. These soft, rum-soaked cakes with a smattering of nuts are divine; to taste one is to forge a lifelong love affair. So you can imagine how pleased I was to come across this recipe which pretty closely matches the wonder of the cakes I used to bring back.

A good rum cake should give you the sweet flavour of rum but not burn your throat with raw alcohol. It should be juicy and sticky but not to the extent of, say, a rum baba. It should also be impossible to eat only one slice!

The secret to the cake is to pour over a glorious rum syrup when the cake is piping hot from the oven. It seeps into the cake and pools at the bottom of the tin (which is the top of the cake when turned out) and you get a sweet juiciness similar to the effect of a golden syrup steamed pudding.

Rum cakes are always made in Bundt-style tins. This pleases me as I have quite a few Bundt tins that I’ve never used. I picked this stunner of a tin and was delighted at how cleanly the cake turned out, showing all the crisp lines of the design. The capacity of the tin was 8 cups and I wouldn’t have wanted to use anything smaller.

The only change I made to the recipe was regarding nuts. A proper rum cake should be made with pecans or walnuts. I used hazelnuts as the CCM (Caked Crusader’s Ma) doesn’t like with pecans or walnuts. It was just as delicious.

Ingredients:

For the cake:
110g unsalted butter, melted
250ml milk
65ml rum (needs to be golden or dark rum)
2 eggs
315g plain flour
270g golden caster sugar
1 tablespoon baking powder (that’s not a typo – it’s a tablespoon)
1 teaspoon vanilla extract
120g chopped mixed nuts (I used only hazelnuts but pecans, walnuts, or macadamias would work)

For the rum syrup:
125g unsalted butter
200g golden caster sugar
65ml water
125ml rum (golden or dark)

How to make:

- Preheat the oven to 180°C/fan oven 160°C/350°F/Gas mark 4.

- Grease a Bundt tin of 8 cup capacity. I used a cake release product although butter would also be good.

- Beat together the butter, milk, rum and eggs.

- Add the flour, sugar and baking powder and beat until well combined.

- Beat in the vanilla extract and chopped nuts.

- Pour into the prepared tin and bake for approximately 40 minutes or until a skewer inserted into the cake comes out clean. Mine took 45 minutes.

- Leave to cool on a wire rack.

- Straightaway, make the syrup: place the butter, sugar and water in a saucepan and bring to the boil.

- Stir in the rum.

- Pour over the hot cake, you may have to do this in stages giving the cake time to absorb the hot syrup.

- Leave the cake to cool completely in the tin before turning out onto a serving plate. The cake needs no accompaniment and should be eaten unadorned.

- Bask in glory at the wonderful thing you have made.

- Eat.