Showing posts with label slice. Show all posts

Monday, 25 August 2014

Almond and cherry slices


Mr CC has been muttering of late that I don’t make his favourite sort of cakes.  The poor thing is practically malnourished due to my neglect! When I asked him what were his favourite sort of cakes he replied: anything that Mr Kipling makes.  Now don’t get me wrong; I am not (ok, I try not to be) a cake snob and will happily enjoy a Mr Kipling cake if there’s one on offer…but the thought of choosing one over a nice home baked treat is something I struggle with; if Mr CC heard my dramatic in-take of breath at his comment he didn’t let on. 


Mr CC mentioned, in particular, almond slices so I pondered how to take the essence of a Mr Kipling almond slice and pimp it up a bit.  I decided on adding a pastry base, chopped cherries and some thick white icing.  It then dawned on me that what I had actually created was the lovechild of a Mr Kipling almond slice and
bakewell tart…and it tasted as good as you’d expect!


If you’re pushed for time you can forget the pastry and simply bake the filling; the result will be a very pleasing almond sponge.  The cherries work so well with almond.  Whilst I still can’t manage half a glace cherry on top of a cake, chopped into small pieces I rather like the fruity –almost jammy - chewy little pop they bring to proceedings.  The cake will keep for days - anything with almonds seems to get better day after day as the nut oil is released.

This basic recipe has some alternative options available – omit the cherries and replace with fresh fruit such as raspberries or blueberries; you could also add a layer of jam between pastry and filling.


Ingredients
For the pastry:
175g plain flour
85g unsalted butter – straight from the fridge
30g caster sugar
1 egg yolk
1 tablespoon cold water

For the filling:
110g unsalted butter, at room temperature
150g golden caster sugar
2 eggs
150g plain flour
1/4 teaspoon baking powder
50g ground almonds
100g glace cherries, chopped quite small
1 tablespoon milk
A couple of handfuls of flaked almonds

For the icing:
100g icing sugar
Enough warm water to make a thick, glossy icing - add it a teaspoon at a time

Method
Start by making the pastry: place the flour and butter in the food processor and blitz until you have fine crumbs.

Add the sugar and blitz briefly.

While the machine is still running pour in the egg yolk and water.

Stop the processor when small clumps of pastry start to form.

Tip the clumps out onto a sheet of clingfilm and, using your hands, bring together into a ball of pastry.

If you wish to make the pastry by hand rub the butter into the flour until you have crumbs.  Stir in the sugar, egg and water and, bring together to a ball of dough.

Roll the pastry out between two sheets of clingfilm – this saves having to add any extra flour and changing the make up of the pastry.

Line a 30cm x 20cm traybake tin with the pastry.  I like to use a disposable foil traybake tin as I find it easier to get the cooked traybake out! 

Use any spare pastry to patch the tin – it’s good natured and will patch easily.

Prick the base of the pastry with a fork.

Cover with clingfilm and refrigerate for 1 hour. (Note that the pastry is rested after rolling – not before).

Preheat the oven to 200°C/fan oven 180°C/400°F/gas mark 6.

Cover the chilled pastry with non-stick foil or baking paper and weigh down with baking beans.

Bake for 10 minutes before removing the paper and beans and cooking for a further 10 minutes or until golden.

Put to one side to cool while you make the filling.

Now make the filling: beat together the butter and sugar until smooth and whippy.

Beat in the eggs.

Stir in the flour and baking powder.

Fold in the ground almonds and chopped cherries.

Stir in the milk to slacken the mixture.

Spoon into the pastry case and flatten well to ensure there are no air pockets.

Level the surface and scatter over the flaked almonds.

Bake for approximately 20 minutes or until a skewer inserted into the almond sponge comes out clean.

Leave to cool, in the tin, on a wire rack.

When the cake is cool make the icing: add warm water, a teaspoon at a time, to the icing sugar and mix until you have a thick, white, glossy icing.

Use a spoon to drizzle over the almond sponge.

Leave to set.

Cut into generous finger-shaped slices – I got 18 fingers.

Eat on its own with a big cup of tea.

Bask in the glory of the wonderful thing you have created.

Eat.


Thursday, 13 September 2012

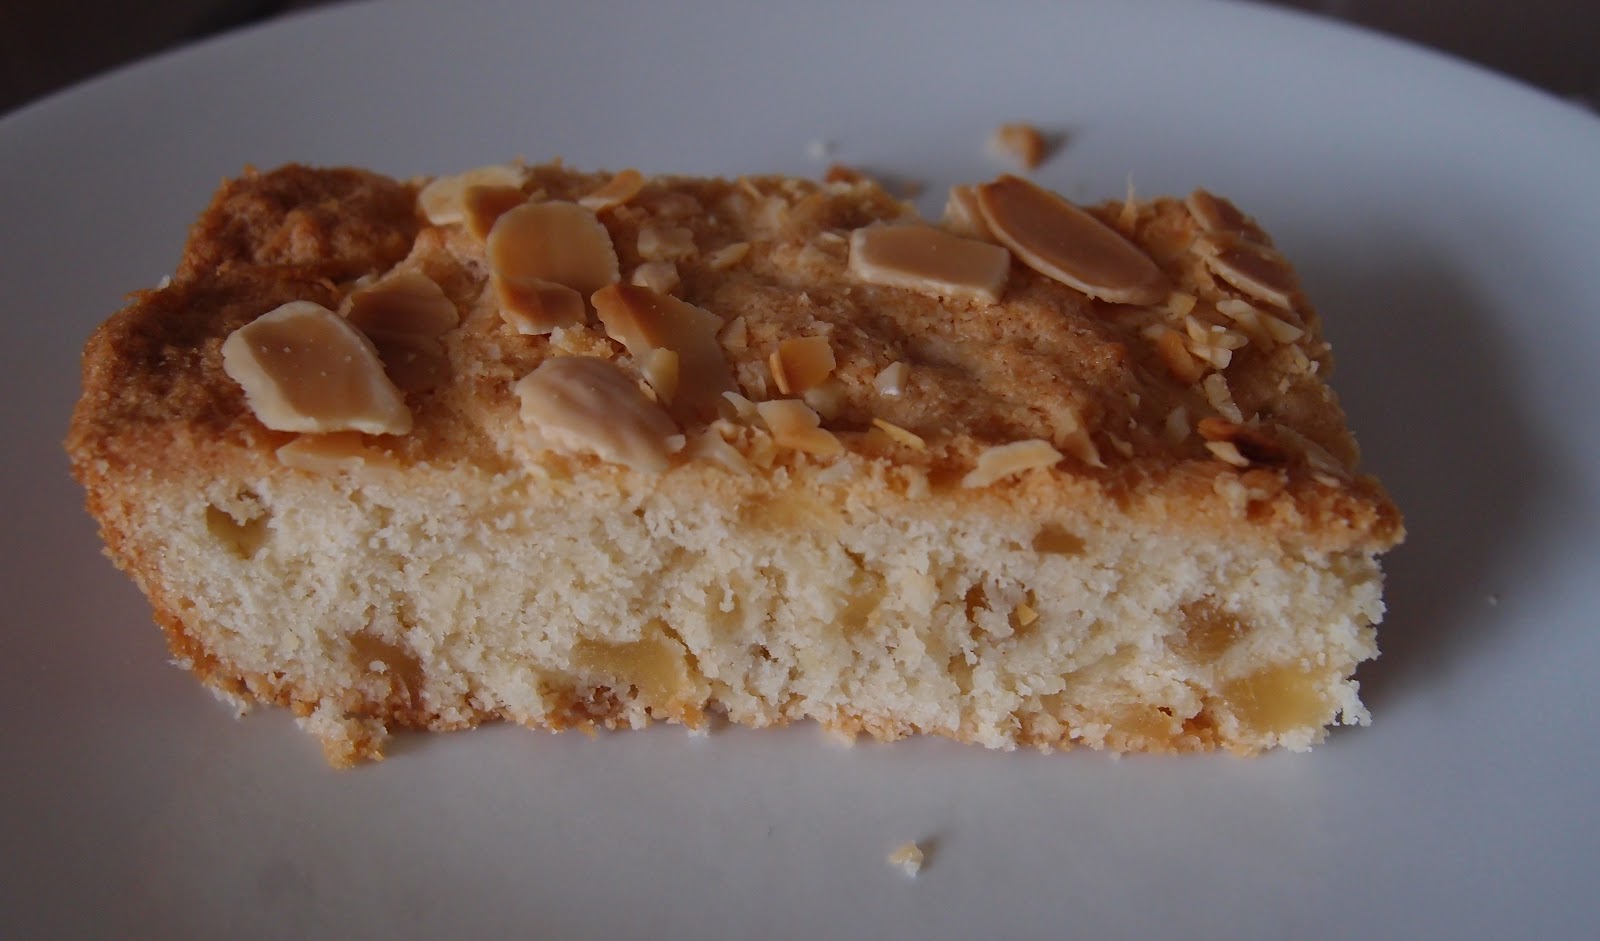
Ginger and almond slices


Ah, ginger and almond – two of my all time baking faves, but (and I’m willing to be corrected!) I don’t think I’ve ever baked something using them both.  I know!  Shock or what?


These slices use crystallised ginger – not stem ginger.  I point that out because I have in the past tried substituting stem for crystallised and it doesn’t work because the stem ginger is hard and doesn’t get soft on baking.  Crystallised ginger is soft and almost melts in your mouth.  Use crystallised only for this recipe as you want the soft ginger to complement the squidgy almonds.


This sort of bake holds a special place in my heart; I have an immense fondness for anything that is a perfect accompaniment to a cup of tea.  I love tea nearly as much as I love cake and biscuits.


The recipe takes a moment of minutes to complete and put in the oven and there’s no additional work required – no toppings or fillings.  Just cut into slices, make a cup of tea (or a pot if you’re a purist), put your feet up and enjoy!   (NB. It keeps really well too – I had a slice with my tea on subsequent days and it stays beautifully crumbly and flavoursome)


Apologies for the very early update this week - Mr CC and I are heading off for a well deserved holiday! 


Ingredients

175g unsalted butter, at room temperature
220g caster sugar
1 egg
225g plain flour
2 tablespoons milk
100g ground almonds
1-2 teaspoons ground ginger – depending how much you like your ginger!
125g crystallised ginger – chopped into small nuggets
70g flaked almonds

Method

Preheat the oven to 190°C/fan oven 170°C/375°F/gas mark 5

Grease a 30cm x 20cm tin.  I used a disposable foil traybake tin from Lakeland.

Beat together the butter and sugar until pale and fluffy.

Beat in the egg.

Beat in half the flour, followed by a tablespoon of milk.

Beat in the remaining flour, followed by the second tablespoon of milk.

Stir in the ground almonds, ground ginger and chopped ginger.

Spoon into the traybake tin and spread out into an even layer.

Sprinkle the flaked almonds over the top.

Bake for approximately 35 minutes or until a skewer inserted comes out clean.

Leave to cool in the tin then cut into fingers.

Bask in the glory of the wonderful thing you have created.

Eat.
Sunday, 9 September 2012

Plum sponge slices


This was my attempt to recreate one of my all time favourite cakes – the plum slice I had in the Fortress cafe in Salzburg


The cake is a sponge base topped with a cream cheese concoction and sliced plums.  The recipe I was going to follow used a fat free sponge.  I am totally willing to accept it is me, but I hate fat free sponges.  Not because they’re fat free (ok, maybe a tiny bit because of that) but because they taste so eggy.  Is it me?  Have I had bad examples?  What’s the secret to making a fat free sponge which doesn’t taste like scrambled eggs?  Teach me!


Anyway, I used my standard cupcake sponge recipe instead and it worked well.  When I looked back at my Salzburg photos, I think they used a similar type of sponge too so I felt vindicated!


The tang of the cream cheese with the fruit and the sponge is a heavenly combination.  There is no sugar in the cream cheese topping other than the jam.  The apricot jam worked well but next time I might try to match the jam to the fruit on top – I think that would be nice. 


You will notice that my plums aren’t submerged in the topping (oo-er.  It’s impossible to refer to plums without sniggering – maybe this is a British thing?).  This is because I thought that, in using tinned plums, there wouldn’t be a need to stew them first and they would break down in the oven.  As we can all see...they didn’t.  It had no effect on the flavour but does look a little curious.  Next time I would cook them a bit to soften them up.


Ingredients

For the plums:
250g fresh plums, halved and stoned
50g golden caster sugar
100ml boiling water

Or...

250g tinned plums in syrup, halved and stoned

For the sponge:
125g unsalted butter, at room temperature
125g caster sugar
1 teaspoon vanilla extract
2 eggs
125g self raising flour
1 tablespoon milk

For the cream cheese:
200g cream cheese – I used Philadelphia
3 tablespoons apricot jam


Method

Preheat the oven to 180°C/fan oven 160°C/350°F/gas mark 4.

Grease a 30cm x 20cm traybake tin.  I used a disposable foil one.

Start with the plums: if you’re using fresh stew them with the sugar and water for 5-10 minutes or until the plums are soft.  Leave to cool in the syrup.

If you’re using tinned plums, put the plums, along with their syrup in a saucepan and just warm through enough to soften them. (I didn’t do this, which is why mine are sitting proud out of the cheesecake...it looks a bit silly, but didn’t change the flavour)

Now make the sponge: beat together the butter and sugar until soft and whippy.

Beat in the vanilla.

Beat in the eggs, one at a time.

Fold in the flour and the milk.

Spoon into the prepared tin and level the surface.

Bake for approximately 15-20 minutes or until a skewer inserted into the sponge comes out clean.  Don’t overbake as the tin will be returned to the oven later.

Put the sponge to one side to cool.

Now make the cream cheese layer: beat together the cream cheese and apricot jam until smooth and runny.

Spread over the sponge and sit the plum halves, skin side down, in the cheese.

Spoon over about 3 tablespoons of the syrup.

Return to the oven for 10 minutes or until the top has taken on a light golden colour.

Leave to cool on a wire rack.

Serve in squares, with thick cream.

Bask in the glory of the wonderful thing you have created.

Eat.

Sunday, 31 July 2011

Cider crumble slice


To some people, apples conjure up an Autumnal feeling.
However, I saw on the BBC news this week that English apples are being picked now, in July, and it’s the earliest they’ve been harvestable for decades. It’s probably something to do with the odd sunshine-and-showers (ok, downpours) summer we’re having but I got distracted by images of lovely apples and forgot to listen to “the science bit”!


In tribute to English apples, I decided to make this traybake; however, there’s a small confession that I couldn’t find any for sale yet (I guess picking takes a while!) so have used imported Granny Smiths.
I make no secret that apple is my favourite fruit to bake with – I love the flavour, the texture, and the look of it.


Cider works so well in cakes – it adds a warm, well rounded, fruitiness to any cake and doesn’t have a harsh alcoholic flavour. I used an oak matured still cider made by H. Weston & Sons
based in Much Marcle, Herefordshire. They’ve been making cider since 1880 so – as you’d imagine – it was pretty good stuff! Much Marcle is a brilliant name; it sounds like it would be a kind hearted character in a Dickens novel.


Buy good cider, it really is worth the extra money, particularly when it will flavour the whole cake. Plus, this recipe only uses 150ml whereas bottles tend to be 500ml...you want something decent to polish off!


I’ve used sultanas and walnuts, but you could substitute raisins, or even dates if you wished, and I’m sure any nut would work!
Apple’s so versatile that there are few other fruits or nuts it won’t compliment.


Ingredients

For the cake:

20g unsalted butter
1 ½ tablespoons golden syrup
150ml cider
250g self raising flour
½ teaspoon ground ginger
45g soft brown sugar
75g sultanas
75g walnuts, chopped
1 egg

For the topping:

1 large Granny Smith apple – or any other tart eating apple
40g unsalted butter
2 ½ tablespoons caster sugar
60g plain flour
75g walnuts, chopped

Optional: a dusting of icing sugar before serving
Thick cream

Method

Preheat the oven to 170˚C/fan oven 150˚C/325˚F/Gas mark 3.

Line a 20cm x 30cm baking tin with baking paper. I used a disposable tin traybake cases and used spray on cake release.

Start by making the cake: place the butter and golden syrup into a saucepan and melt together over a gentle heat.

Remove the pan from the heat and stir in the cider – put to one side.

In a large bowl, stir together the flour, ginger, sugar, sultanas and walnuts.

Add the golden syrup mixture along with the egg and stir until well combined.

Spoon into the prepared tin and level the surface.

Now make the topping: peel, core and chop the apple into rough chunks about 1.5 cm big.

In a saucepan (use one larger than you need just for the butter as the other ingredients will be added) melt the butter then stir in the sugar, flour, chopped apple and walnuts. It will be a dry mix.

Spread this topping over the cake batter already in the baking tin – I found this easiest to do by hand.

Level the surface then bake for approximately 30 minutes or until a skewer inserted in the cake comes out clean. Mine took exactly 30 minutes.

Leave to cool in the baking tin, on a wire rack.

A dusting of icing sugar just before serving really “pretties them up”!

Serve in generous squares with thick cream.

Bask in the glory of the wonderful thing you have made.

Eat.

