Sunday, 1 July 2012

Coconut and raspberry set cheesecake


My default cheesecake recipe is a no-faff, no bake recipe but this set cheesecake (set with gelatine) caught my eye because of my love of coconut and raspberry.


I panicked at how runny the cheesecake was, and it certainly adds tension when you pour it over the base and wait to see if your biscuit base is water-tight enough to contain it, but the gelatine then does its work resulting in a lovely soft set, summery cheesecake.  The texture is lighter than any cheesecake I’ve had – almost a hybrid of mousse and marshmallow but with the unmistakable tang of cheesecake.


The addition of golden syrup gave an almost flapjacky vibe to the base.  I used hobnobs but any plain biscuit such as a shortbread, digestive, rich tea etc would work.  I just like the oatiness of a hobnob!


 ng coconut milk in the body of the cheesecake gives a delicate, almost perfumed whisp of coconut to the taste – I liked it very much.  It wasn’t how I’m used to coconut, which is usually desiccated coconut in a cake or biscuit – this was far more aromatic.


As I made this recipe I realised that whenever anything requires cream cheese I default to Philadelphia.  Does everybody do that or am I being unambitious?


Ingredients:

For the base:
250g biscuits – I used plain hobnobs
100g unsalted butter
2 tablespoons golden syrup

For the topping:
4 leaves gelatine, immersed in a bowl of cold water
400ml double cream
400g cream cheese – I used Philadelphia
400ml coconut milk
200g icing sugar
400g raspberries – washed and dried
1 tablespoon desiccated coconut


Method:

Place either the ring from a 20cm round springform tin or an adjustable dessert ring on the plate you’ll server the cheesecake from. Wrap the ring in either clingfilm or greaseproof paper to ensure that you can free the cheesecake easily.  Alternatively, you can make this in a 30cm x 20cm traybake tin.
Break the biscuits into crumbs – either in a food processor or with the bag and rolling pin method (i.e. place biscuits in a bag. Secure end. Bash with rolling pin)
If using the food processor method add the butter and golden syrup to the crumbs and pulse it until the butter is distributed. If using the bag method, melt the butter and syrup and stir in.
Use the crumbs to line the base of the cheesecake. Press them down onto the plate but not so hard that you create biscuity concrete!  Take care to go right to the edge of the ring to make a seal – the cheesecake mix is very runny and you don’t want it to leak.
Refrigerate while making the cheesecake.
Pour 100ml of the double cream into a saucepan and heat until almost boiling.
Meanwhile, put the cream cheese, the remaining 300ml of the double cream, coconut milk and icing sugar into a bowl and beat until thick and smooth.  In truth, mine never got thicker than very lightly whipped cream – it certainly wouldn’t hold a shape.
Take the cream off the heat and, after squeezing all the water from the gelatine leaves, whisk them into the hot cream.
Tip the cream/gelatine mixture into the cream cheese mixture and whisk thoroughly – again, mine didn’t thicken all that much.
Add half the raspberries to the mix and whisk again – you want the raspberries to break down and turn the mix a light pink.
Pour the mixture over the biscuit base – pour a little at first just to make sure you have no leaks, then the rest.  NB. If you do spot a little creaminess oozing out (I did) just place some kitchen towel against the outside of the mould – the chill of the fridge will stop it pretty quickly.
Scatter the remaining raspberries over the cheesecake mix (as mine was so runny they sunk!)
Scatter the desiccated coconut over the top.
Refrigerate overnight
Bask in the glory of the wonderful thing you have created.
Eat.

Sunday, 24 June 2012

History corner – brown cake and patriotic biscuits


Time for a delve into history corner and, for this visit, I’m baking from “Isobel’s Home Cookery” from 1916.  Isobel’s Home Cookery was a monthly publication and, at the end of the year, a bound volume was produced, which is what I have.


1916 was slap bang in the middle of World War 1 and, while Britain didn’t have rationing until the very end of the war, care was taken to avoid waste and flamboyance in recipes.


I chose brown cake because it seemed such an unglamorous name for what is effectively a chocolate sponge sandwich.  Unusually, the recipe requires you to make chocolate milk and this provides not only the flavour, but also most of the moisture as the recipe uses only one egg.  For a modern version of this cake I would expect three eggs.


The cake rather divided my eatership –some finding it too dense and cloying in texture.  Interestingly, they don’t like brownies either for the same reason.  I do like brownies and think that this cake is similar to a squidgy brownie...which is no bad thing, but don’t make it expecting a light crumbly sponge.


The icing is particularly austere in that it contains cocoa, sugar and water.  No buttercream here!  Surprisingly, it tastes very good and rich – a cocoa hit for the chocolate lovers out there.


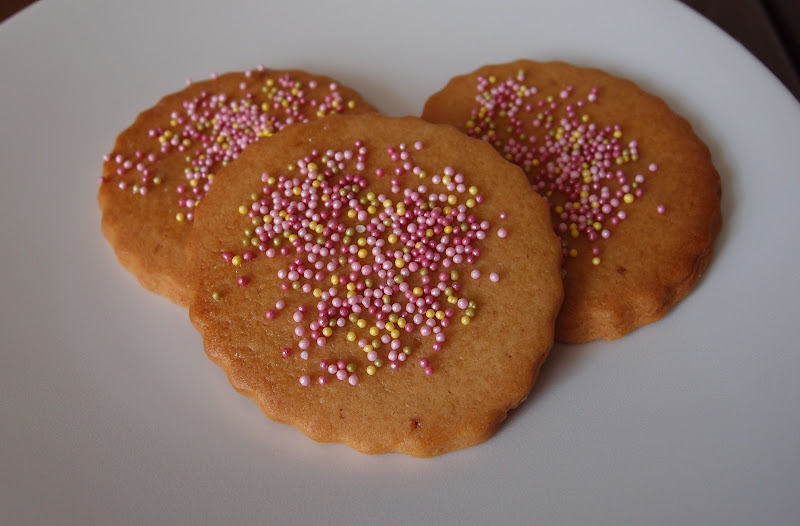
The patriotic biscuits are a light gingerbread which manages to be crunchy and chewy at the same time.  The only patriotic element seems to be using red, white and blue sprinkles but, as I didn’t have any, I opted for pastel shades.


What I love about old recipe books is the insight they give you into ordinary people’s lives and views; the hot issues and health scares of the day.  Here are some of my favourite examples:


I had never considered that the piece of cheddar lurking in my fridge was plotting to do me harm!


In an age where we’re bombarded with statistics on childhood obesity and TV chefs are launching crusades about poor school lunches, I find it refreshing (and a tiny bit comforting, if I’m honest) that there was an age when mothers were advised to give their children sugar, especially in cake form.


This is less than 100 years ago but look at how old age is portrayed.  I’d love to know how old the lady was in this photo and then compare her to women of her age nowadays – I think we’d be shocked.


This is one of my favourites.  March is the month when youngsters are apt to get ‘out of sorts’.  I’m sure with this Mrs Danvers-esque woman bringing them trays they’ll be motivated to get well and out of her clutches in no time!


While most of the book focuses on running the home and looking after the family, some sections are rather more poignant, like this one about husbands coming home from the front.  Wives are recommended to give their husband food they wouldn’t get in the trenches and pastry is suggested as an achievable luxury.


There is a section on cakes and biscuits you can always have on hand so that you can offer unexpected visitors something a little more exciting than bread and butter.  What I love is the dress the lady is wearing.  If I have unexpected visitors (which I don’t because anyone who knows me knows better than to turn up unannounced!) they will find me in slippers, jogging bottoms and a t-shirt.  This lady looks rather more groomed!


This boy is pale and thin because he has the same kind of sandwiches every day!  Not fair.  I had ham sandwiches practically every day at school – how come the affliction of thinness passed me by?  I think I will stick with ham sandwiches rather than the suggested raisin and nut sandwiches.  What next – ham flapjacks?


I end on a note of caution and advice – feed up when you feel run down.  Be safe out there people......


Ingredients for the brown cake

For the cake:

285ml / ½ pint milk
45g / 1 ½ oz cocoa, mixed with enough cold water to make it into thin cream – I added 8 tablespoons
115g / 4oz unsalted butter, at room temperature
170g / 6oz brown sugar
1 egg
½ teaspoon vanilla extract
340g / 12oz self raising flour

For the icing:

Equal quantities of cocoa and icing sugar – I used 8 tablespoons of each
Enough boiling water to make a glossy icing

Method for the brown cake

Preheat the oven to 180°C/fan oven 160°C/350°F/gas mark 4.

Line two 20cm round loose bottomed sandwich tins with baking paper.

Place the milk in a small saucepan and bring the milk to the boil.

While the milk is heating, mix together the cocoa with enough cold water to make it the consistency of thin cream.  I found this to take 8 tablespoons.

When the milk boils, remove from the heat and stir in the cocoa.

Put to one side to cool.

In a mixing bowl beat together the butter and sugar until smooth and well combined.

Beat in the egg and vanilla.

Stir in half the flour along with half the cocoa milk.

Repeat with the remainder.  Don’t worry – the batter will be runny.

Ladle the batter into the two prepare tins.

Bake for 20-25 minutes or until a skewer inserted into the cakes comes out clean.

Place the tins on a wire rack to cool and de-tin the cakes as soon as you can safely handle the tins.

Leave the sponges to cool completely before storing in an airtight container.

Now make the icing: Place an equal quantity of cocoa and icing sugar into a bowl – I used 8 tablespoons of each as I only planned to sandwich the cakes, not decorate the top.

Add boiling water, a teaspoon at a time, and beat into the dry ingredients.

Keep adding tiny amounts of boiling water – the icing should be glossy and thick.  Adding too much water will make it dull. (Mine took 9 teaspoons in the end)

Place one sponge on a serving plate and spread the icing over the top.

Place the other sponge on top.

Bask in the glory of the wonderful thing you have created.

Eat.


Ingredients for the patriotic biscuits

57g / 2oz unsalted butter, at room temperature
170g / 6oz plain flour
1 teaspoon ground ginger
57g / 2oz light brown sugar – the recipe called for ‘moist sugar’ which I think is dark brown sugar i.e. sticky and treacly
115g / ¼ lb golden syrup
To decorate: 1 egg white and hundreds and thousands (ideally red, white and blue)

Method for the patriotic biscuits

Preheat the oven to 200°C/fan oven 180°C/400°F/gas mark 6.

Line two baking sheets with baking paper or non stick foil.

Beat the butter until it is soft and creamy.

Add the flour and beat until the mixture resembles breadcrumbs.

Stir in the ginger and sugar.

Stir in the golden syrup and bring the mixture into a firm, moist dough.

Roll out between two sheets of clingfilm and aim for a thickness of approx 0.5cm.

Using a 7cm round cutter I got 18 biscuits.  The dough re-rolls easily but when rolled out the golden syrup starts to rise to the surface so work quickly.

Place the biscuits on the prepared sheet (they don’t spread that much) and bake for 10 minutes or until a darker golden colour.

Leave to cool for 5 minutes when out of the oven.

Brush with beaten egg white and sprinkle with hundreds and thousands.

Bask in the glory of the wonderful thing you have created.

Eat.
Sunday, 17 June 2012

Coffee streusel layer cake


Today is Father’s Day and the CCD’s (Caked Crusader’s Da) favourite cake flavour is coffee.  That made the selection of this cake extremely easy – and yet another celebration cake I wouldn’t be eating.  Let’s just say coffee’s not my thing.


What sets this apart from other coffee cakes I have made is that the sponge itself contains no coffee.  However, baked into and onto the sponge is a streusel containing instant coffee granules thus packing a real wallop (technical term) of flavour along with texture.  I had my doubts as to whether this would provide enough flavour...until I made the streusel and sniffed it; it smelled like a coffee shop where they grind their own beans (a horrible or lovely smell, depending on your tastes).


A generous drizzle of coffee icing adds further oomph (enough of the technical language I hear you cry!) and looks rather pretty.  In order to test that the icing was smooth and ready to use I tasted a bit...and can vouch that it had a very, very strong flavour...shudder.


I selected this recipe as the cake keeps for several days in an airtight tin; this meant the CCD could take home some slices and enjoy them throughout the week.  Let’s face it, when you tot up all the things our dad’s do for us, they deserve more than one day of celebration!


Happy father’s day to all the dad’s out there!


Ingredients

For the streusel:
80g walnut pieces
2 tablespoons instant coffee granules
115g soft light brown sugar
2 tablespoons plain flour
30g butter – melted and cooled

For the cake:
115g unsalted butter, at room temperature
115g caster sugar
2 eggs
175g self raising flour
4 tablespoons milk

For the icing:
1 tablespoon instant coffee granules
1 tablespoon boiling water
100g icing sugar

Method

Preheat the oven to 160°C/fan oven 140°C/325°F/Gas mark 3.

Line a 20cm round springform tin with baking paper.

Start by making the streusel: Place all the ingredients in a bowl and stir together.  At first it will seem like there isn’t enough butter to bind the dry ingredients, but keep stirring and it will become moist and clump into a texture like wet sand.

Put to one side while you make the cake.

Beat together the butter and sugar until pale and whippy.  Don’t skimp on this stage as this is where the air gets into the sponge.

Beat in the eggs one at a time, adding a little of the flour if it starts to curdle.

Fold in the flour and the milk.

Spoon half the cake batter into the prepared tin and level the surface.

Sprinkle half the streusel mix over the cake in an even layer.

Spoon the remaining cake batter over the streusel and spread it out, taking care not to disturb the streusel.

Sprinkle the remaining streusel over the top.

Bake for 1-1 ½ hours or until a skewer inserted into the cake comes out clean.

Place on a wire rack to cool and, when safe enough to handle, remove the cake from the tin and leave to cool completely.

When the cake is cool, make the icing: dissolve the coffee in the boiling water and leave to cool.

When cool beat into the icing sugar to make a thick, glossy icing, adding more water if necessary.

Drizzle over the top of the cake.

Bask in the glory of the wonderful thing you have created.

Eat.

Sunday, 10 June 2012

Toffee topped banana and brazil nut cake


This cake is massive!  When I spooned the batter into the tin it filled it to the brim and I had a horrible feeling that one of my tasks that afternoon would be scraping cake from the bottom of the oven!  But it didn’t overspill – I think that’s due to the long, slow cooking time.


It’s the only large cake I’ve made that has a muffin top to it!  The cake came up well above the height of the tin.


I don’t make a lot of banana cakes as a large percentage of my family won’t eat them; however, when I saw this beauty selfishness took over and I knew we had to become better acquainted.  I’m not sure if it was the toffee covered nut topping or the fact that it just sounded so great from the ingredient list.  Whatever the reason, we’ve had a very successful first date and are now going steady!


I cut the nuts finer for the cake than I did on the top.  I don’t mind chunky nuts on top of a cake where they can be seen, but when hidden in sponge a large nut can be a nasty surprise for delicate teeth.



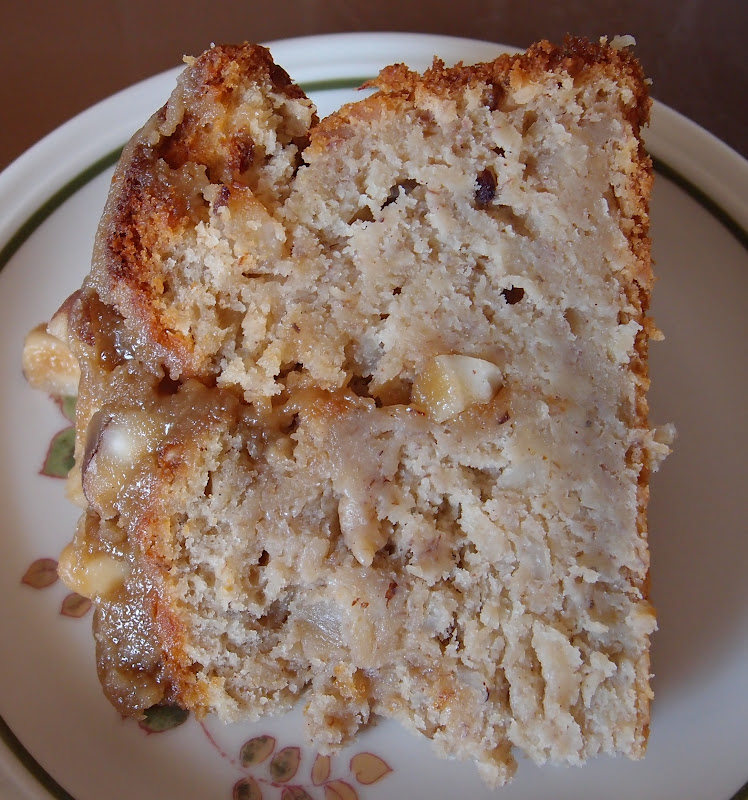
This cake keeps for days getting better and better – so no need to panic about how huge it is – and is lovely for breakfast, an accompaniment for your mid-morning or mid-afternoon tea, and, if you cut a large enough slice, will do very nicely as a meal in itself!  This next photo show why it’s worth piercing the cake with a skewer before pouring on the toffee topping – look at how it’s oozed into the cake:


Ingredients

For the cake:

175g unsalted butter, at room temperature
175g light brown sugar
4 eggs
125g brazil nuts – chopped quite small
3 large bananas – peeled and mashed
½ teaspoon mixed spice
350g self raising flour
1 teaspoon baking powder
300ml plain Greek yoghurt
1 tablespoon runny honey

For the topping:

75g unsalted butter
175g light brown sugar
2 tablespoon double cream
75g brazil nuts – roughly chopped

To serve: thick cream


Method

Preheat the oven to 180°C/ fan oven 160°C/ 350°F/gas mark 4.

Line a 20cm round springform tin with baking paper.

Beat together the butter and sugar until light and fluffy.

Beat in the eggs, gradually.  The mix might start to curdle a little on the fourth egg but that’s fine.

Stir in the brazil nuts and spice.

Mash the bananas and stir into the mix.  I find the most efficient mashing technique is to use my potato ricer.

Stir in the flour and baking powder.

Stir in the yoghurt and honey.

Spoon into the prepared tin and don’t panic – the tin will be full to the brim!

Bake for approximately 1 hour 20 minutes (mine took exactly this time) or until a skewer inserted into the cake comes out clean.

Leave to cool in the tin until you can safely remove the tin.  Then leave to cool completely on a wire rack.

Pierce the cake with a skewer.

Now make the topping: Place the butter, sugar and cream in a pan and gently melt together.
Bring to simmering point and stir well.

Remove from the heat and stir in the chopped nuts.

Pour the mixture over the cake letting it drizzle a little down the sides.

You can if you wish put the whole cake under the grill for 1- minutes to toast the nut topping but I didn’t bother as my grill is erratic and I didn’t want to risk burning the cake.

Serve the cake with thick cream.

Bask in the glory of the wonderful thing you have created.

Eat.