Thursday, 13 October 2011

The Caked Crusader plaque...made by a talented friend!

One of the best things about having artistically gifted friends is that presents tend to be thoughtful, unique and totally tailored to you. My friend Soo is not only a mega-talented knitter but has now branched out into paper crafts.


I love my glittery plaque – when I put the lights on at night the glitter goes bonkers; it’s like having a disco in a frame! Oh yes, in case you were wondering – she made the frame too!

If you’d like to read more about how Soo made it here's the link.


Thanks Soo!

Sunday, 9 October 2011

History Corner – Empress cakes


Miss Tuxford’s “Cookery for the Middle Classes” was – despite its rather exclusive title – a big hit. Originally published in 1902, my copy is the 11th edition dating from 1930. That’s quite a lifespan for one cook book.


The subtitles of this book highlight how far food and food preparation has come in a short period of time. The full title is “Cookery for the Middle Classes (including a few vegetarian dishes) and Useful hints on Gas Stove Cooking Including the New Automatic Control”. This book is set in the time when having a temperature control on your oven was cutting edge innovation. There is a section at the back of the book instructing you how to set the oven properly depending on what you’re cooking. Sponge cakes need to be baked at 5E, if you’re interested.


One wonders what Miss Tuxford would’ve done had any of the lower classes dared bake from this book? It seems a crazy thing to limit your market in such a way especially when Miss Tuxford had an entrepreneurial streak. At the back of the book she has a page of items for sale included food essences such as vanilla, and also “useful and inexpensive utensils”, my favourite of which is the “Straining grid for use in deep fat frying or boiling fish and cauliflowers whole (designed by myself)”. A whole boiled cauliflower. Imagine it. Are you imagining it? Well, you don’t have to – here is the least appetising illustration of a cauliflower ever (with a strange looking thumb thrown in for free) :


And a close up:


I chose the Empress Cakes recipe as they were probably a well-known recipe at the time the book was originally published. Queen Victoria died in 1901, only a year before publication. No doubt these little cakes were named in honour of her, as one of her titles was Empress of India.


Lining the pan with nuts wasn’t as fiddly as I thought it might be. The recipe gave no indication as to the amount of nuts to use so I guessed (my guess is in the recipe below) – feel free to use less if this looks too nutty:


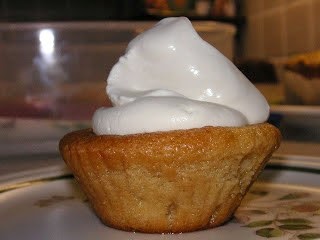
The cocoa is delicate; I wouldn’t call these a chocolate sponge, more sponge with a hint of cocoa. The idea of lining the pans with nuts so that they bake into the sponge works surprisingly well and creates a nice look. However, I wasn’t sure which way to serve them – nuts up or nuts down? On this blog post you’ll see a mix of both!


As you’ll notice my cakes came out a touch on the large side – that’s the problem with old recipes; they don’t tell you what size pans to use or guidelines. I know I should’ve trimmed the mushroom top off to make them look daintier but, let’s be honest, the mushroomy top is often the best bit of a cake!


They were also delicious warm with custard – a cake or a pud; what’s not to love? One thing I would say, they definitely dried out a couple of days after baking (tasted lovely though) – still fine to serve as pud with custard, but if you had them with a cup of tea if would be a good idea to add a dollop of cream.


Although Miss Tuxford wrote the preface well over 80 years ago it shows how nothing really every changes. Except for the old fashioned phrasing, this could’ve been written today:

“During recent years the cost of living has greatly increased and many ladies have sought a cookery book giving recipes which, whilst ensuring dainty, wholesome and nourishing dishes, are withal modest in cost.”


Ingredients

½ lb / 227g unsalted butter, plus extra to grease the pans
½ lb / 227g caster sugar
1 tablespoon cocoa powder
4 eggs
¾ lb / 340g plain flour
1 teaspoon vanilla extract
½ teaspoon baking powder
Milk, if needed
Chopped almonds to line the tins – I used a mixture of ground almonds and chopped hazelnuts totalling 120g

Method

Preheat the oven to 150°C/ fan oven 130°C/300°F/ Gas mark 2, or as the recipe calls it – “slow”.

Generously grease a cupcake pan – if you have a deeper, more ‘muffin-y’ pan that will be better. Take a second pan and grease half the holes – the mix will make 18 cakes. I made 12 from mine and they were too big!

Sprinkle the chopped almonds into the pans ensuring that they stick to the bottom and sides. This can be a bit fiddly but is worth the effort.

Place the butter, sugar and cocoa in a bowl and beat together until light and whipped.

Add two of the eggs and beat well.

Add half the flour and stir in.

Add the remaining two eggs and beat well.

Add the remaining flour, along with the vanilla and baking powder and stir well.

If the mix is dry i.e. not a dropping consistency, add a little milk – do this with caution so you don’t add too much.

Carefully spoon into your almond-lined cake pans and level the surface. Fill them more than you would a cupcake case because the low baking temperature means they won’t rise as much. I filled mine to the top because the recipe gave no guidance – I think the ideal would have been somewhere between 1/2 - ¾ full.

Bake for approximately 20 minutes or until a skewer inserted into the cakes comes out clean. Mine took much longer – just over 30 minutes, so don’t worry if yours take longer too!

Leave to cool – in the tins – until cool enough to handle and safely remove. Leave to cool completely on a wire rack.

The cakes will store for several days in an airtight container but note they will dry out – best to have some cream on hand!

Bask in the glory of the wonderful thing you have created.

Eat.

Sunday, 2 October 2011

Famous Faces’ Favourite Fancies – Ginger cake


“Legend” is a word that is bandied about far too often these days if you ask me, but I’m going to use it here and mean it. If you asked most people to name a snooker legend the first name out of their mouth would be Steve Davis
.


In terms of someone dominating a sport you’d have to look quite a way to beat Steve Davis. Just read this incredibly potted (ha ha, pun totally intended!) summary of his achievements:

  • First player to complete a televised 147 (maximum) break;
  • More professional titles than any other player;
  • Winner of the World Championship six times in the 1980s;
  • World number 1 for seven years running;
  • Famously lost the black ball finish in the 1985 World Championship final against Dennis Taylor, which although finishing past midnight had an audience 18.5 million people – still a record for BBC2;
  • BBC Sports personality of the year;
  • MBE and OBE;
  • Top ten hit with Chas & Dave (OK, he might want to forget that one!)


Famous for his ginger hair he gained nicknames such as “The Nugget” and “The Ginger Magician”. My grandmother though, who was a staunch fan, only ever referred to him by one name: Lover Boy. Quite how she came up with this name I do not know, but that was what she ALWAYS called him! Maybe that’s why I decided to write to him; he provided my grandmother with so much entertainment that, even now several years after her death, we still refer to him as Lover Boy (which might freak him out if he ever reads this!)


His calm-under-pressure temperament led him to be called boring, something that he has always played up to despite having a terrific sense of humour. Perhaps it was that sense of humour that led him to choose ginger cake as his favourite fancy!


This ginger cake is something a bit different; it is adapted from a German ginger spice cake recipe and doesn’t contain the usual golden syrup and treacle. This results in a lighter, less sticky texture. It replaces sugar with honey and adds some lightness in the addition of soured cream. I was further intrigued by the use of rye flour...which I couldn’t find anywhere so will have to revisit this when I find some! There’s quite a lot of spice:


I brushed some ginger syrup over the cake as it cooled just to intensify the flavour. This is optional. As with all ginger cakes, the flavours develop over time so try and make a day or two in advance of when you wish to serve it.


For this cake, I made my white icing much thicker than I normally would. I think it was the German influenced recipe which got me thinking about the thick icing on German Christmas gingerbread – often the biscuit will be shaped like a house with thick white icing representing snow on the roof. That’s what I’ve tried to do here and I love it –the icing looks almost cartoony!


Ingredients

For the cake:

125g unsalted butter
250g honey
3 eggs
4 teaspoons ground ginger
1 teaspoon ground cinnamon
½ teaspoon mixed spice
½ teaspoon allspice
125g plain flour
1 teaspoon baking powder
100g rye flour – I couldn’t find this in my local shops so used wholemeal flour
150ml soured cream

Optional: 2 tablespoons ginger syrup to brush over the cake when it comes out the oven

For the icing:

100g icing sugar
Enough water or syrup from a stem ginger jar to make a thick icing – add a tablespoon at a time

Method

Generously grease a 20cm bundt tin with butter or, ideally, cake release spray. The recipe I used gave no indication of cake tin size so I used a 23cm tin, which was too big.

Place the butter and honey in a large saucepan (all the other ingredients need to fit in here) and melt together. Leave to cool.

Preheat the oven to 170°C/ fan oven 150°C/325°F/ Gas mark 3.

Beat the eggs and spices into the butter-honey mixture.

Fold in half of the plain flour, rye flour and baking powder.

Fold in half of the soured cream.

Repeat the folding process until all the ingredients are combined.

Spoon the mixture into the prepared cake tin and level the surface.

Bake for 15 minutes then lower the temperature to 130°C/ fan oven 110°C/250°F/ Gas mark 1 and bake for approximately a further 40 minutes or until a skewer inserted into the cake comes out clean. Mine only needed 35 minutes which surprised me as I never thought the cake would cook successfully at such a low temperature.

Leave to cool, still in the tin, on a wire rack. I find ginger cakes rather fragile so usually let them cool in the tin before turning out.

If using, brush the ginger syrup over the cake in the tin, let it seep down the edges too (the cake will have just started to pull away from the tin giving a gap for the syrup!)

When the cake is cool it can be iced: place the icing sugar in a bowl and gradually beat in either water or ginger syrup. Add liquid sparingly as it is easy to make it too runny. I made mine very thick.

Pour the icing over the cake and leave to set.

Bask in the glory of the wonderful thing you have created.

Eat.

Sunday, 25 September 2011

Macmillan Cancer Support Coconut Cake


You may have seen adverts or mentions for the “World’s Biggest Coffee Morning” on Friday 30th September
; now in its 21st year this event encourages people to take some time out with their nearest and dearest, enjoy a cup of coffee (or tea!) and perhaps a slice of lovely cake whilst raising money for Macmillan Cancer Support.


This year, even if you can’t hold or attend an event you can do your bit by buying Macmillan’s Little Book of Treats from any M&S Cafe – the book is amazing; it’s only £3 and has 31 recipes in it...and I honestly want to make ALL of them! And if that isn’t for you, you can simply buy any from a range of nine products in an M&S Cafe and they will donate 10p to Macmillan for each purchase.


So, faced with a book where I wanted to make all 31 recipes what did I pick? I followed my heart and went with one of my true loves – coconut! The moist coconut cake recipe is lovely and I made minimal tweaks to it.


The cake has an interesting method in that you soak the desiccated coconut in the milk for a few hours to plump it up before adding to the cake batter. Not only does this soften the coconut, but it also infuses the milk a bit too. I will definitely be using that tip again.


Textures are important in this cake; the soft, moist sponge is one of the lightest I’ve ever made – you’d almost swear it was made with only the white from the egg (it isn’t). The white icing was thinner than I’m used to and set with an almost crisp, shell-like quality. I loved it – cake perfection!


I really rate this tip I picked up from watching Ina Garten
– stand the cake on 4 squares of paper or foil before pouring on runny icing. These protect the plate from having a puddle of icing – simply remove i.e. pull out when the icing is set! Here are the three stages:


If you’re hosting a coffee morning on 30th September you won’t go far wrong with this cake. I could eat it forever if there was a continual supply of cups of tea!


Ingredients

For the cake:

100g desiccated coconut
150ml milk
110g unsalted butter, at room temperature
250g caster sugar
2 eggs
250g self raising flour

For the icing:

25g desiccated coconut – or you can use sweet tobacco (it’s just a name – it isn’t tobacco), available from sweet shops – it’s toasted shredded coconut tossed in cocoa powder
200g icing sugar
75ml water or lemon juice – I used water


Method

2-4 hours before you wish to start baking, soak the coconut in milk.

Preheat the oven to 170°C/fan oven 150°C/340°F/gas mark 3.

Line a 20cm round springform tin with baking paper.

Beat together the butter and sugar until light and fluffy. It won’t go creamy as it normally would because the amount of butter has been reduced to accommodate the milk.

Beat in the eggs one at a time.

Gently stir in the flour, coconut and milk.

Spoon into the prepared tin and level the surface.

Bake for approximately 1 - 1 hour 15 mins or until a skewer inserted into the cake comes out cleanly. Check it after an hour and cover the top with foil if it’s browning too much.

Leave to cool, in the tin, on a wire rack. When the cake is cool enough to handle de-tin it and leave to cool completely on the wire rack.

Now make the icing: sprinkle the desiccated coconut into a dry frying pan and toast gently. It will burn quickly so don’t leave it unattended. I used sweet tobacco from a sweet shop (it doesn’t contain tobacco)

Tip onto a plate and leave to cool.

Place the icing sugar in a bowl and gradually beat in the water/lemon juice – you may not need it all. Beat until you have a glossy, thick, lump free icing. You want a consistency that will ooze but not run...if that makes sense!

Stand the cake on 4 squares of paper or foil – this will collect any icing and stop it pooling on the plate. Simply remove when the icing is set.

Drizzle the icing over the cake and allow it to ooze down the sides a little.

Sprinkle the toasted coconut on top.

Bask in the glory of the wonderful thing you have created.

Eat.