Saturday 31 January 2009

Sticky apple gingerbread pudding

Early update for you this week, my little cakeophiles, as I’m off on my travels for work.


Apple and gingerbread is not a combination I have ever tasted before but as soon as I read this recipe I knew it would work – I could taste the sweet, sticky gingerbread with its kick of heat and the acidity of the apple cutting through it.


The other reason I picked this recipe is because I am a sucker for a cake that’s made in a saucepan – it just feels so wrong! The whole gingerbread is made in one saucepan; how cool is that? I was tempted to try baking it in the saucepan too but realised that the handle meant it wouldn’t fit in any of my air tight containers for storing overnight.


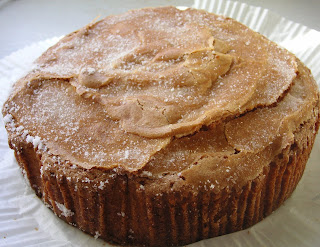
One thing I will say about this, so you don’t panic when you make it, is that the batter is UGLY. I mean ug-ly. It looked most unsavoury – it was lumpy and runny and well, I won’t even describe it the way I want to lest I turn your stomachs.


The CCB (Caked Crusader’s Brother) claimed it was “a perfect winter pud” in a way that made it sound like he was desperate to be quoted. We all mocked him but I’m quoting him anyway because he was right. It’s warming and tasty and comforting.


Ingredients:
125g unsalted butter
125g caster sugar
350g golden syrup
2 eggs
250g plain flour
3 heaped teaspoons ground ginger
1 level teaspoon mixed spice
1 teaspoon bicarbonate of soda
250ml hot water
3 small eating apples, peeled, cored and diced

To serve: custard, ice cream or cream

How to make:

- Preheat oven to 160°C/fan oven 140°C/315°F/ Gas mark 2-3. (Note: if I made this again I would do it on 180°C as, in my oven, this took too long and started to dry the apple out)
- Grease a 2ocm square loose bottom tin and line the base.
- Put the butter, sugar and golden syrup into a saucepan – make sure the saucepan is large enough to hold all the other ingredients. Heat gently until the butter and sugar have melted and you have a smooth, thick mixture. (My tip for weighing out golden syrup, treacle or anything sticky like that is to put the bowl or saucepan on the scales and pour it straight into that, rather than weigh in the scales’ pan and then have to scrape it out into the other bowl).
- Remove the saucepan from the heat and allow to cool slightly.
- While the mixture is cooling weigh out all the dry ingredients i.e. flour, ginger, spice, bicarbonate of soda, and prepare your apples.
- Using a wire whisk, beat the two eggs into the butter mixture.
- Sieve half of the dry ingredients into the butter mixture and stir in.
- Add half of the hot water and stir in.
- Stir in the rest of the dry ingredients, followed by the rest of the water.
- At this point the mixture will be fizzing due to the bicarbonate of soda and it is quite hard to get the wet and dry ingredients to mix. Be gentle and stop stirring as soon as they are combined; over-mixing will make the gingerbread tough.
- Pour the ugly, lumpy batter into the prepared tin and scatter the chopped apples over the top.
- Bake for 1 hour and 15 minutes but check after 1 hour. It is ready when a skewer inserted into the gingerbread comes out cleanly. Mine took 1 hour and 45 minutes and, because of this, the apple started to dry a little on the top – next time I would bake at a higher temperature.
- Leave in the tin and cool completely on a wire rack. This pudding is better if made a day in advance as it becomes fuller flavoured and stickier overnight.
- Cover with foil and reheat in a gentle oven – approximately 160°C/fan oven 140°C/315°F/ Gas mark 2-3 for 20 minutes and serve with custard, cream or ice cream.
- Bask in glory at the wonderful thing you have made.
- Eat.

Madeira cake

I made this cake a little while back; it wasn’t that I didn’t have any faith in my Brussel Sprout cake...but I thought it couldn’t hurt to have a standby item, just in case everyone who tried it started convulsing and frothing at the mouth.


There isn’t really much you can say about Madeira cake. There are only five ingredients – it’s simple and plain yet it’s perfection in cake form. The buttery soft sponge is both satisfying and easy to eat; no need for forks or spoons or cream accompaniments. If contentment were a cake it would be a Madeira. Who am I kidding??? Of course contentment is a cake....it might well be this actual one:


Traditionally Madeira cake is flavoured with lemon. This is a vanilla version but you could easily substitute the vanilla with the same volume of lemon juice and some finely grated zest.

The cake isn’t named after the Madeira islands but rather the wine that was served with it. See? This site is educational; it's not all about lusting at cake. (Official stats just in: site is 0.5% educational, 99.5% lusting at cake)


One interesting serving suggestion is to submerge stale Madeira cake in piping hot custard. The only problem I foresee is that I can’t ever imagine having any stale Madeira cake; believe me, this is not a cake that hangs around for long!

Look at the luscious crusty sugar topping:


Ingredients:
180g unsalted butter, at room temperature
175g caster sugar plus an additional 2 tablespoons for sprinkling on top
3 eggs
165g self raising flour
2 teaspoons vanilla extract


How to make:

- Preheat the oven to 160°C/fan oven 140°C/315°F/Gas mark 2-3.
- Line a 20cm springform tin with baking paper.
- Start by beating together the butter and sugar until light and fluffy.
- Beat in the eggs gradually, adding a little of the flour if the mix looks like it’s curdling.
- Beat in the vanilla.
- Fold in the flour.
- Spoon into the prepared tin and level the surface.
- Sprinkle the additional caster sugar over the top.
- Bake for approximately 1 hour or until a skewer inserted into the cake comes out clean. Mine took 55 minutes.
- Leave to cool for 20 minutes in the tin before turning out and allowing to cool completely on a wire rack.
- Bask in glory at the wonderful thing you have made.
- Eat.

Sunday 25 January 2009

Chocolate and custard sponge sandwich


This recipe caught my eye because it looked like my favourite type of doughnut – custard filled with chocolate icing – but in a sponge sandwich format. Try as I might, and I’ve given it a lot of thought, that remains the best way to describe this cake!


Ah, the sponge sandwich; just typing those two words makes me feel happy...and hungry. It’s so perfect – two layers of lovely sponge with something delicious in between (and on top too if you’re lucky).


The sponge is very yellow because of the addition of custard powder to the batter.


My favourite part of this recipe was actually the glaze which was quite the tastiest I’ve had. It’s sweet and smooth but retains an intensely chocolate flavour. I will certainly be using it to top cupcakes in the future.

The glaze drips down the side of the cake and puddles invitingly at the base:


The glaze does set but remains soft and luscious – you can see what I mean from this slice:


UPDATE: OK, there have been a few comments enquiring whether I have breached my own commandments regarding the daisies. I can assure you all that the daisies are 100% edible and are made from a rice papery/wafery substance.

Ingredients:
For the cakes:
200 plain flour
200g caster sugar
½ teaspoons bicarbonate of soda
2 teaspoon baking powder
225g unsalted butter, at room temperature
4 eggs
3 tablespoons custard powder (I used Bird’s)
2-3 tablespoons milk

For the buttercream:
125g icing sugar
4 teaspoons custard powder
75g unsalted butter, at room temperature
1 ½ teaspoons boiling water

For the chocolate glaze:
60ml water
2 tablespoons golden syrup
125g caster sugar (50g only if using milk chocolate)
175g dark or milk chocolate
Sprinkles of your choice – I used chocolate vermicelli

How to make:

- Preheat the oven to 180°C/fan oven 160°C/350°F/Gas mark 4.
- Line two 20cm loose bottomed sandwich tins with baking paper making sure that the paper comes up 2-3cm above the top of the tin.
- Start by making the cake: Place all the ingredients, except the milk, in a mixing bowl and beat until smooth and well combined. You can also do this in a food processor.
- Add the milk a tablespoon at a time until you have a batter that drops from the spoon easily. You may not need all the milk.
- Divide the batter between the two prepared tins and level the surface.
- Bake for approximately 20 minutes or until a skewer comes out cleanly. Mine took 30 minutes. The sponge will be quite puffy because of the cornflour in the custard powder.
- Let the cakes cool for 15 minutes in the tin before turning out and leaving to cool completely on a wire rack. The cakes can be made a day in advance and kept in an airtight container.
- Now make the buttercream: this can be done with either a stand mixer or in a food processor. Sieve the icing sugar and custard powder together into a bowl.
- Beat in the butter.
- Beat in the boiling water.
- Use the buttercream to sandwich together the two sponges.
- Now make the chocolate glaze: Put the water, golden syrup and sugar together in a saucepan and stir, over a low heat until the sugar has dissolved.
- Let the mix come to the boil and then remove the pan from the heat.
- Cut the chocolate into small pieces and add to the pan. Stir a little to ensure that all the chocolate is covered by the hot liquid.
- Leave to melt for a few minutes before whisking into a smooth and shiny glaze. Whisk for a good few minutes, because if you pour over the cake when it’s too runny you will lose it all down the sides!
- Pour over the buttercream filled cake and let it run down the sides.
- Sprinkle with the decoration of your choice before the icing sets.
- Bask in glory at the wonderful thing you have made.
- Eat.

Vanilla butter biscuits

Sometimes the simplicity of a biscuit or cake is what makes it so special. That’s the case here. These little vanilla biscuits are heavenly. You could dress them up if you wanted to – you could pipe the biscuit dough and then, when baked, dip the ends in melted chocolate; one day I will probably do that. But for now, I just wanted a lovely plain biscuit that was crumbly and buttery and had a hint of vanilla.


I used vanilla to flavour these but the basic butter biscuit recipe would suit any flavour. You could use any flavoured sugars instead of plain caster sugar, and when baked there are infinite ways you could decorate these. You could even make a buttercream and sandwich two of the biscuits together.

The biscuits are crumbly and buttery like shortbread, but unlike some shortbreads they are not gritty.


As the recipe included quantities in cups, I have set them out in the ingredients list below.

Ingredients:
115g (1.5 cups) unsalted butter, at room temperature
3 tablespoons icing sugar
150g (1.25 cups) plain flour
2 teaspoons vanilla extract

To sprinkle on top before baking: 4 teaspoons vanilla sugar

How to make:

- Preheat the oven to 180°C/fan oven 160°C/350°F/Gas mark 4.
- Line two baking trays with baking paper.
- Beat the butter and sugar until light and fluffy. This will take a few minutes so don’t skimp!
- Beat in the flour and vanilla and mix until you have a dough.
- Take teaspoons of the dough and roll into balls. Put a maximum of 12 balls on each baking sheet as the biscuits expand a little when baking.
- Using a fork, gently press down onto the biscuit balls to flatten. Don’t press too hard.
- Sprinkle the vanilla sugar over the biscuits making sure that some settles into the grooves left by the fork.
- Bake for 15-20 minutes or until the biscuits are golden brown. Mine took 18 minutes.
- Leave to cool on the baking sheet for 10 minutes before moving onto a wire rack to cool completely. This is because biscuits are always fragile straight from the oven and need to harden up.
- Bask in glory at the wonderful thing you have made.
- Eat.

Thursday 22 January 2009

The Caked Crusader’s 10 Commandments of Cake & Desserts

The CCB (Caked Crusader’s Brother), in one of his more inspired moments, challenged me to come up with my “10 Commandments of Cake & Desserts”.

Never one to shy away from a challenge I came up with the following:

1. No low fat substitute products
2. Fruits should always be stoned or de-pipped
3. If you can’t eat it, it shouldn’t be on the plate
4. Always custard, never crème anglaise
5. Always make enough so everybody can have seconds
6. You can never have enough cake tins or recipe books
7. A mint sprig is a problem, not a garnish
8. Extract = good; essence = evil
9. Invest in a good spatula and use it often
10. Cake is a baton – pass it on

Now to expand on my views just so you know where I’m coming from with regard to these bold statements:

1. No low fat substitute products

Why would you? You’ve obviously decided you’re having some cake/dessert so why spoil the treat? Would you go to the cinema and decide to sit with your eyes closed all through the film? Of course not; it would lessen the enjoyment you got from your treat. So why lessen the deliciousness of a cake/dessert by using something ghastly like low-fat cream cheese? Just typing “low fat” brings me out in a shiver.

2. Fruits should always be stoned or de-pipped

I don’t care if you warn everyone the cherries still contain their stones – no one biting into a piece of something lovely wants to suddenly feel that their tooth has shattered on impact with a pip. Plus it creates problems – what are people meant to do with the pips they’ve got in their mouth? Spit them out? Leave them on the plate? Choke on them? Until I get some sort of commission deal in place with a local dentist all my fruits shall be de-pipped.

3. If you can’t eat it, it shouldn’t be on the plate

Birthday and Christmas decorations are lovely but, by the time a slice of something is served to a recipient, all such frippery should be removed. This also goes for artistic swirls of peel, stalks left on cherries and those wizened, crispy brown leaves that physalis (cape gooseberries) come in. On a side note, I always have to be careful when mentioning physalis as my instinct is to call them syphilis. Obviously, one should never serve anyone a plate of anything containing syphilis – not even Heston Blumenthal has tried that yet.

4. Always custard, never crème anglaise

I defy anyone to convince me that crème anglaise is anything other than a watered down version of custard - an ugly show pony that thinks just because it has a few vanilla seeds in it it’s somehow haute cuisine. Trading standards punish pubs who sell watered down drinks, so why aren’t they tackling the important issue of diluted custard? Where’s a policeman when you need one? Officer – arrest this chef, a crime has been committed.
Custard is glorious and thick and yellow; it coats the spoon and creates a sense of wellbeing. Crème anglaise is mean and thin; it runs off the spoon like watery gruel. Do not allow it to taint your baking.

5. Always make enough so that everyone can have seconds….

….then, cajole everyone into having seconds. Aside from no cake (which is always the default worst position), there is nothing worse than being given a meagre slice of cake in the knowledge that there is no more. Further, if there are unexpected guests or you merely misjudge how many slices a cake will yield, someone will go without. View this CAFTA winner to see the misery this causes.

6. You can never have enough cake tins or recipe books

Despite what anyone tells you, even when your cupboards are packed tighter than a rush hour tube train and you’re too afraid to open the door in case you cause a landslide of aluminium and steel, you do not have enough cake tins. You don’t have to use them; picking them up occasionally and stroking them a la Gollum and the Ring is more than adequate reason to buy them.
Rev. Sydney Smith once said “there is no furniture so charming as books” and he was almost right. There is no furniture so charming as recipe books, particularly cake and dessert recipe books.

7. A mint sprig is a problem, not a garnish

Be honest now, when a dessert is put in front of you I bet the first thing you do is pick up the mint sprig and place it on the side of the plate. As far away from the main attraction as you can lest your spoon accidentally makes contact with it again. I know of but one person who has ever eaten the mint garnish (you know who you are!) and that was only because he had vowed to eat everything capable of being eaten on his plate for a week; even he found the mint garnish tough work. What is its purpose? It doesn’t look pretty, it doesn’t taste nice and – if eaten – overpowers everything else on the plate. Begone foul leaf!

8. Extract = good; essence = evil

The benefit of home baking is that you can control exactly what goes into your cakes/dessert. No additives, no nasty ingredients, no things beginning with E that sound like they shouldn’t exist outside a laboratory. Extract comes directly from the actual item i.e. vanilla extract is made from vanilla beans, almond extract from almonds. Essence is padded out with water and alcohol and other nasties. Admittedly, extract is more expensive but you use less of it; further (and this is the clincher for me) the flavour of extract is far superior to any essence.

9. Invest in a good spatula and use it often

It breaks my heart to see cake batter left in the bowl or on beaters – even on TV shows where they claim they don’t have the time to scrape it all out. The cake batter left in the bowl is identical to the batter in the cake tin so why leave it out? Suppose you had your cake batter in the tin, were just about to put it in the oven and I came along asking if I could take a tablespoon of mix out and throw it away? Apart from asking me how I got in your kitchen, I suspect you would say “no, that’s good mix, I need it”. Point made.

10. Cake is a baton – pass it on

Far too many people have never known the delight of home made cake or, if they have, it is a fond-yet-distant memory usually involving a grandma or two. If those of us who bake don’t share the joy it brings or the divine results we cannot convert others. OK, this is starting to sound a bit cult-like. What I mean is offer to teach someone else how to bake – even if it’s just a plain fairy cake – share your recipes, share your baking. Once people have tasted good home baking they will be more critical of shop bought cakes that use inferior ingredients and are not always made with care. We are cake evangelists and must spread the word!

So, that’s my 10 Commandments. Are there any you disagree with or have I missed out on a key issue?

Sunday 18 January 2009

Rhubarb and apple streusel

Serendipity – happy coincidences – isn’t just a rather weak romcom starring John Cusack (not that it’s stopped me from watching it about six times – like everything else John Cusack’s in) it actually exists in real life. “How so?” I hear you ask; well a week ago I was walking around Borough Market in my lunch hour and saw some beautiful forced rhubarb. I didn’t buy it because I didn’t have a recipe. Then, during the week, I came across this one so went back and bought my rhubarb!


I hate the name forced rhubarb, as it sounds a bit violent – I always wonder what the poor rhubarb was forced to do. Of course, I’m being silly; “forced” in this context means that it is grown out of season and indoors - it is also the most glorious shade of pink imaginable. Usually all my cakes are made with garden (free range?) rhubarb which is a summer crop.

This is an interesting cake as there isn’t actually any ‘cake’ part to the dish! It’s fruit sandwiched between crumbly streusel, the bottom layer of which bakes down into a base that is part cakey and part biscuity and totally delicious. You can see what I mean in these photos:


As it bakes the fruit releases juices into the bottom layer of crumble. In order not to lose any of these I used a cake tin liner which is an all in one liner i.e. no joins or gaps. It’s a good idea to use one of these not only to catch all the fruity juices but also because this type of cake is always quite fragile until it has cooled and a liner makes it easier to pick up and move.

The other curious thing with this cake is that it’s bigger going into the oven than coming out – which is the opposite of practically every other cake. Going into the oven the cake is piled up to the top of the tin, but as it cooks the fruit breaks down.

The cake is so packed with fruit you can see it trying to burst free in this photo:


The tart acidity of the rhubarb teamed with the sweet apple and almond crumble is a delightful combination. You could serve the cake warm with custard for dessert or at room temperature with whipped cream. I added a little custard to my cream as rhubarb and custard is a classic that must be adhered to whenever possible.


Rhubarb Crumble on Foodista

Ingredients:
For the fruit:
4 eating apples, peeled, cored and diced
300g rhubarb
80g golden caster sugar

For the streusel:
250g plain flour
125g ground almonds
125g golden caster sugar
250g unsalted butter, diced – use it straight from the fridge, the colder the better

To serve: custard or cream

How to make:

- Preheat oven to 190°C/fan oven 170°C/375°F/ Gas mark 5.
- Line a 20cm round springform tin.
- Chop the rhubarb into approximately 3cm chunks and place in a bowl with the diced apple.
- Sprinkle over the sugar and stir through the fruit so all of it is coated. Put to one side.
- Put all the ingredients for the streusel into the bowl of a food processor and blitz to fine crumbs. It is vital that the butter is cold otherwise you will get a dough rather than a crumble. If this does happen, all is not lost – simply refrigerate and then grate.
- Press a smidgen over half of the streusel mix into the prepared cake tin.
- Place the rest of the streusel in the fridge – I found this stopped it getting warm and clumpy.
- Tip all the fruit on top and then, using the palm of your hand, press down quite firmly. There is a lot of fruit and you need to compress it in order to fit the rest of the streusel on top.
- Scatter the remaining streusel on top. It should come up to the very brim of the tin.
- Bake for approximately 1 hour or until the top is golden and crispy and you can see juices bubbling up. Mine took a little longer at 1 hour and 20 minutes.
- Leave to cool in the tin on a wire rack.
- Serve either at room temperature with some whipped cream or warm with custard.
- Bask in glory at the wonderful thing you have made.
- Eat.

Buttermilk spice cake


There is something eternally inviting about a simple butter cake packed with spicy warmth. This is such a cake. It’s just a good honest cake that is lovely to tuck into alongside a nice mug of tea.


You can vary the spices to suit your tastes but I stuck with cinnamon, nutmeg and mixed spice. Spooning different spices into the cake bowl always makes me feel like a sorceress (some may say ‘witch’ was a better description!) concocting a potion – I think it’s all the little jars and a teaspoon of one, half a teaspoon of another etc. It’s practically alchemy!


I added a sugar topping to the cake; the original recipe didn’t have one. Sugar sprinkled on top and allowed to bake into the cake is delicious and gives an extra texture to the cake – an almost crumbly crust.


Many people describe cakes like this as a “cut and come again cake” and it’s the perfect description. There’s no messy filling, it’s easy to eat, doesn’t need anything with it and is packed with flavour. Plus, how easy is it to make? Look at how brief the recipe instructions are!


Ingredients:
300g plain flour
225g caster sugar
1 ½ teaspoons bicarbonate of soda
1 teaspoon baking powder
1 teaspoon ground cinnamon
1 teaspoon mixed spice
1 teaspoon ground nutmeg
100g unsalted butter, melted
350ml buttermilk
2 eggs

Optional topping: 3 tablespoons brown sugar (I used cinnamon infused sugar)

How to make:

- Preheat the oven to 180°C/fan oven 160°C/350°F/Gas mark 4.
- Line a 20cm springform cake tin with baking paper making sure that the paper comes up 2-3cm above the top of the tin.
- Place all the dry ingredients (i.e. the first seven items on the list) in a bowl and mix.
- To the dry ingredients add the melted butter, buttermilk and eggs and beat until smooth and combined.
- Pour the batter into the prepared tin and bake for approximately 40 minutes or until a skewer inserted into the centre of the cake comes out cleanly. Mine took 50 minutes.
- Leave to cool, in the tin, on a wire rack until cold enough to handle. Then remove the tin and leave to cool completely.
- Bask in glory at the wonderful thing you have made.
- Eat.

Sunday 11 January 2009

Sticky toffee pudding


I have made individual sticky toffee puddings before but this is a larger version and the sauce recipe is quite different.


There seems to be something about Christmas-time in Britain that makes everyone wildly over-estimate the amount of dates their guests will wish to eat. Most of us can happily get through the year without thinking much, if at all, about eating dates but, come December we’re buying boxes of the things as if Christmas would be ruined without them. I can hear the CCM (Caked Crusader’s Ma) bristling whilst reading this so I’d better confess – it was me who grossly over-bought dates this year. But who could blame me - aren’t they beautiful?


This was my thought process: it’s colder than Antarctica in England this week and I need to get rid of lots of dates. Voila! Sticky toffee pudding. If there was ever a better reason to stock pile dates I’m interested to hear it!

Here’s the cake fresh from the oven:


I can’t even try to argue any health benefits on this one; it’s as sinful as pudding can be. The sweet, light sponge is dotted with dates, releasing their beautiful toffee flavour in every mouthful. Add to that the thick, creamy sauce stoked up with brown sugar and black treacle and it’s an assault on the taste buds! Yum.

A piece of cake....


...only truly becomes sticky toffee pudding once the sauce is added:


Ingredients:
For the cake:
175g stoned and chopped dates (I used Medjool)
300ml water
1 teaspoon bicarbonate of soda
50g unsalted butter
175g caster sugar
2 teaspoons vanilla extract
2 eggs
175g self raising flour

For the sauce:
300ml double cream
50g Demerara sugar
2 heaped teaspoons black treacle


How to make:

- Preheat oven to 180°C/fan oven 160°C/350°F/ Gas mark 4
- Grease a 22cm square tin.
- Boil the dates in the water for 5 minutes until the dates are soft. Make sure you use a large saucepan – larger than you think you need.
- Stir in the bicarbonate of soda. It will bubble up a lot, hence the need for a large saucepan. Put to one side until needed.
- Cream together the butter and sugar until well combined. It won’t become light and fluffy because the sugar far outweighs the butter.
- Beat in the vanilla extract.
- Beat in the eggs one at a time.
- Stir in the flour.
- Pour in the contents of the saucepan i.e. dates AND liquid.
- Stir until well combined. The batter will be very runny so don’t panic.
- Pour into the prepared tin and bake for 35-40 minutes or until a skewer inserted into the centre of the sponge comes out cleanly.
- Leave to cool on a wire rack.
- Now make the sauce: put all the ingredients into a saucepan and stir, over a low heat, until smooth.
- Bring to the boil.
- Cut the sponge into squares and ladle the sauce over the top. Serve with either ice cream (my favourite) or custard.
- You can make both the sponge and the sauce in advance and re-heat when required. I re-heated the sponge, still in the tin, in a fan oven temperature of 130°C . The sauce can be re-heated in a saucepan on the hob – simply stir until smooth and then bring to the boil.
- Bask in glory at the wonderful thing you have made.
- Eat.

Mint choc chip cupcakes


We all know the benefits of peppermint. Depending on who you listen to it will cure just about any ailment going as well as making your teeth smell nice. However, if you’re anything like me (lucky, lucky you!), you would probably rather eat your own feet than drink peppermint tea. I have tried, I really have but as soon as that cup of watery, green tinged minty infusion assails my nostrils I start to feel it wasn’t a good idea; if it gets as far as my mouth my gag reflex kicks in and I have to pour it down the sink and make a proper brew. And yet I love peppermint; I can eat more After Eights than should be humanly possible.

These cupcakes could be the solution to increasing my intake of peppermint. I really liked them but they seemed to get an almost Marmite-like love-hate reaction from my eatership; they are clearly an acquired taste – I always feel it’s important to point things like this out to you!


The rich, chocolate cupcakes would be lovely on their own or with other buttercreams. As they use both cocoa and chocolate chips you get a double whammy of chocolate in both taste and texture.


The dominant flavour is the mint buttercream icing. Normally I’m not a fan of colourings but I think it’s necessary here. After all, would mint choc chip ice cream have the same allure without it’s mad greenness?


The peppermint extract should be used sparingly unless you want your buttercream to taste like toothpaste. Now there’s an idea – a cupcake that cleans your teeth as you eat it.......we would all be cavity free in no time!

Footnote: Having just eaten one of these a day after making, I would advise you all to make the buttercream a day in advance. It's definitely mellowed into a fuller, lovely mint flavour whereas on the day it was a bit harsh.

Ingredients:
For the cupcakes:
125g unsalted butter
125g caster sugar
2 eggs
2 tablespoons milk (whole or semi skimmed)
20g cocoa powder
105g self raising flour
¼ teaspoon bicarbonate of soda
100g milk chocolate chips

For the buttercream:
100g unsalted butter
200g icing sugar
1-2 tablespoons milk (whole or semi skimmed)
3-4 drops peppermint extract
Green colouring

For decoration: chocolate buttons or sprinkles

How to make:

- Preheat the oven to 180°C/fan oven 160°C/350°F/Gas mark 4.
- Line a cupcake tin with 12 paper cases.
- Cream together the butter and sugar until it is pale, light and fluffy.
- Beat in the eggs one by one.
- Beat in the milk.
- Beat in the cocoa powder, flour and bicarbonate of soda.
- Stir in the chocolate chips.
- Spoon into the 12 paper cases. Don’t worry about levelling the surface – this will happen when they go into the oven.
- Bake for 20-25 minutes or until a skewer inserted in the centre of the cakes comes out cleanly. Mine took 20 minutes.
- Leave to cool, still in the tin, on a wire rack for 10 minutes or so before removing from the tin and leaving to cool completely.
- Now make the buttercream: beat the butter until it turns a lighter shade and looks fluffy and light.
- Add half of the icing sugar and beat.
- Add the rest of the icing sugar and beat until you have a light buttercream.
- Beat in one tablespoon of milk. You’re looking for a light, spreadable consistency but not runny. If necessary beat in a second tablespoon of milk.
- Beat in the peppermint extract. Start with a couple of drops and taste before you add any more. It’s down to your personal taste whether you decide to add more but I warn you that it’s easy to add too much and ruin your buttercream. You can always add more but you can’t take it out once it’s added!
- Beat in the green colouring.
- Spread the buttercream over the top of the cupcakes and top with the chocolate decoration of your choice.
- Bask in glory at the wonderful thing you have made.
- Eat.

Tuesday 6 January 2009

CAFTA

It’s been a while since a CAFTA (Cake’s Achievement in Film and Television Arts) award has been bestowed but this nomination by Trashalou was too good to pass up – good work my Dr Who AND cake obsessed friend!

The award is for “Cake almost stealing the scene from everyone’s favourite Timelord” (I admit it’s quite a narrow category) and goes to the pretty little cupcake that Rose gives The Doctor at the end of the episode “Fear Her” (Episode 12, Series 2).

The Doctor has just saved not only the world (again) but also the 2012 Olympics and has returned to find Rose at a street party.

Rose offers him the cake -she seems to be missing her little finger (this is not part of the plot, just an observation of mine):


He not only accepts but tucks in (good man):


The happiness a good cupcake brings (OK, so it’s a totally gratuitous photo but it was too cute not to include, and he is actually looking at the cake which is just out of shot):


This leads to one of The Doctor’s wisest observations yet: “Ballbearings you can eat – masterpiece!”

Please email me (with photos) your CAFTA nominations.

Sunday 4 January 2009

A little bit of nonsense

I love this site - normally it's not cake related but this one was too funny not to mention. I should explain to the uninitiated that the site invites readers to provide captions for photos of cats, the funniest is displayed on the photo:

funny pictures of cats with captions
more animals

Saturday 3 January 2009

Cherry Meringue pies


After levelling the bases of my Christmas snowmen sponges I had some tasty looking offcuts!


We’re all being (rightly) encouraged to waste less food so I pondered how to use the leftover sponge. Raiding my store cupboard I found some tinned cherries, and, after making my custard tarts I had lots of leftover egg whites. At this point a lightbulb switched on in my brain and cherry meringue tarts were born!

I layered the cherries onto the sponge. Tinned cherries are lovely - a real success story; so often we think of tinned fruit as inferior to fresh, but I think these cherries are proof that it's not always true:


A layer of meringue and – voila!


They are beautiful and certainly don’t look like a creation borne of leftovers:


I was on a roll at this point; the creative juices were certainly flowing (it doesn’t happen very often so I enjoy it when it does!). I didn’t use all of the tinned cherries. Again, not wanting to waste them, I pureed them and served them with the pies as a fruit coulis:


Using up offcuts from other recipes never tasted so good:


This is the last of my Christmas posts – business as usual resumes next week!

Ingredients:
8 discs of Genoese sponge – for the recipe click here
2 tins of cherries
6 egg whites
375g caster sugar
½ teaspoon cornflour

How to make:

- Preheat the oven to 220°C/fan oven 200°C/425°F/Gas mark 7.
- On a baking sheet, lay out the cooked sponge discs.
- Place some cherries on top of each sponge. Don’t go right to the edge because you want the meringue to sit on the sponge.
- Put the egg whites and sugar in a bowl and whisk until the mixture turns thick and glossy. This will take quite a long time – mine took over 10 minutes.
- Whisk in the cornflour.
- Either pipe or simply spread the meringue over the cherries and sponge.
- Bake for 5-10 minutes or until the meringue is just starting to brown. Check after 5 minutes as the meringue can burn very quickly.
- Leave to cool on a wire rack before serving.
- Bask in glory at the wonderful thing you have made.
- Eat.