Showing posts with label orange. Show all posts

Sunday, 1 November 2015

Chocolate orange carrot cake


I’ve never baked (or indeed seen, or eaten) a chocolate carrot cake before.  It seemed the perfect cake given the increasingly autumnal feel in the air – soft sponge with chocolate and spice; it would be a good Bonfire Night cake too.  Funny how we associate flavours with seasons/events.


Being a carrot cake this is a very light sponge.  The brown sugar adds a caramel sweetness which always works well with spice.  The cocoa adds a chocolately depth.  The sultanas are entirely optional but, in my world, always make everything better so I added some!  I ‘ummed and aaaaahed’ over whether to make this as a single sponge or to make as a sandwich style cake.  In truth, I think it would work as either, but I was in the mood for a little cream cheese frosting so whipped up an orange one to compliment the zest in the cake.


I like it when bakes evolve like this, with a series of little decisions being made along the way to create the finished item.  This was a very popular cake and something a little bit different which, 8 years into my blog, feels increasingly difficult to achieve!


The flavours of this cake work well together but all remain identifiable because they hit your palate at different times.  The initial hit is the chocolate sweetness; this is cleaned away by the sharp cream cheese frosting and you are left with a fruit orange spice flavour.  It comes in three distinct waves.  Once I spotted this I took my time over each mouthful (unlike me) and ticked the stages of flavour off each time...this is how I entertain myself!


Mr CC was very sceptical about this cake initially.  When I said to him I was making a chocolate orange carrot cake he gave me a look which I can only describe as a ‘what you talking bout Willis?’ look (a reference that you will need to be a certain age to get!) but, when he tasted it, he really liked it!


Ingredients

For the sponge:
280g soft light brown sugar
200g self raising flour
80g cocoa powder
½ teaspoon bicarbonate of soda
1 teaspoon mixed spice
1 teaspoon ground cinnamon
Optional: 50g sultanas
zest of 1 orange (save the rest of the orange for the buttercream)
4 eggs
200ml sunflower oil – or any flavourless oil, I used light olive oil suitable for baking
100ml milk
200g carrots, grated – this equates to approx 3 medium carrots

For the buttercream:
350g cream cheese – I used Philadelphia
50g unsalted butter, at room temperature
160g icing sugar
1 -2 tablespoons orange juice

To decorate: chocolate sprinkles


Method

Preheat the oven to 180C/fan oven 160C/350F/gas mark 4.

Line two 20cm loose bottomed round sandwich tins with baking paper.

Place all the dry ingredients in a bowl and mix together e.g. light brown sugar, self raising flour, cocoa, bicarb, mixed spice, cinnamon and – if using - sultanas.

Place all the wet ingredients in a large jug e.g. orange zest, eggs, oil, milk and carrots and beat together.

Pour the wet ingredients into the dry and mix together.

Divide equally between the cake pans.

Bake for approximately 40 minutes (start checking after 30 minutes) or until a skewer inserted into the cake comes out clean.

Leave to cool in the tins, on a wire rack, for about 30 minutes before turning out and leaving to cool completely.

Now make the filling: Beat the cream cheese and butter until soft, light and whippy.

Add the icing sugar and beat well.

Add the orange juice – start with just one tablespoon – and beat until you have a light, spreadable buttercream.  Add more orange juice if required.

Place one sponge on the serving plate and spread about 1/3 of the buttercream over the top.

Place the remaining sponge on top.

Cover the top and sides with the frosting.

Cover the top with chocolate sprinkles.

Refrigerate until about 20 minutes before serving.

Serve in generous slices with a cup of tea.

Bask in the glory of the wonderful thing you have created.


Eat.

Sunday, 18 January 2015

Brown butter spice cake


Christmas may be over but winter is definitely here, which is why I was drawn to a spicy cake this week.  This cake had so many lovely facets that appealed to me: tea, spice, treacle, brown butter and even a bit of citrus.  All the flavours were offset by a very simple classic buttercream.


It’s worth taking your time over making the brown butter.  Your nose will tell you without any doubt that there is a huge difference between brown butter and burnt butter!  Gently heat the butter and it will become foamy; let this stage pass and the butter will turn clear and a wonderful dark amber colour…and it smells divine.  It’s also a bit like caramel in that you’re better to take it off the hob just before it’s at the stage you want, as it carries on darkening and you risk taking it too far.


This is such a comforting, homely looking cake but it packs in so much flavour – the best of all worlds.  The tea and citrus lifts what would otherwise be a lovely but ordinary dense gingerbread; I expected the cake to be more sponge-like but it isn’t – it’s definitely in the gingerbread camp.    Not sure what I did but my cakes came out huge!  I had to shave a bit off each one just to get it to a size that would fit in any of my storage tins!  Still, it gave me the opportunity to photograph a whole layer:


This cake is a keeper, by which I mean you’re best off making it a day or two in advance – it gets stickier and more flavoursome.  Bring on the snow – I’m ready for it!


Ingredients

For the cake:
250g unsalted butter
250g caster sugar
2 eggs
100g treacle
250ml tea, made using 2 teabags
Grated zest of 1 orange
600g self raising flour
1 teaspoon ground cinnamon
½ teaspoon ground ginger
½ teaspoon mixed spice

For the buttercream:
100g unsalted butter, at room temperature
1 teaspoon vanilla extract
200g icing sugar
1 tablespoon milk


Method


Preheat the oven to 180C/fan160C/350F/ gas 4. 
Line two loose bottomed 20cm round sandwich tins with baking paper.
Now make the cakes: melt the butter in a pan until it turns brown (but not burned).  Do this over a gentle heat – at first it will foam, but will brown shortly after.
Strain the butter through a coffee filter or several sheets of kitchen paper into a bowl and leave to cool.
Beat the cooled brown butter into the sugar, eggs and treacle.
Stir in the cooled tea and orange zest (I put the zest in the tea so that it infused the flavour into the tea).
In a separate bowl mix together the flour, spices and baking powder.
Beat the butter mixture into the flour mixture.
Divide evenly between the prepared tins and level the surfaces.
Bake for 20-25 minutes or until a skewer comes out clean.   Mine actually took a fair bit longer – nearer to 40 minutes.
Cool, in their tins, for 20 minutes before de-tinning and leaving to cool completely on a wire rack.
Now make the buttercream: beat the butter until it is soft and whippy.
Beat in the vanilla and icing sugar.
Beat in the water.
Place one of the cakes on the serving plate and spread the buttercream over it.
Place the other sponge on top.
Bask in the glory of the wonderful thing you have created.
Eat.


Sunday, 26 October 2014

Sticky orange potato cake


I remember watching Sesame Street when I was growing up and there would always be a bit where the screen was split into quarters depicting four different things or activities accompanied by a song, ‘one of these things is not like the others’.  You had to spot the odd one out.  You can play that game with the title of my cake this week: the correct answer is ‘potato’.


There are German plum dumpling recipes that use a potato based mix to enclose the plums but this is my first potato cake.  With all that mashed potato in it you expect it to be heavy or densely textured.  It isn’t!  It’s a light sticky cake and it melts in your mouth.  Enjoy it at room temperature with a cup of tea (always my preferred option) or warm with ice cream for dessert.  Or get the best of both worlds by eating it at room temperature and then warming the leftovers the next day for dessert.


The ground almonds provide texture and the syrup gives a sticky, wet texture.  The texture is unusual at first.  After my first bite I wasn’t sure if this was the cake for me however, once I got used to the texture I really enjoyed it.  I have pondered how best to describe it and struggled; I think the best way is to say that if you don’t like the following then it’s not the cake for you: 
  • Syrup cakes 
  • Baklava (the stickiness of it) 
  • Semolina (the texture)

Really – I’m not trying to put anyone off but this is not a cake for everyone and I want you to bake it knowing what you’re going to get.  Satisfied customers only on my site!


Using gluten free baking powder will turn this into a gluten free bake.


Ingredients

For the cake:
350g potatoes suitable for mashing – I used maris piper
200g unsalted butter, at room temperature
155g caster sugar
1 teaspoon vanilla extract
4 eggs
175g ground almonds
2 tablespoons (not a typo) baking powder
Zest of two oranges

For the syrup:
Juice of two oranges
3 tablespoons caster sugar

Method

Peel the potatoes and cut into large chunks.

Place in a pan and cover with water.

Bring to the boil then reduce the heat, part cover the pan, and simmer for approximately 15 minutes or until the potatoes are soft enough to mash.

Mash the potatoes.

Put to one side and leave to cool.

Preheat the oven to 180°C/fan oven 160°C/350°F/gas mark 4.

Line a 20cm springform round tin with baking paper.

Beat together the butter and sugar until light and fluffy.  Don’t skimp on this stage.

Beat in the vanilla.

Beat in the eggs, one at a time.

Stir in the ground almonds, baking powder and orange zest.

Stir in the cooled mash potato.

Spoon into the prepared cake tin and level the surface.

Bake for approximately 45 minutes or until a skewer inserted into the cake comes out clean.

About 20 minutes before the cake is cooked, place the orange juice into a saucepan and bring to the boil.

Let boil until the liquid has halved.

Remove from the hob and leave to cool.

Stir in the sugar – wait until the orange syrup is cool or the sugar will melt.

When the cake has been out the oven for 15 minutes de-tin it and place on a wire rack with a piece of foil underneath.

Spoon the orange syrup over the top (the foil underneath the rack will catch any drips)

Leave to cool completely before serving.

Bask in the glory of the wonderful thing you have created.


Eat.

Sunday, 21 September 2014

Orange madeira cake


There is something about the juicy flavour of orange that lifts a sponge and elevates it to something far beyond the sum of its parts, and yet I find that I don’t bake with it very often.  This is a conundrum.  To rectify this I found a madeira cake recipe that used lemon and switched it to orange, also adding an orange glaze.


Loaf cakes are very satisfying for a blogger – they are usually quick and easy to get into the oven, and you’re guaranteed nice even slices to photograph!  The shape of the tin provides a nice crust and a soft sponge underneath…no wonder they are Mr CC’s favourite (as a side note I am pleased to report that, while he doesn’t really understand why, he has learned that ‘dry’ is not taken as a compliment when critiquing sponge!)


This cake smells glorious while baking in the oven; it is a cake to bake while you have people looking around your home thinking of buying it!  The addition of a small amount of ground almonds also keeps the cake moist and gives it a lovely crumb.


Using freshly squeezed orange juice in the glace icing pays dividends; it’s almost confusing in your mouth because you’re eating icing but tasting orange juice – it really packs a punch in terms of flavour.


Ingredients

For the sponge:
175g unsalted butter, at room temperature
175g golden caster sugar
3 eggs
grated zest of 1 orange
200g self raising flour
50g ground almonds

For the glaze:
100g icing sugar
enough orange juice to make an icing – add 1 teaspoon at a time


Method

Preheat the oven to 170°C/fan oven 150°C/340°F/gas mark 3.

Line a 900g loaf tin with baking paper.

Beat together the butter and sugar until light and whippy – don’t skimp on this stage.

Beat in the eggs one at a time, adding some of the flour if it looks like the mix might curdle (NB. Use this as a test – if you’ve beaten your butter and sugar enough it won’t curdle!)

Fold in the orange zest, flour and ground almonds.

Spoon into the prepared tin and level the surface.

Bake for approximately 55 minutes or until a skewer inserted into the cake comes out clean.

Leave to cool, in the tin, for approximately 20 minutes before de-tinning and leaving to cool completely on a wire rack.

When the cake is cold you can make the icing: beat together the icing sugar and orange juice until you have a thick glossy glaze.  Add the orange juice 1 teaspoon at a time – it is very easy to make it too runny.

Spoon over the cake and let drizzle down the sides.

Serve in thick slices with a cup of tea.

Bask in the glory of the wonderful thing you have created.

Eat.


Sunday, 20 July 2014

Orange semolina cake


This recipe is adapted from a traditional Greek Revani cake recipe; I have halved the amount of syrup to stop the cake being too sweet and sticky.  For me, there’s a tipping point with syrup – I love baklava for example, but not when you bite into it and syrup pours out.  I realise it is unlike me to call for restraint, but it had to happen one day!  I added some finely grated zest to the batter to make sure the orange flavour wasn’t lost.


Mr CC and I are in the process of moving.  That perhaps makes it sound more organised than it is – basically, we’ve sold our place and we’re looking for a place to move to (did anyone say ‘stress’?).  I’m trying to wind down my larder cupboards...currently so well stocked that the Russian army could drop in unannounced and all enjoy several courses.  That was a favourite phrase of my mother’s; I’m not sure why it was always the Russian army rather than any other country – perhaps she felt it conveyed scale?


Anyway, as Confucius never said: the task of clearing larder cupboards begins with the first bag of semolina.   Hence this week’s bake of semolina cake.  Unusually for me, it’s a dairy free bake.


The semolina gives the cake a different texture to classic sponge; perhaps a little more bite, but in a pleasing rather than gritty way.  As with all syrup cakes, this is best made a day in advance and left to absorb.


Ingredients

For the cake:
175g caster sugar
4 eggs
325g semolina
200g plain flour
225ml olive oil – I used the light one suitable for baking
2 teaspoons vanilla extract
3 ½ teaspoons baking powder
250ml water
Grated zest of one orange

For the syrup:
250ml water
225g caster sugar
Large pieces of orange peel from 1 orange


Method


Preheat the oven to 200°C/fan oven 180°C/400°F/gas mark 6.

Line a 23cm round springform pan with baking paper.

Beat together the sugar and eggs until thick and creamy.

Add the semolina, flour, olive oil, vanilla, baking powder, water and zest and beat until well combined.

Pour the batter into the prepared tin and bake for approximately 40 minutes or until a skewer inserted into the cake comes out cleanly. 

Leave to cool completely in the tin.

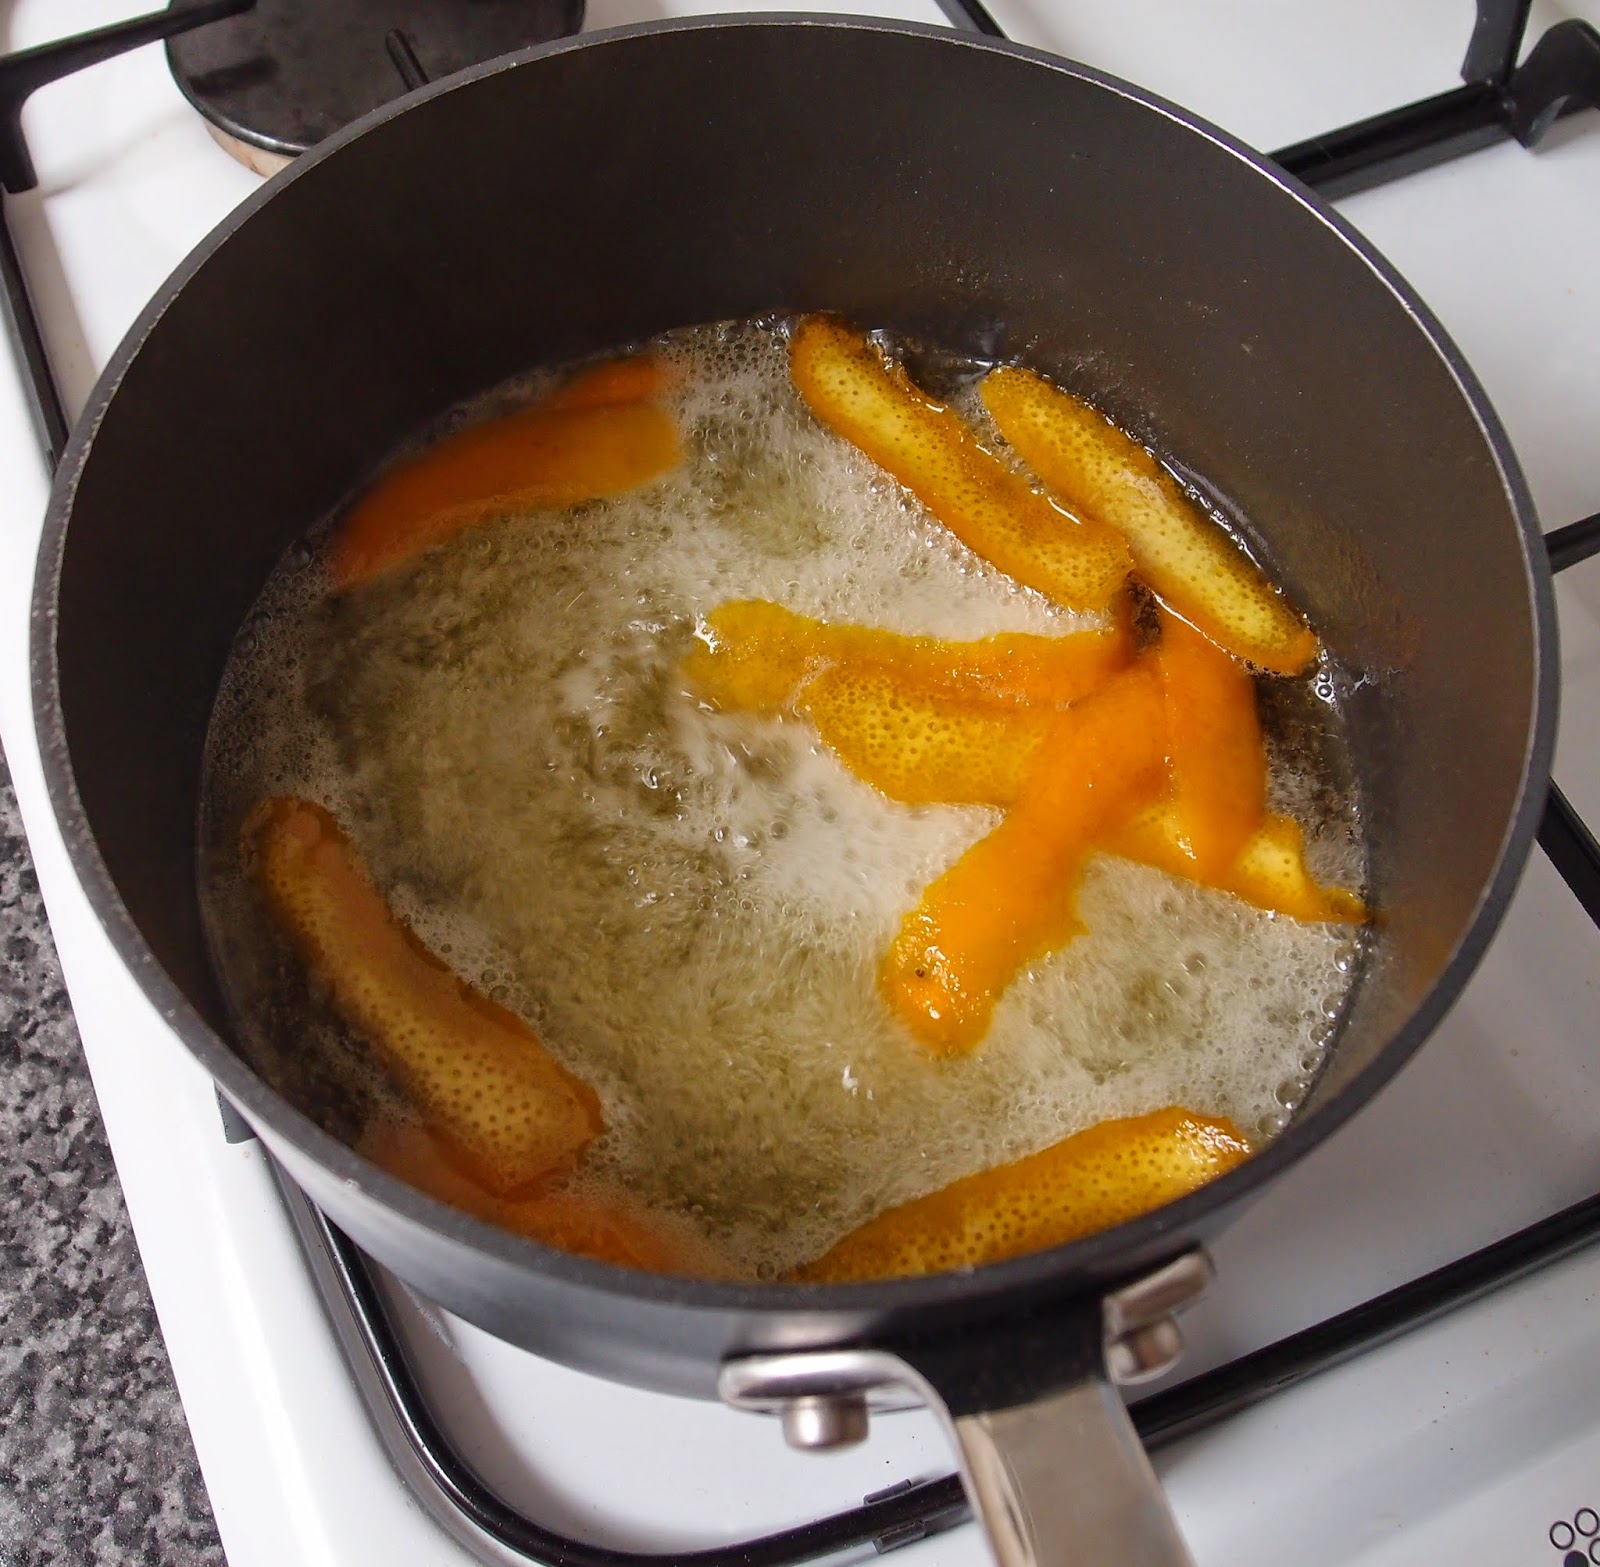
Now make the syrup: place the water, sugar and peel in a pan and bring to the boil without stirring.

Leave to boil gently for 8-10 minutes until it reduces and turns syrupy.

Pour through a sieve into a jug or bowl.

Pour/brush over the cool cake and leave to absorb.  I like to leave the cake in the tin for this stage as any leakage is trapped and absorbed into the cake (if you’re using a loose bottomed or springform tin wrap the outside of the tin with foil so that, if there is any leakage, it’s not all over your work top).

Serve with thick cream.

Bask in the glory of the wonderful thing you have created.

Eat.

Sunday, 22 June 2014

Speculaas biscuits


Anyone who has been to the Netherlands is bound to have either eaten, or brought back and eaten, or brought back as gifts (and then hopefully eaten when visiting) Speculaas biscuits.  I have enjoyed them thin and crispy, and also thicker and more gingerbread-like in texture.  The warming combination of spice is lovely and, while they are traditionally a Christmas biscuit, I see no harm in enjoying them all year round.


What has stopped me making speculaas thus far is the absence of an authentic spice mix, or recipe to make one.  Therefore when Steven Dotsch, of the Speculaas Spice Company kindly offered to send me a sample of their speculaas spice mix I typed, ‘yes please’ as fast as my biscuit-loving hands could manage!  Opening the sachet released a heavenly waft of warming spices and I sat there sniffing, turning away to let the smell disappear, and then turning back and inhaling again.  I would have carried on doing this a lot longer had I not become aware of Mr CC watching me with a puzzled expression.


There seems to be a wide variety of speculaas biscuit recipes out there; I did some window shopping and then chose which elements to include in my version.  I opted for ground almonds and orange zest because I planned to make the thicker, more gingerbread-like textured biscuit and both ingredients released oils that would stop the dough from being too dry or bready.  The orange was the first flavor to hit followed by the warming spices; I particularly liked the texture of these biscuits as they were light and crisp.  Here they are ready for the oven:


Freshly baked:


I love this photo – you can see the dark flecks of spice in the biscuit:


The smell of these baking was the smell of Christmas!  I was tempted to break out my Michael Buble Christmas CD until I remembered it was June and I didn’t need to give Mr CC any more reasons to doubt my sanity. (As a side note, I suspect the mere fact that I own Michael Buble CDs is enough to make Mr CC doubt my sanity…let’s just say he’s not a fan! Of Mr Buble, that is.  I know he likes me!)


Ingredients

For the biscuit dough:
250g self raising flour
125g soft brown sugar
3 teaspoons speculaas spice mix
50g ground almonds
1 orange – zest only
100g unsalted butter, at room temperature
1 egg
1 tablespoon milk


For the glaze:
1 egg white, beaten
3 teaspoons soft brown sugar
Handful of flaked almonds 


Method

Preheat the oven to 180°C/ fan oven 160°C/350°F/ gas mark 4


Line two baking sheets with baking paper or non stick foil.


Place all the biscuit dough ingredients in a mixer or food processor and blitz together until you have a ball of dough. 


Shape into a fat disc and wrap in clingfilm.


Refrigerate for about 30 minutes.


Roll the dough out between two sheets of clingfilm – this stops you needing to add extra flour to the dough.  Aim for just under 0.5cm thickness. 


Using the cutter of your choice cut your biscuits out and place on the baking sheet – they spread a little but not much.  I used a 7cm round cutter and got 22 biscuits.


Reroll the dough to ensure it is all used – it rerolls very well so you should be able to use every last scrap.


Brush with the egg white and then sprinkle on the soft brown sugar.

Arrange the flaked almonds on the top of each biscuit.

Bake for approximately 14 – 18 minutes or until the biscuits are turning brown.  I like to rotate my baking sheets halfway through the cooking time to encourage even browning.


Leave to cool on the baking sheet for 10 minutes before removing and placing on a wire rack to cool completely.


Bask in the glory of the wonderful thing you have created.


Eat.

Sunday, 11 August 2013

Orange and almond cupcakes


Orange adds such a freshness to cakes, particularly buttercreams.  It’s been a while since I baked with orange so when I saw this recipe in one of the food magazines I moved it right to the top of my “to bake” list!


For only two tablespoons of orange juice these have a lovely sweet citrus taste and it works really well with the tangy cream cheese frosting.  I could’ve just eaten the frosting in a glass for dessert!


The almonds make the sponge soft and flavourful but not at all dense.  For a cake containing almond, and a cream cheese frosting, it’s amazing how light the resultant cupcake is – these were very well received by all my eaters.


When you take the lid off the storage tin the most wonderful aroma of orange and almond hits you – I love it when a cake smells of its flavour; it builds a happy expectation of the joy to come!


The other big plus these cupcakes have (aside from their deliciousness) is how quick and easy they are to make.  No fancy methods here – if you can weigh stuff out and beat stuff you will end up with a lovely cupcake.  They could be jazzed up with a bit of decoration but I’m rather a purist (or lazy, take your pick) where my cakes are concerned and like them left clean and unfussy.


Ingredients

For the sponges:
225g unsalted butter, at room temperature
225g golden caster sugar
3 eggs
190g plain flour
75g ground almonds
2 teaspoons baking powder
zest of 1 orange, plus 2 tablespoons orange juice (keep the remaining juice for the frosting)
1 teaspoon almond extract

For the frosting:
200g unsalted butter, at room temperature
450g icing sugar
200g cream cheese – I used Philadelphia
2 tablespoons orange juice
optional: orange food colour


Method

Preheat the oven to 170°C/fan oven 150°C/340°F/gas mark 3.5

Line two cupcake pans with 18 paper cases.

Start by making the sponge: beat together the butter and sugar until light and pale.

Beat in the eggs, one at a time.

Beat in the flour, almonds, baking powder, orange zest, juice and almond extract.

Spoon into the paper cases.

Bake for approximately 22 minutes, or until a skewer inserted comes out clean.

Leave to cool.

Now make the frosting: beat the butter until soft.

Add the icing sugar and cream cheese and stir together manually before going back to the stand mixer – this stops the icing sugar clouding up!

Beat until well combined.

Beat in the orange juice and – if using – orange colouring.

Spoon into a piping bag and, if the frosting is very soft, don’t be afraid to chill it for ten minutes before piping.

Pipe over the cupcakes.

Refrigerate until 30 minutes before serving.

Bask in the glory of the wonderful thing you have created.


Eat.

Sunday, 5 May 2013

Rhubarb, orange and almond cake


Some people listen out for the first cuckoo to tell them when spring’s here.  I wait for the CCD (Caked Crusader’s Da) to tell me that he’s got tons of rhubarb and I’d better come up with some plans for it or it will rot...no pressure then!


So here it is; my first home-grown rhubarb bake of the year.  Spring has officially arrived!  Rhubarb and almond always work well together, as do rhubarb and orange...so putting all three together is dynamite!  Orange seems to add freshness to rhubarb and lift the flavour to something even zingier.  The almond does what it always does and adds lovely body to the sponge and a comforting blanket of flavour.


This is a big cake but it keeps well.  It’s the sort of cake I find irresistible – homely and rustic.  I love how the rhubarb bakes down and becomes squidgy but retains a hint of sharpness.


Definitely a cake you have to be genteel to eat – it requires a plate and fork as it is very soft and crumbly.  You won’t get away with a quick hand-held slice gobbled down in the kitchen while you make a cup of tea! (please tell me it’s not just me who cuts themselves a little slice to sit down with, but then cuts a ‘bonus’ slice to eat while you’re waiting for the kettle?)


Ingredients

400g rhubarb cut into 1cm chunks
280g golden caster sugar
225g unsalted butter, at room temperature
zest and juice of one orange
225g self raising flour
100g ground almonds
1 teaspoon baking powder
3 eggs
2 handfuls flaked almonds

To decorate: icing sugar

To serve: if serving warm then custard or cream, if serving at room temperature then definitely cream!


Method

Place the chop rhubarb in a bowl and sprinkle 50g of the sugar over it.  Stir to ensure that the rhubarb is covered and leave for 30 minutes.

Preheat the oven to 180°C/fan oven 160°C/350°F/gas mark 4.

Line a 20cm round springform cake tin with baking paper.

Place the butter, remaining sugar (i.e. 230g), orange zest and juice into a bowl and beat until smooth and well blended.  It might look a bit curdled and yucky at first but keep beating and it will all come good.  You will end up with a rich yellow whippy batter.

Add the flour, almonds, baking powder and eggs and beat until well combined.

Tip in the rhubarb and all the juice that has come out of the rhubarb.  Stir in until evenly distributed throughout the batter.

Spoon into the prepared tin and level the surface.

Scatter the flaked almonds over the top.

Bake for approximately 1 hour 25minutes or until a skewer inserted into the cake comes out clean.  NB.  Check the cake after an hour in case the edges are browning too much – if they are, wrap a piece of foil around the edge to shield them, and continue baking.  I had to do this. 
Don’t worry if it takes longer to bake than the guideline time – the rhubarb releases a lot of juice and this can slow down the baking process.

Leave to cool in the tin until you can safely remove the tin.

Leave to cool completely on a wire rack.

Just before serving, sieve some icing sugar over the top.

Bask in the glory of the wonderful thing you have created.

Eat.