Showing posts with label cream. Show all posts

Monday, 28 March 2016

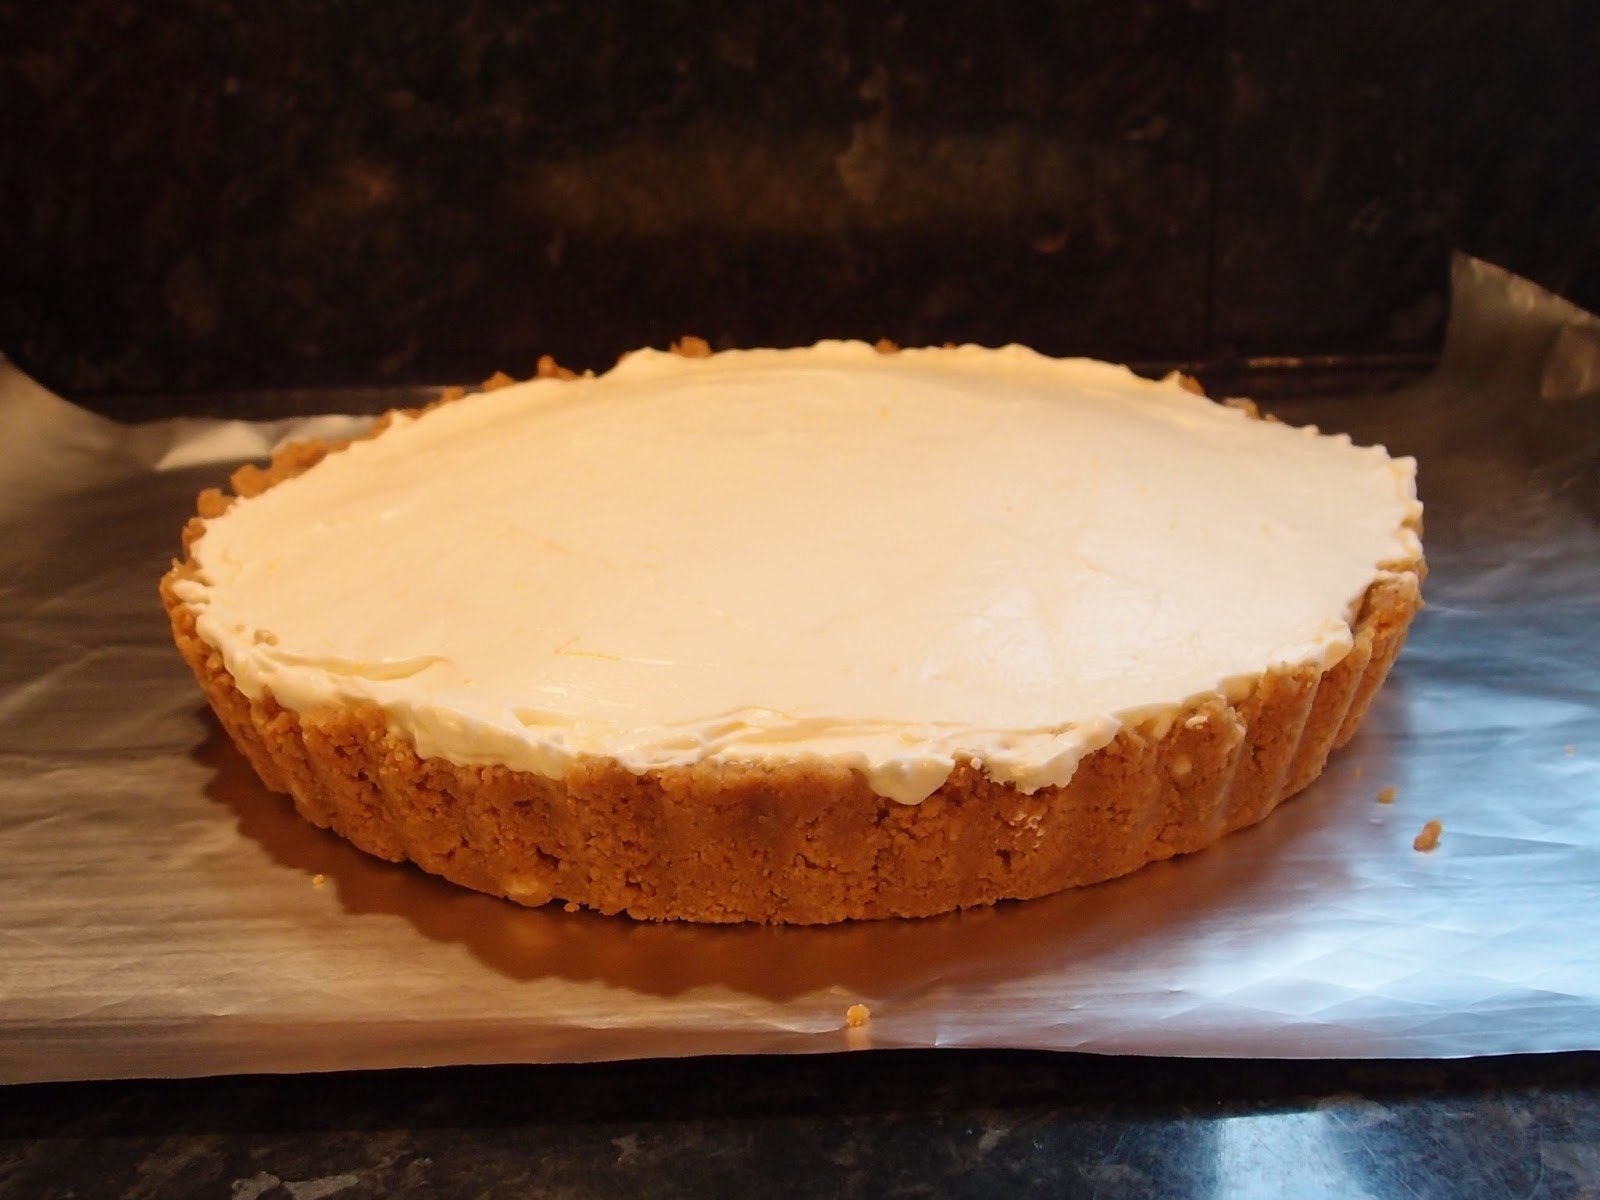
Lemon cream pie


Sometimes, I can be sceptical about recipes if they look too simple.  This was such a recipe and gosh was I wrong!  Firstly, it’s no bake so is super quick to make; secondly, it has few ingredients and thirdly, it requires no skill or techniques whatsoever.  Win-win-win!
The texture of this is amazing – it is the softest, lightest, smoothest texture I can recall.  Imagine a whipped mousse crossed with a cloud and you’d be getting there!  The lightness of texture offsets the richness so it’s actually deceptive; I could quite easily have been on my second slice before I realised how creamy it was!


The basic method could be adapted to any citrus fruit – it’s the acid from the fruit you need to set the cream.  It worked very well with lemon because the fresh zing balanced the richness of the cream.  The gingernut base gives an extra flavour too.


Just about the perfect dessert for a lazy holiday weekend.  It keeps for 2-3 days in the fridge so you can just cut slices as they’re required (makes a refreshing change from all the chocolate!).  I know that I will also adapt this recipe to build it in a glass too – the creamy filling was light enough to work with that style presentation.


Ingredients

225g gingernut biscuits
115ml unsalted butter, at room temperature
300ml double cream
265g condensed milk
Juice of 2 lemons
zest of 1 lemon


Method

Blitz the gingernuts in a food processor.

Add the butter (no need to melt it if you’re using a processor) and blitz again until you have the texture of clumpy damp sand.

Press into the bottom of a 20cm loose bottomed flan dish and press a little up the sides too.

Refrigerate while you make the filling.

Whip the cream until it reaches the soft peaks stage.

Fold in the condensed milk, lemon juice and zest.

Spoon into the biscuit base and spread out.

Refrigerate for at least 2 hours before serving.

Bask in the glory of the wonderful thing you have created.


Eat. 

Sunday, 15 November 2015

Florentine biscuit bars


This recipe is adapted from the one in the BBC Good Food 25th birthday edition.  As soon as I saw the combination of florentines and shortbread I was sold!  I always associate florentines with Christmas as that’s the only time of year we ever used to have them; I don’t know whether they have any particular association with Christmas but, growing up, I remember they always used to form part of M&S’s confection/biscuit range.  M&S used to make a mixed box i.e. milk, dark and white chocolate.  Tactically I would always eat the milk first as I was the only one in my family to like white chocolate so I didn’t have to rush with those!


This is a good recipe to use up all the odds and ends of nuts a baker always seems to have in their cupboard; I buy a bag of nuts for a particular recipe and then don’t use them all.  I seem to have endless bags with about 20-30g of nuts left in them – this is where they get to step into the spotlight!


The cherries and pistachios look so pretty in amongst the nuts and chocolate.  You could make it look extremely festive by using red and green cherries…although I try not to think too hard about what they do to turn those poor cherries such a vivid green.  Some questions are best left unanswered.


Ingredients
For the base:
200g unsalted butter, at room temperature
100g golden caster sugar
200g plain flour
100g ground rice flour


For the topping:
25g unsalted butter
75g golden caster sugar
1 tablespoon plain flour
75ml double cream
50g flaked almonds
25g whole blanched almonds
75g chopped nuts of your choice – I used a mix of pistachios and chopped hazelnuts
75g glace cherries, halved
100g chocolate chips


Method
Line a 20cm square tin with baking papermaking sure the paper comes up high enough that you can use it to lift the finished bake up out of the tin.

Use a food processor to blitz together the butter and sugar.

Add the flour and rice flour and pulse until it starts to come together – don’t overwork it or your biscuit will be tough rather than crumbly.

Press into the base of the tin taking care to distribute the mix evenly.

Prick all over with a fork, cover with clingfilm and refrigerate for at least 30 minutes (or up to 2 days).

Preheat the oven to 180°C/fan oven 160°C/350°F/gas mark 4.

Bake the biscuit base for 25 minutes.

While the base is cooking start work on the topping: place the butter, sugar and flour in a pan large enough to take all the other topping ingredients and gently melt together stirring all the time.

When all the sugar crystals have dissolved add the cream and stir until smooth.

Stir in all the nuts and cherries.

Stir in the chocolate chips.   If you prefer, you can omit the chocolate chips and instead melt the chocolate and drizzle over the baked bars.

Spoon the hot nut mixture over the just-baked base and ensure it is well spread out.  Be gentle – a spatula or the back of a spoon works well.

Return to the oven and bake until the top is firm but retains a little squidge; this will take anywhere between 10-20 minutes but it can catch quickly so check every 5 minutes.

Leave to cool, in the tin, on a wire rack.

Cut into fingers.

If you didn’t add chocolate chips, decorate by melting 100g chocolate by your preferred method i.e. microwave or hob, and drizzle over the cold bake. (I like to do this after I’ve cut the fingers as then the chocolate isn’t disturbed with cutting)

Bask in the glory of the wonderful thing you have created.


Eat.

Sunday, 23 November 2014

Chocolate and chestnut tart – happy birthday to me!


It was some time ago that I ate the “best cake ever” (in my opinion).  It was a ‘maronischnitte’ from CafĂ© Sacher in Salzburg; a creamy chestnut delight.  My thoughts turned to it recently and I decided to take elements of it for my birthday cake…or birthday tart as it became.


Last weekend Mr CC and I had a spiritual experience: we visited Whole Foods on Kensington High Street.  Never before have we so wanted to dislike a shop yet fallen in love with it so quickly.  I was convinced it would be overpriced hydroponic mung beans being sold to yummy mummies but it wasn’t; it was glorious.  I could’ve spent a grotesque amount of money but limited myself to what I could hold in my hands, which turned out to be a pot of couverture chocolate, a pot of red onion and horseradish stuffing, and three bars of chocolate.  Not to be used in the same dish, I’m sure you’ll appreciate.


I used my couverture in the making of the ganache.  Apart from the pebble shaped pieces looking professional in the pan I didn’t honestly notice much difference in the way it handled. It may have melted a bit quicker, and for milk chocolate had a very strong rich cocoa taste but nothing really stood out as different.


For the chestnut element I used a tin of Clement Faugier chestnut spread as it was sweet and had vanilla added to it.  Ok, and I love the tin it comes in.  The tin has a lot of ribbing to it and a really busy, vintage-y design; I particularly love the fuzzy looking chestnuts.


A biscuit base (I wasn’t in the mood for pastry), chocolate ganache, sweet chestnuts and lashings of whipped cream.  Happy birthday to me!


Ingredients

For the biscuit base:
200g biscuits – hobnobs, digestives or shortbreads will all work
100g unsalted butter
1 tablespoon golden syrup or honey
For the ganache:
200ml whipping cream
1 teaspoon vanilla extract
200g milk chocolate – or dark if you prefer

For the topping:
250g sweetened chestnut puree
300ml whipping cream

To decorate: chocolate flake


Method

Place the biscuits, butter and golden syrup in a food processor and blitz until you have moist crumbs.  If you don’t have a food processor, place the biscuits in a bag and beat to crumbs with a rolling pin.  Then put in a bowl and add the butter (melted) and golden syrup.
Press the crumbs into a 23cm round loose bottomed tart tin (I used a disposable foil tin as we’re in the process of packing up the house for moving – it did make it harder to get out, so use a loose bottomed tin if you can).  Alternatively, you could use a 36cm x 12cm rectangular loose bottomed tart tin.
Refrigerate for at least an hour.
Now make the filling: Place the cream in a saucepan and add the vanilla.
Bring the cream to up to boiling point, without actually letting it boil, and then remove from the heat.
Break up the chocolate and add to the cream.
Let it stand for a couple of minutes before going in with your whisk and ensuring that the cream and chocolate are fully combined.
Leave to cool for 15-20 minutes.  Whisk occasionally to thicken up the ganache.
Remove the tart base from the fridge and pour the ganache into it.
Return to the fridge and leave to firm up – once it is firm, wrap it in clingfilm (if you try and do this straightaway you will get a mess and the clingfilm won’t pull away easily).
Spread the chestnut puree over the ganache.
Whip the cream and pipe over the chestnut layer.
Finish with some flaked chocolate.
Remove from the fridge 30 minutes before you wish to serve.
Serve in slices.
Bask in the glory of the wonderful thing you have created.

Eat.


Sunday, 23 March 2014

Chocolate sandwich cake


This recipe came about as I was thinking how I could make a classic Victoria sponge but dress it up differently enough so it felt like a new cake.  Making it into a chocolate cake was an obvious idea – most sponges will adapt to a chocolate sponge by replacing some of the flour with cocoa; as long as the flour and cocoa equal the original flour weight it should work.


The sponge manages to be rich and intensely flavoured whilst light in texture.  I opted for a three rather than four egg mix as the thick layer of ganache adds some height to the cake and I wanted a slice to fit on a plate!  I know the sensible option would’ve been to stick with a bigger sponge and just serve it on dinner plates but I had a rare moment of restraint and downsized my mix!


I love the classic method for making a Victoria sponge as it’s so simple: weigh the eggs in their shells and whatever they weigh is the amount for the other ingredients i.e. butter, sugar and flour (or flour + cocoa if making a chocolate sponge).  It guarantees a perfect sponge every time and is satisfyingly old fashioned.


The whipped cream is a lovely filling for the cake as it lightens what could otherwise be rather too much richness.  OK, you’ll know me well enough by now to understand that I don’t ever think anything can be too rich, but I’m trying to sound like a normal person and that’s the sort of thing I hear people say!


Ingredients

For the sponge:
3 eggs – weighed in their shells.  Mine were 218g therefore the remaining ingredients should all be 218g:
218g Unsalted butter
218g Caster sugar
180g Self raising flour – 180g +38g cocoa = 218g
38g Cocoa powder
2 tablespoons milk

For the ganache filling:
90ml double cream
175g milk or dark chocolate, or a mix of both, chopped
25g unsalted butter

For filling:
150ml double cream


Method

Preheat the oven to 180°C/fan oven 160°C/350°F/gas mark 4.

Line two 20cm round loose bottomed sandwich tins with baking paper.

Weigh the eggs in their shells and note the weight.  Mine weighed 218g.

Weigh out the butter so it equals the weight of the eggs and beat in a bowl.

Weigh out the same amount of sugar and add to the butter, beating until the mix is light and fluffy.

Beat in the eggs one at a time.

Fold in the flour and cocoa (which should, as a total, equal the egg weight).

Stir in enough milk to ensure the sponge batter is of dropping consistency.

Spoon into the prepared tins and level the surface.

Bake for approximately 20-25 minutes or until a skewer inserted into the sponges comes out clean.

Leave to cool in the tins for about 20 minutes, then de-tin and leave to cool completely on a wire rack.

You can make the cakes a day in advance and store in an airtight container overnight.

Now make the ganache: heat the cream until it is bubbling but not boiling.

Remove from the heat and stir in the chocolate.

Stir until you have a smooth melted chocolate, then stir in the butter.

Leave to cool and thicken – this may take a little while, so I put it in the fridge for about 30 minutes.

When it is thick enough to spread and hold its position, spread over the bottom layer of sponge cake.

Whip the cream until it holds in peaks and spread over the ganache.

Top with the other layer of sponge.

Bask in the glory of the wonderful thing you have created.


Eat.

Sunday, 9 March 2014

No-bake chocolate tart


Seriously – this recipe only requires the hob, no oven at all!  I know it’s hard to believe.  This is an incredibly rich and indulgent dessert and is so simple to make I predict it will become a much loved and trusted recipe to fall back on when you need to rustle up something special at speed.


The chocolate filling is basically a thick ganache that has been allowed to set in the fridge.  It is so creamy and rich that even I couldn’t manage a huge slice...trust me, I tried!


The biscuit base is similar to the traditional cheesecake biscuit base but with a twist – the addition of golden syrup; this adds a sweet note and works well with the unsweetened ganache.


This is one of my rare recipes where everyone in the family had a second slice – it seemed to suit all tastes, preferences, age groups!


Ingredients

For the biscuit base:
200g biscuits – hobnobs, digestives or shortbreads will all work
100g unsalted butter
1 tablespoon golden syrup or honey

For the ganache:
200ml whipping cream, plus a further 200ml for whipping and piping on top
1 teaspoon vanilla extract
100g dark chocolate
100g milk chocolate
To decorate: raspberries or chocolates – I used Twirl pieces


Method

Place the biscuits, butter and golden syrup in a food processor and blitz until you have moist crumbs.  If you don’t have a food processor, place the biscuits in a bag and beat to crumbs with a rolling pin.  Then put in a bowl and add the butter (melted) and golden syrup.

Press the crumbs into a 36cm x 12cm rectangular loose bottomed tart tin.  Alternatively, you could use a 23cm round loose bottomed tart tin.

Refrigerate for at least an hour.

Now make the filling: Place the cream in a saucepan and add the vanilla.

Bring the cream to up to boiling point, without actually letting it boil, and then remove from the heat.

Break up the chocolate and add to the cream.

Let it stand for a couple of minutes before going in with your whisk and ensuring that the cream and chocolate are fully combined.

Leave to cool for 15-20 minutes.  Whisk occasionally to thicken up the ganache.

Remove the tart base from the fridge and pour the ganache into it.

Return to the fridge and leave to firm up – once it is firm, wrap it in clingfilm (if you try and do this straightaway you will get a mess and the clingfilm won’t pull away easily).

Remove from the fridge 30 minutes before you wish to serve and decorate with whipped cream and either raspberries or chocolates.

Serve in slices.

Bask in the glory of the wonderful thing you have created.


Eat.

Sunday, 15 December 2013

Chocolate chestnut cupcakes


The greatest cake I have ever eaten was the maronischnitte (chestnut slice) from Cafe Sacher in Salzburg. It had everything one could hope for in a cake – it was light, creamy, indulgent, delicious, beautiful...and sitting in front of me, waiting to be eaten.  I was thinking of it only the other day and decided I needed to bake something with chestnut puree.


I teamed my ‘go to’ chocolate cupcake sponge with a tribute to the famous Mont Blanc dessert where the chestnut puree is piped in a mad wiggly way over the whipped cream.  The chocolate batter looks like a decadent ganache and it’s always a struggle not to eat too much of it on the way to the oven!


What a combination chocolate and chestnut is!  So rich and decadent – perfect for winter and perfect for Christmas.  The cream plays an important role too and lightens the texture and flavours. 


I did think about topping the cupcakes with a festive decoration but then asked myself the important question: what is a better topping for a chocolate cake than crumbled Flake?  The answer is, of 
course: nothing.  So I went with crumbled Flake.  To thine own self be true.


So here they are: my perfect Christmas cupcake.  Lovely to eat and a lot of fun to make.  Enjoy!


Ingredients

For the chocolate cupcake:
125g unsalted butter, at room temperature
125g caster sugar
2 eggs
100g self raising flour
3 tablespoons cocoa powder
2 tablespoons milk
50g chocolate chips – I used milk chocolate

For the chestnut cream:
284ml carton whipping cream
1 tsp vanilla extract
250g sweetened chestnut purée

To decorate: flake chocolate bars


Method

Preheat the oven to 190°C/fan oven 170°C/375°F/Gas mark 5.

Line a cupcake pan with 12 paper cases.

Beat together the butter and sugar until light and fluffy.

Beat in the eggs, flour, cocoa and milk.

When the mixture is smooth and well combined stir in the chocolate chips.

Spoon the batter into the paper cases.

Bake for 12-15 minutes or until a skewer inserted into the cupcakes comes out clean. Mine took 15 minutes.

Remove from the tin as soon as possible and leave to cool on a wire rack – removing from the tin is important, as the heat of the tin will mean that the cupcakes continue to (over)cook.

Now make the chestnut cream:  beat the cream and vanilla extract until just stiff.

Spoon or pipe a generous dollop on the top of each cupcake. If you pipe use a round rather than star nozzle.

Beat the chestnut purée to loosen.

Spoon into a piping bag fitted with a 3mm plain nozzle and pipe wiggly lines over the cream and meringue.  Don’t be tempted to use a thinner nozzle as the puree may have little bits of chestnut in it that will block the nozzle...as I found out to my cost!

Sprinkle crumbled flake over the top.

Refrigerate until 20 minutes before serving.

Bask in the glory of the wonderful thing you have created.


Eat.

Sunday, 20 October 2013

German bee-sting cake


I begin with a confession: traditional German bee-sting cake (Bienenstich) is usually a yeasted batter, but regular readers will know my fear/horror/dislike of using yeast, so when I found this non-yeasted version I made a bee-line for it (pun intended).


Like many traditional cakes the origin has been lost.  One legend claims that a bee was attracted to the honey topping and stung the baker who made it (I don’t like dissing legends but that one is quite lame, as legends go).  Another legend claims that 15th century German bakers successfully fended off raiders by throwing bee-hives at them and celebrated their victory by inventing this cake (this is more like it – I choose to believe this one!).


This cake uses popular flavours – honey, almond and vanilla – but has a twist in its method that makes them seem fresh and new.  When you spoon the cake batter into the tin you add a thick layer of runny honey on top over which you scatter a lot of flaked almonds.  The weight of all this suppresses the rise of the sponge but what your reward for this is a sticky spongy topping with lovely toasted nuts. It’s not dissimilar to the lovely bit of sponge that’s absorbed all the syrup on a steam sponge pudding.


As if all that wasn’t enough, the cake is then sliced and filled with vanilla custard cream.  I almost wept with happiness when I read the recipe!  I began with a confession but I must also end with another one – I messed up.  Big time.  To create the filling you make the custard and let it set in the fridge, then whip some cream and fold them together.  Stupidly, I added the custard to my whipped cream and let the kitchenaid whip them together which made it far too runny to sandwich the cake with.


Even more stupidly, asI was adding the custard to the mixer I thought, ‘I’ve done this before and it didn’t go well’.  Doh!  So, I didn’t cut the cake into layers; I left it whole and served my custard cream on the side.  Just as delicious but tinged with shame!  Please don’t let my idiocy put you off because this is a gorgeous cake.


Ingredients

For the cake:
125g unsalted butter, at room temperature
150g caster sugar
1 teaspoon vanilla extract
2 eggs
225g self raising flour
6 tablespoons milk
125ml runny honey, warmed
150g flaked almonds

For the filling:
50g caster sugar
2 tablespoons cornflour
3 egg yolks
125ml milk
75ml double cream


Method

Preheat the oven to 180°C/fan oven  160°C/350°F/gas mark 4.

Line a 20cm round springform tin with baking paper.

Beat together the butter and sugar until light and fluffy.  It won’t go pale and creamy because of the proportions, but you will notice it become lighter.

Beat in the vanilla.

Beat in the eggs, one at a time.

Beat in 1/3 of the flour followed by 2 tablespoons of milk.

Repeat until the flour and milk are fully incorporated.

Spoon into the prepared cake tin and level the surface.  Make a good attempt at levelling it so that the honey doesn’t pool into one side when you pour it on.

Pour the honey over the unbaked sponge and use the back of a spoon to gently guide it over the cake.

Sprinkle the almonds over the cake ensuring the cake and honey is completely covered.  It will look like a lot of almond.

Bake for approximately 45-50 minutes or until a skewer inserted into the cake comes out clean.

Leave to cool in the tin before turning out.

The cake can be made a day in advance and stored in an airtight container if you so wish.

Now make the filling: whisk together the sugar, cornflour and egg yolks until smooth.

Gradually whisk in the milk.

Pour into a saucepan and cook over a low heat, stirring all the time.

When the mixture is thick enough to coat the back of the spoon remove from the heat and pour into a bowl.

Press clingfilm onto the surface of the mixture to stop a skin forming. 

Refrigerate.

Whip the cream until firm peaks form before folding in the chilled egg yolk mixture.  Do this by hand – don’t be tempted to let the mixer do it – it will make it runny!

To serve, slice the cake in half horizontally and place one half on a plate.

Spread the custard cream over the cake and place the nut-topped layer of cake on top.

Dust with icing sugar if you desire.

Bask in the glory of the wonderful thing you have created.

Eat.

Sunday, 6 October 2013

Black forest gateau


 I have a theory (actually I have a few, but we’ll save those for other times) that thin chocolate always tastes better than thick chocolate.  I’m sure this is why we all pay large amounts of money for small amounts of chocolate come Easter time – thin chocolate tastes too good to resist!  It is why I have always been a fan of buttons – they are like portable versions of Easter eggs.  When one of my favourite chocolate companies, Lily O’Brien started making buttons, I obviously got excited!


My discovery of Lily O’Brien buttons coincided most fortuitously with Mr CC noting that I never made gateaux.  He is a big fan of gateaux and can put creamy cakes away in a far greater capacity than a non-creamy cake.  I think it might have been The Hairy Bikers we saw making a black forest gateau and we both got nostalgic for the time when, being children of the 1970s, a Sara Lee defrosted black forest gateau was a Sunday highlight.


I decided to use the dark chocolate buttons melted and added to the cake batter, and milk chocolate buttons for decoration.  Normally I find dark chocolate too bitter to eat on its own but these buttons had the dark richness without a bitter edge.  Solves the problem of what to do with the kilo bags.....! (Don’t you just love it when the only option is to buy a kilo bag!)


For an impressive dessert this is actually pretty simple – the only baking requirement is the sponge and that is a very straightforward recipe.  I piped the cream for decoration around the edge,  in an attempt to look neat, but if you are handy with a palette knife it would look just as good.


I know the black forest gateau is derided as naff but I cannot fathom why when it tastes sooooo good.  The chocolate sponge moistened with kirsch, the cherries, cream and more chocolate...if that’s naff then bring me my metallic shell suit cos I don’t want to be cool!


Ingredients:

For the sponge:
175g unsalted butter, softened
175g golden caster sugar
3 eggs
100ml milk (whole or semi skimmed)
200g self raising flour
1 teaspoon baking powder
200g dark chocolate (I used Lily O’Briens buttons)
1 teaspoon vanilla extract

To assemble:
900ml double cream
1 jar of cherries in kirsch – mine were Opies, and I found them in Waitrose
Chocolate buttons or curls (I used Lily O’Briens milk chocolate buttons
)


Method:

Preheat the oven to 180°C/fan oven 160°C/350°F/Gas mark 4.

Line a 20cm round springform tin with baking paper.

Cream the butter and sugar together until they are pale and fluffy. Don’t skimp on this stage – give the mixture a good beating.

Add the eggs, flour, baking powder and milk to the bowl and beat until thoroughly combined. The mix will look deliciously creamy.

Melt the dark chocolate either in the microwave (it will require approximately a 1 minute 30 seconds, in 30 second bursts) or in a bowl above a pan of simmering water on the hob.

Stir the melted chocolate into the batter.


Pour into the prepared tin and bake for approximately 40-50 minutes or until a skewer comes out clean. Mine took roughly 50 minutes.
Allow to cool in the tin for 20 minutes before removing and leaving to cool totally on a wire rack. Once cool, the cake can be stored in an airtight container for a day or so before assembling the cake.

When you wish to assemble the gateau cut the sponge into three even layers.  It’s important the layers are flat, so you might need to sacrifice any dome on the top of the sponge. (NB. ‘sacrifice’ means cut off and eat!)

Whip the cream until it is almost at stiff peak stage, but not quite.
Take a disc of cake and place on a plate.   Brush over some of the kirsch from the cherry jar – how much depends on you and how boozy you want it to taste.

Pipe a scant ¼ of the cream over the disc and dot with some cherries.

Place the second disc of sponge on top and repeat the kirsch, cream and cherries.

Place the final disc of sponge on the top.

Pipe the remaining cream over the top and sides of the gateau.

Decorate with chocolate around the sides and some more cherries on the top.

Refrigerate so the cream firms up and you will be able to cut nice slices.  Take out of the fridge about 10 minutes before serving.

Bask in glory at the wonderful thing you have made.

Eat.

