Monday 29 June 2009

CAFTA

It’s been a while since the last CAFTA (Cake’s Achievement in Film and Television Arts) award was made but thanks to the CCBF’s (Caked Crusader’s Boyfriend) enthusiastic appreciation of the A-Team we have this delight!

If you are of a certain age, Saturday nights of your childhood meant only one thing – The A-Team. Fact fans will want to know that this cake features in an episode called “Till Death Do Us Part” from Season 1. Shockingly (I say ‘shockingly’ because it forces me to admit I am old) this episode first aired in April 1983.

The award is for “Crime fighting cake” and goes to this enormous cake. Here it is being put into position:


Who baked it? Chef Murdock no less. We know he’s a chef because he has a floppy hat and a drawn on moustache. We might question whether he’s actually a chef when BA reveals the icing on the cake is made from shaving foam. But he is called Howling Mad Murdock so it was only to be expected:


But why would anyone want such a big cake when there’s a perfectly acceptable cake already on the table? (Yes, that is Murdock in a wedding dress)


Perhaps because the smaller cake couldn’t accommodate.....


....who guessed it? BA was in the cake! He bursts free calling the congregation “suckers”. Charming.


The cake is then used as a weapon. Although, if I ever get to pick, this is the way I’d want to go:


It's pure A-Team; all those bullets flying around yet the baddies only get hit with some cake!

Sunday 28 June 2009

Strawberry and custard cupcakes


With the theme of then next Iron Cupcake London being summer fruits my thoughts turned to what I might enter if I was allowed to, which I'm not. This recipe, while quite simple, is delicious and the combination of strawberry and custard, rather than the more common strawberry and cream, was a big hit with everyone who tasted it.


The original recipe stated that you should glaze the finished cupcakes with melted apricot jam. I can see this would add a nice shiny professional looking finish but when you have something as juicy and delicious as a strawberry I like to taste it; I often find that apricot jam glazes overpower the fruit.


You could of course use any fruit to top these little cupcakes, but what with it being slap bang in the middle of Wimbledon fortnight strawberries seemed appropriate. I have far more interest in Wimbledon this year as I have a lot riding on it – the CCBF (Caked Crusader’s Boyfriend) stated (misguidedly if you ask me)that Andy Murray would win the title. I may have been slightly dismissive of this...perhaps suggesting that Roger Federer could beat him with one arm tied behind his back. This resulted in the CCBF challenging me to a bet – whoever of our choices finishes higher wins. The bet has an extremely high stake – a fridge magnet of the winner’s choice. Go Roger!!!


Ingredients:
For the cupcakes:
185g unsalted butter, at room temperature
170g caster sugar
2 teaspoons vanilla extract
3 eggs
125g self raising flour
60g plain flour
125ml milk

For the filling and topping:
125g thick custard
12 small strawberries
Optional: 160g apricot jam to glaze

How to make:

- Preheat the oven to 180°C/fan oven 160°C/350°F/Gas mark 4.
- Line a cupcake pan with 12 paper cases, have a second tin on standby with paper cases as I found the mix made enough for several more cupcakes.
- Beat the butter, sugar and vanilla together until creamy and light.
- Beat in the eggs one at a time.
- Weigh out the flours and measure out the milk.
- Fold half the flour in, followed by half the milk. Repeat.
- Spoon the mixture into the paper cases. Fill each case about 2/3 full.
- Bake for approximately 15 minutes or until a skewer inserted into the centre comes out cleanly.
- Leave to cool on a wire rack.
- When cool cut the centre out of each cupcake – don’t go right through to the bottom; you’re aiming to create a little bowl made of cupcake.
- Fill each cavity with as much custard as possible without it spilling out the top.
- Sit a strawberry on top of the custard.
- If using the glaze, melt the jam and then brush it over the top. I didn’t bother.
- Refrigerate until about 20 minutes before you want to serve.
- Bask in glory at the wonderful thing you have made.
- Eat.

Fresh cherry cake with a hint of cinnamon


Summer is now in full swing with scorching temperatures in England this weekend. Unfortunately, the heat is coupled with high humidity which always makes baking a little trickier but us mad-keen bakers soldier on!


If asked to name a summer fruit I’m sure most of us would answer “strawberry” but in terms of sheer flavour and juiciness not much can beat a big, dark cherry. Perhaps I was a little extravagant in using Bing cherries, as they are quite expensive, but I do believe that – for a simple cake like this – quality ingredients are the key to flavour.


Stoning the cherries makes the cake much more pleasant to eat. I only use my cherry stoner about once a year but, when it’s needed, it truly is worth its weight in gold in terms of timesaving. I made two of these cakes thus had to stone 700g of cherries. It took less than 10 minutes. I do find that it splatters a bit though and my work top (and me) ended up looking a bit like the CSI team should be called in!


Ingredients:
For the topping:
25g plain flour
¼ teaspoon ground cinnamon
25g golden caster sugar
25g unsalted butter, chilled

For the cake:
350g ripe cherries, stoned
280g self raising flour
½ teaspoon ground cinnamon
100g golden caster sugar
2 eggs
8 tablespoons milk, plus more if needed
170g unsalted butter, melted

To serve: a dusting of icing sugar and thick spooning cream

How to make:
- Start by making the topping. Place all the ingredients into a food processor and blitz until you have crumble. (You can do this by hand with the old rubbing the butter into the flour method).
- It was very hot when I made this and the crumble started to form into big lumps. Don’t panic – refrigerate until needed then it will crumble between your fingers on to the cake.
- Preheat the oven to 180°C/fan oven 160°C/350°F/Gas mark 4.
- Line a 20cm round springform tin with baking paper.
- Stone your cherries.
- Melt the butter and leave to one side.
- Combine the flour, cinnamon and sugar into a bowl and make a well in the centre.
- Add the egg, milk and melted butter and whisk until well combined. You’re looking for a heavy, thick batter that will drop from the spoon/whisk. I needed to add a little extra milk to achieve this.
- Spoon the batter into the prepared tin and level the surface.
- Scatter the cherries over the top and press lightly into the batter.
- Take the crumble topping from the fridge and using your fingers crumble the lumps into finer pieces and scatter evenly over the cherries.
- Bake for approximately 35 minutes or until a skewer inserted into the centre comes out clean.
- Leave to cool in the tin until you can comfortably handle the tin.
- Turn out onto a wire rack and leave to cool completely.
- Serve at room temperature with thick cream.
- Bask in glory at the wonderful thing you have made.
- Eat.

Sunday 21 June 2009

Rum and raisin slices


If there is a flavour combination the CCD (Caked Crusader’s Da) cannot resist it’s rum and raisin, thus for Father’s Day this seemed an obvious choice.


I adapted the recipe – originally it was for sultanas soaked in Irish whiskey but as I don’t like whiskey......can you see where this is going?


The CCD loved this cake and wanted it noted that he had three pieces of it. Normally he has a piece of cake but never seconds. This time he had seconds and thirds and kept some slices back for tomorrow. In my baking career this has never happened so it is truly an event worth documenting! In fact, I felt like the Man from Del Monte had just said "yes"!


These are a very simple bake and the only planning involved is making sure you soak the fruit for long enough before you make the cake. I used a mixture of golden and brown raisins and soaked them in rum for about 36 hours. By this time they were plump, juicy and sparkling like jewels.


Ingredients:
For the raisins – make well in advance:
150g raisins
100ml dark rum

For the cake:
130g unsalted butter, at room temperature
130g golden caster sugar
2 eggs, separated
130g self raising flour
2 tablespoons Demerara sugar


How to make:

- At least 24 hours before you plan to bake the cake, soak the raisins in the rum. Cover the bowl tightly (I used clingfilm) and, whenever you pass the dish, peel back the clingfilm and give the raisins a stir.
- Preheat the oven to 180°C/fan oven 160°C/350°F/Gas mark 4.
- Line the base and sides of an 18cm square tin with baking paper.
- Beat the butter and sugar together until creamy and light.
- Beat in the egg yolks one at a time.
- Stir in the raisins and rum.
- In a separate bowl whisk the egg whites until you reach the stiff peak stage.
- Fold the egg whites into the cake mix in three batches alternately with batches of the flour.
- Spoon into the tin and level the surface.
- Sprinkle the Demerara sugar over the top and bake for 25 minutes or until a skewer inserted into the cake comes out cleanly. Mine took exactly 25 minutes.
- Leave to cool in the tin for 15 minutes before turning out and letting cool completely.
- Cut into fingers.
- Bask in glory at the wonderful thing you have made.
- Eat.

Toffee apple and almond tart


Today is Father’s Day so my baking took on a CCD-friendly (Caked Crusader’s Da) twist. The CCD likes toffee, apples and, unsurprisingly, toffee apples so this tart looked a winner for him. I adapted the recipe from one of Richard Corrigan's so knew it would be good!


None of the stages of this recipe are difficult but there are a lot of stages so make sure you have enough time to make it. The pastry is buttery and delicious. I thought it was going to be tricky to work with as it was a sticky dough but it was incredibly well-behaved; it didn’t tear at all. Look at the buttery colour of it:


The bed of almond sponge puffs up around the apples when it cooks and takes on the juicy flavour of the dulce de leche. It really is a treat for the tastebuds. I think this tart was professional standard – you’d be delighted to get this in any restaurant or patisserie.


I used apples from the fruit and veg box kindly provided by Abel & Cole. As these were sweet red apples, I mixed them with some Granny Smith’s to increase the tartness of the apples.


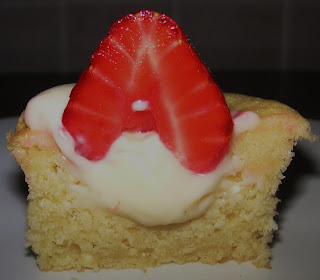
As always I like to provide serving suggestions.....


....and a ‘spoon shot’:


Ingredients:
For the pastry:
250g plain flour
125g unsalted butter, straight from the fridge and cubed
50g caster sugar
2 eggs

For the almond cream:
100g unsalted butter
100g caster sugar
2 eggs
100g ground almonds
25g plain flour

For the apple layer:
4 dessert apples, peeled and cut into slices (I cut each apple into 8 wedges)
1 tablespoon caster sugar
4 tablespoons dulce de leche

For the topping:
35g unsalted butter
15g plain flour
65g Demerara sugar
25g ground almonds
Handful of flaked almonds

To serve: custard or thick spooning cream


How to make:
- Start by making the pastry. Place the flour, butter and sugar into a food processor and blitz until you have breadcrumbs. (You can do this by hand with the old rubbing the butter into the flour method)
- Add the eggs and blitz again.
- Tip out onto a sheet of clingfilm and, with a little extra flour if necessary, bring the mixture into a dough.
- Wrap in clingfilm and chill for at least 30 minutes.
- Preheat the oven to 150°C/fan oven 130°C/300°F/Gas mark 2.
- Roll out the pastry between two sheets of clingfilm until it is large enough to line a 25cm loose bottomed flan tin. There is no need to grease the tin as the pastry is so buttery. I found the pastry behave really well and there was no tearing thus no patching needed. Leave any surplus pastry hanging over the edge
- Line the pastry with a sheet of baking paper and fill with baking beans and bake blind in the oven for 45 minutes. This sounds a long time but the light is very low so the pastry won’t burn.
- Remove the paper and beans and, when cool enough to touch, trim away the excess pastry.
- Increase the oven to 180°C/fan oven 160°C/350°F/Gas mark 4.
- Now make the almond cream: cream together the butter and sugar until pale and fluffy. Beat in the eggs, then the ground almonds then the flour. Put to one side.
- Now cook the apples. Place the apple wedges in a pan and cook over a high heat so that they soften and release some juice.
- Add the sugar and ensure that the apples are all coated. They will start to caramelise.
- When the apples are soft and golden, but not falling apart, remove the pan from the heat and leave to cool a little.
- Now make the topping: rub the butter into the flour until you have breadcrumbs.
- Stir in the sugar and almonds.
- When the apples are cooled stir in the dulce de leche.
- Now assemble the tart for final baking. Spread the almond cream into the pastry case. It will look like there is too much but, with careful spreading it will easily fit.
- Arrange the apples on top making sure you scrape all the lovely dulce de leche out of the pan as well.
- Sprinkle the topping over the apples along with a handful of flaked almonds.
- Bake in the oven for 30-40 minutes, making sure the topping doesn’t burn. Mine took just over 40 minutes.
- Serve either warm with custard or at room temperature with cream.
- Bask in glory at the wonderful thing you have made.
- Eat.

Friday 19 June 2009

Iron Cupcake London – prizes


The second ICL challenge takes place on Monday 6th July, and the theme is “summer fruits”. Just to remind you all of the details:

Are your cupcakes up to the challenge? Are you worthy of the Iron Cupcake Winner’s rosette and the acclaim that comes with it? There’s only one way to find out…..

ICL Challenge II: Summer Fruits
Make one batch (i.e. 12) of cupcakes using summer fruits in any way you wish…

On the night everyone will have a say in declaring the winner, who walks away with the ICL Winner’s rosette plus a cupcake themed goody bag (presented in the much-coveted ICL bag!) see details below.

Event details:

Monday 6 July 2009

6.00pm – 8.30pm

Barrowboy & Banker pub, 6-8 Borough High Street, SE1 9QQ

Entry fee: £5 – even if you don’t wish to enter the competition why not come along to taste the cupcakes? (Entry fee includes tea or coffee)

For further information visit:

I can now reveal the prizes – ta da!


The main prize is a fabulous cupcake courier that allows you to transport, not 12, not 24 but 36 cupcakes!!! It is an amazing item and special thanks must go to the lovely people at The Cupcake Courier who donated the prize.


Of course, if you’re in London you can win the cupcake courier at ICL, if you’re not in London then hot foot it over to The Cupcake Courier website and buy yourself the Rolls Royce of cupcake transportation. When they’ve travelled in one of these, your cupcakes will never let you put them in Tupperware or an old biscuit tin again!


Along with our terrific main prize you’ll also have noticed cupcake magnets, lip balms and a cupcake candle. All of these will go to the winner and also the first runner up.

See you on the 6th July......

Sunday 14 June 2009

Summer fruit vanilla cake


This is a recipe that gives you options: you can leave the fruit out and have a lovely plain vanilla cake; you can vary the fruit depending on what’s in season; you can replace the fruit with something else – chocolate and nuts, perhaps? You can dress it up with whipped cream or buttercream; you can leave it whole or cut it through to make into a layer cake.


What I’m trying to communicate is that this is one of those staple recipes that every good baker should have in their armoury. I see it as the equivalent of that perfect pair of black trousers you can dress up or down depending on the occasion and they’ll always look good.


After seeing some beautiful blueberries and raspberries I decided to use them in my version of this cake. I love the colour combination of the purply-blue and red plus both fruits pack a punch which adds depth of flavour to the sponge.


The cake uses yoghurt which gives a denser –but not heavy - texture to the sponge. The vanilla syrup, drizzled over the cooling cake ensures that each bite of this cake will be succulent and fragrant with vanilla.


Ingredients:
For the cake:
250g unsalted butter, at room temperature
250g golden caster sugar
2 teaspoons vanilla extract
5 eggs
85g plain flour
100g full fat yoghurt
250g self raising flour
3 tablespoons milk
200g raspberries
150g blueberries

For the syrup:
50g golden caster sugar
50ml water
Seeds from half a vanilla pod

How to make:

- Preheat the oven to 160°C/fan oven 140°C/315°F/Gas mark 3.
- Line the base and sides of a 20cm round springform tin with baking paper.
- Beat the butter, sugar and vanilla until smooth and fluffy.
- Beat in the eggs, one at a time, adding a little of the plain flour if the mixture starts to curdle.
- Beat in the yoghurt.
- Combine the two flours then very gently beat into the mixture. Stop as soon as the flour is combined.
- Gently stir the fruit into the batter and ensure that it is distributed nicely throughout the batter.
- Spoon into the prepared cake tin and bake for approximately 1 hour 20 minutes or until a skewer inserted into the centre of the cake comes out clean. Mine took 1 hour 40 minutes.
- Now make the syrup: heat all the ingredients in a saucepan and stir until the sugar has dissolved. Leave to cool.
- Once the cake is out of the oven leave it to cool for 30 minutes before making holes right the way down (use a skewer) and pouring the syrup over. It’s best to do this a little at a time and wait for it to be absorbed rather than swamp the cake all at once.
- Leave to cool completely then store in an airtight tin.
- Serve with cream and fruit or however you wish.
- Bask in glory at the wonderful thing you have made.
- Eat.

Milk chocolate truffle torte


Now if you’re anything like me (lucky you!), you’ll be looking at this thinking “hmm, looks nice but it’s not the dessert I’ve been waiting all my life to eat”. Please reassess this view!

I don’t know how it does it, but this truffle torte manages to be more chocolaty than chocolate. Don’t be fooled by the slimness of the finished torte, it contains 3 bars of chocolate and almost half a litre of cream. Admit it, you’re a little more interested now than you were at the start....


Sometimes a dish can take ages to prepare yet not really look like it has when you serve it up; somehow all that effort isn’t reflected in the final plate. This is the exact opposite, for the cake takes only about 15 minutes to prepare for the oven yet tastes like you’ve been slaving over it for hours.

The texture is just what you’d find in the centre of a big, satisfying truffle; consequently it is rather rich...and if I advise small portions you know it must be a pretty full-on experience!


One warning – the batter is so runny it’s like chocolate milk. Don’t skimp on lining the tin with foil or you may see all your beautiful creamy chocolate pooling at the bottom of the oven! I prepared the inside of the tin by cutting foil like this:


It gave a nice snug fit to the inside of the tin:


Even though I also lined the outside of the tin it didn't prevent a small amount of leakage.

Ingredients:
450ml whipping cream
300g milk chocolate, broken into pieces
2 eggs
2 egg yolks
100g golden caster sugar
1 teaspoon vanilla extract
2 tablespoons plain flour

To serve: icing sugar, crème fraiche or cream

How to make:
- Preheat the oven to 140°C/fan oven 120°C/275°F/Gas mark 1.
- Line one 20cm round springform tin with foil, ensuring it’s as watertight as possible.
- Bring the cream to the boil in a saucepan.
- Remove from the heat and add the chocolate. Leave to cool, whisking occasionally to ensure the chocolate is melting.
- While that’s happening, place the eggs, egg yolks and sugar into the food processor and blitz until pale, fluffy and doubled in volume. This will take approximately 8 minutes.
- Add the chocolate mixture and vanilla to the fluffy egg and blitz again.
- Add the flour and blitz again.
- Pour into the prepared tin and bake for approximately 1 hour or until the cake feels set when pressed. If it’s shrinking from the side of the tin that’s another good indication that it’s ready.
- Leave to cool in the tin before covering and refrigerating overnight.
- Remove from the fridge shortly before serving and dust with icing sugar.
- Serve with either crème fraiche or cream.
- Bask in glory at the wonderful thing you have made.
- Eat.

Sunday 7 June 2009

Strawberry buttermilk cake


English strawberries are really coming into their own right now – it’s hard to imagine a tastier, better looking fruit.

I have often used strawberries on top of a pastry base but can’t recall baking with them so I was intrigued as to how they would taste in this recipe. The short answer is: delicious!


As the cake bakes for a long time at a medium heat the strawberries break down into a fruity, syrupy consistency that creates an almost ripple-like effect in the cake. The flavour also intensifies to such a degree that they were similar to very sweet rhubarb. I now understand why rhubarb and strawberries are seen as a classic combination. This slice was photographed the day the cake was made – you can see how some strawberries retained their shape, whereas others collapsed into syrupy goodness:


The next day, the cake firmed up and became almost scone-like:


The crumble topping adds a delicious light, crumbly, biscuity crust to the surface which is lovely to push your fork through.


You can serve this warm with custard but I went for room temperature with clotted cream. I mean – come on! Strawberries have to be served with cream...we’re in England for goodness sake!


Ingredients:
For the crumble topping:
40g plain flour
50g unsalted butter, chilled and cubed
95g soft brown sugar

For the cake:
125g unsalted butter, at room temperature
2 eggs
225ml buttermilk
250g self raising flour
225g caster sugar
375g strawberries, washed and hulled, halve any large ones

How to make:
- Preheat the oven to 180°C/fan oven 160°C/350°F/Gas mark 4.
- Line one 20cm loose bottomed square tin with baking paper.
- Start by making the crumble topping: rub the butter into the flour until you have the consistency of fine breadcrumbs.
- Stir in the sugar.
- I then put the crumble in the fridge until needed as this stops it becoming soft and retains the lovely crumb texture.
- Put the butter, eggs and buttermilk into the food processor and blitz until smooth and well combined.
- Add the flour and sugar and blitz again until well mixed.
- Transfer all the mixture into a large mixing bowl and gently stir in the strawberries.
- Spoon the batter into the prepared tin and sprinkle the crumble over the top.
- Bake for approximately 50 minutes or until a skewer inserted into the centre of the cake comes out cleanly. Mine took 55 minutes.
- Leave to cool in the tin before removing as the strawberries make the cake quite fragile when warm.
- Serve either warm with custard/ice cream or at room temperature with your choice of cream.
- Bask in glory at the wonderful thing you have made.
- Eat.