Showing posts with label icing. Show all posts

Sunday, 26 July 2015

Chocolate yoghurt cake


Sometimes, you don’t ‘want’ or ‘fancy’ cake…you NEED it.  I really needed chocolate cake this weekend; nothing fancy, just a handsome piece of sponge with a bit of icing.  This cake hit the mark – packed with chocolate flavour, it has a lovely light crumb and a simple topping that adds a rich mousse-like texture.


The inclusion of yoghurt created a light sponge; yoghurt’s impact on a cake fascinates me because it makes the cake light and airy but also adds moisture and the two seem like they should be mutually exclusive.  I’m no scientist; I just know it works!


The sponge is flavoursome enough that it could standalone.  It would also be perfect made into a loaf cake, cupcakes or individual sponges for a pudding.  It’s one of those recipes that can be adapted easily and should be filed away in your armoury of ‘awesome bakes’. 


Many years ago, I saw Ina Garten demonstrate a simple tip when you’re icing the cake on its final serving plate/stand.  Place four squares of foil on the plate, then the cake on top.  The foil will catch any drips of icing and you can them whip them away leaving a clean plate.  I use it all the time and always marvel that it’s the simplest tips that are always the most useful!


Served warm for dessert with custard or ice cream, or as a good slab of sponge with a cup of tea, this one is a crowd pleaser.  It’s not too sweet but, at the same time, it’s really cocoa-y without having the grown up bitterness that can sometimes go with that.  Even a bit of whipped cream and a few berries would make it look a rather smart dessert. 


Ingredients

For the cake:
175g unsalted butter, at room temperature
275g caster sugar
1 teaspoon vanilla extract
3 eggs
175g Greek style yoghurt
225g self raising flour
50g cocoa powder
1 teaspoon bicarbonate of soda

For the icing:
25g unsalted butter
25g cocoa powder
3 tablespoons milk, plus extra if needed
175g icing sugar


Method

Preheat the oven to 180C/fan oven 160C/350F/gas mark 4.

Line a 20cm round springform tin with baking paper.

Start by making the cake: beat together the butter and sugar until smooth and well combined.  It won’t become really light and fluffy because of the ratios involved.

Beat in the vanilla.

Beat in the eggs one at a time.

Beat in the yoghurt.

Fold in the flour, cocoa and bicarbonate of soda and mix until just combined – don’t overwork it.

Spoon into the prepared tin and level the surface.

Bake for approximately 35-45 minutes or until a skewer inserted into the cake comes out clean.  It’s best to start checking at around the 40 minute mark but don’t worry if it takes longer.  Mine took just over 50 minutes.

Leave to cool in the tin for approximately 20 minutes before de-tinning and leaving to cool completely on a wire rack.

Now make the icing: place the butter and cocoa powder in a saucepan and melt together over a gentle heat, stirring all the time.  It will look a bit icky at this point!

Remove from the heat and beat in the milk and icing sugar; add more milk as required to reach a thick, mousse-like texture.

Put to one side while you prepare the cake for icing.

Place four squares of foil on the serving plate and sit the cake on these so that they will catch the icing drips and keep the plate clean.

Spoon or pour the icing slowly over the cake letting it run down the sides.

When the icing has set a little, gently pull out the foil from under the cake – and voila! A clean plate.  If the icing is very runny pop the cake in the fridge for 10 minutes to make it set.
Serve in generous slices.

Bask in the glory of the wonderful thing you have created.


Eat.

Sunday, 30 June 2013

Cherry almond sponge cake


I do love a good sponge; it has always been a weakness of mine.  This week I decided to keep it really simple – a lovely sponge with thick white icing.  Given it’s turned out to be the hottest weekend of the year so far, it was a good choice – definitely not the time to be making delicate buttercreams!


I toyed with calling this a bakewell sponge, but it is more bakewell influenced in that it borrows the idea of almond, cherry and icing.  There is something about adding almond to a sponge that elevates it to a higher level of delight – particularly the day after baking when all the nutty richness has been released.


I have finally realised – embarrassingly late, perhaps – how much better hot water is than cold when making a white icing/glaze.  Not sure why, but my thought would be that the hot water (I used boiled, straight from the kettle) melts the sugar on impact giving a smoother finish, and then sets quicker.  Am I imagining it, or do you agree?


This recipe is similar (but not identical) to a previous bakewell sandwich cake that I made.  In that recipe I made the cake in two sandwich tins and used jam and icing.


Ingredients

For the cake:
265g unsalted butter, at room temperature
265g caster sugar
4 eggs
265 self raising flour
½ teaspoon baking powder
35g ground almonds
1 teaspoon almond extract
5 tablespoons soured cream

For the icing:
200g icing sugar
2-3 tablespoons hot water, or enough to make a thick, but pourable, icing

To decorate: glace cherries


Method

Preheat the oven to 180°C/fan oven 160°C/350°F/gas mark 4.

Line a 20cm square pan with baking paper.  If you prefer, you could use a 30cm x 20cm traybake tin but you will get a ‘flatter’ sponge.

Beat together the butter and sugar until pale, light and whippy.  It should look almost like whipped cream.

Beat in the eggs one at a time.  If the mixture looks like it might curdle beat in some of the flour.

Stir in the flour, baking powder, ground almonds, soured cream and almond extract.

Spoon into the prepared tin and level the surface.

Bake for approximately 45 minutes or until a skewer inserted into the cake comes out cleanly.  Start checking the cake for ‘done-ness’ after 40 minutes.  NB, if you are using the shallower traybake tin only bake for approximately 30 minutes before checking.

Leave to cool for 10 minutes in the tin; the cake will settle a little.

Remove from the tin and leave to cool completely on a wire rack.

Now make the icing: beat together the icing sugar and water until you have a thick but pourable glaze.  Always add the water gradually – it’s easy to add more, but harder to correct a too runny consistency.

Pour the glaze over the cake and leave to set.

Before fully set decorate the top of the cake with glace cherries.  I chose to leave them whole so they stood proud from the icing.

Bask in the glory of the wonderful thing you have created.


Eat.

Sunday, 24 June 2012

History corner – brown cake and patriotic biscuits


Time for a delve into history corner and, for this visit, I’m baking from “Isobel’s Home Cookery” from 1916.  Isobel’s Home Cookery was a monthly publication and, at the end of the year, a bound volume was produced, which is what I have.


1916 was slap bang in the middle of World War 1 and, while Britain didn’t have rationing until the very end of the war, care was taken to avoid waste and flamboyance in recipes.


I chose brown cake because it seemed such an unglamorous name for what is effectively a chocolate sponge sandwich.  Unusually, the recipe requires you to make chocolate milk and this provides not only the flavour, but also most of the moisture as the recipe uses only one egg.  For a modern version of this cake I would expect three eggs.


The cake rather divided my eatership –some finding it too dense and cloying in texture.  Interestingly, they don’t like brownies either for the same reason.  I do like brownies and think that this cake is similar to a squidgy brownie...which is no bad thing, but don’t make it expecting a light crumbly sponge.


The icing is particularly austere in that it contains cocoa, sugar and water.  No buttercream here!  Surprisingly, it tastes very good and rich – a cocoa hit for the chocolate lovers out there.


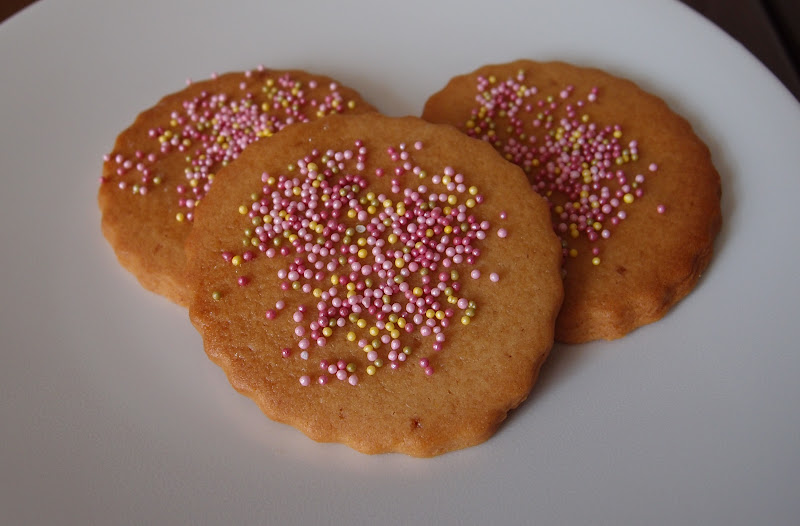
The patriotic biscuits are a light gingerbread which manages to be crunchy and chewy at the same time.  The only patriotic element seems to be using red, white and blue sprinkles but, as I didn’t have any, I opted for pastel shades.


What I love about old recipe books is the insight they give you into ordinary people’s lives and views; the hot issues and health scares of the day.  Here are some of my favourite examples:


I had never considered that the piece of cheddar lurking in my fridge was plotting to do me harm!


In an age where we’re bombarded with statistics on childhood obesity and TV chefs are launching crusades about poor school lunches, I find it refreshing (and a tiny bit comforting, if I’m honest) that there was an age when mothers were advised to give their children sugar, especially in cake form.


This is less than 100 years ago but look at how old age is portrayed.  I’d love to know how old the lady was in this photo and then compare her to women of her age nowadays – I think we’d be shocked.


This is one of my favourites.  March is the month when youngsters are apt to get ‘out of sorts’.  I’m sure with this Mrs Danvers-esque woman bringing them trays they’ll be motivated to get well and out of her clutches in no time!


While most of the book focuses on running the home and looking after the family, some sections are rather more poignant, like this one about husbands coming home from the front.  Wives are recommended to give their husband food they wouldn’t get in the trenches and pastry is suggested as an achievable luxury.


There is a section on cakes and biscuits you can always have on hand so that you can offer unexpected visitors something a little more exciting than bread and butter.  What I love is the dress the lady is wearing.  If I have unexpected visitors (which I don’t because anyone who knows me knows better than to turn up unannounced!) they will find me in slippers, jogging bottoms and a t-shirt.  This lady looks rather more groomed!


This boy is pale and thin because he has the same kind of sandwiches every day!  Not fair.  I had ham sandwiches practically every day at school – how come the affliction of thinness passed me by?  I think I will stick with ham sandwiches rather than the suggested raisin and nut sandwiches.  What next – ham flapjacks?


I end on a note of caution and advice – feed up when you feel run down.  Be safe out there people......


Ingredients for the brown cake

For the cake:

285ml / ½ pint milk
45g / 1 ½ oz cocoa, mixed with enough cold water to make it into thin cream – I added 8 tablespoons
115g / 4oz unsalted butter, at room temperature
170g / 6oz brown sugar
1 egg
½ teaspoon vanilla extract
340g / 12oz self raising flour

For the icing:

Equal quantities of cocoa and icing sugar – I used 8 tablespoons of each
Enough boiling water to make a glossy icing

Method for the brown cake

Preheat the oven to 180°C/fan oven 160°C/350°F/gas mark 4.

Line two 20cm round loose bottomed sandwich tins with baking paper.

Place the milk in a small saucepan and bring the milk to the boil.

While the milk is heating, mix together the cocoa with enough cold water to make it the consistency of thin cream.  I found this to take 8 tablespoons.

When the milk boils, remove from the heat and stir in the cocoa.

Put to one side to cool.

In a mixing bowl beat together the butter and sugar until smooth and well combined.

Beat in the egg and vanilla.

Stir in half the flour along with half the cocoa milk.

Repeat with the remainder.  Don’t worry – the batter will be runny.

Ladle the batter into the two prepare tins.

Bake for 20-25 minutes or until a skewer inserted into the cakes comes out clean.

Place the tins on a wire rack to cool and de-tin the cakes as soon as you can safely handle the tins.

Leave the sponges to cool completely before storing in an airtight container.

Now make the icing: Place an equal quantity of cocoa and icing sugar into a bowl – I used 8 tablespoons of each as I only planned to sandwich the cakes, not decorate the top.

Add boiling water, a teaspoon at a time, and beat into the dry ingredients.

Keep adding tiny amounts of boiling water – the icing should be glossy and thick.  Adding too much water will make it dull. (Mine took 9 teaspoons in the end)

Place one sponge on a serving plate and spread the icing over the top.

Place the other sponge on top.

Bask in the glory of the wonderful thing you have created.

Eat.


Ingredients for the patriotic biscuits

57g / 2oz unsalted butter, at room temperature
170g / 6oz plain flour
1 teaspoon ground ginger
57g / 2oz light brown sugar – the recipe called for ‘moist sugar’ which I think is dark brown sugar i.e. sticky and treacly
115g / ¼ lb golden syrup
To decorate: 1 egg white and hundreds and thousands (ideally red, white and blue)

Method for the patriotic biscuits

Preheat the oven to 200°C/fan oven 180°C/400°F/gas mark 6.

Line two baking sheets with baking paper or non stick foil.

Beat the butter until it is soft and creamy.

Add the flour and beat until the mixture resembles breadcrumbs.

Stir in the ginger and sugar.

Stir in the golden syrup and bring the mixture into a firm, moist dough.

Roll out between two sheets of clingfilm and aim for a thickness of approx 0.5cm.

Using a 7cm round cutter I got 18 biscuits.  The dough re-rolls easily but when rolled out the golden syrup starts to rise to the surface so work quickly.

Place the biscuits on the prepared sheet (they don’t spread that much) and bake for 10 minutes or until a darker golden colour.

Leave to cool for 5 minutes when out of the oven.

Brush with beaten egg white and sprinkle with hundreds and thousands.

Bask in the glory of the wonderful thing you have created.

Eat.

Sunday, 20 May 2012

Chocolate fudge birthday cake


It is Mr CC’s birthday and time for one of his ‘challenges’ that only serve to prove what a hopeless cake decorator I am!  This year he wanted a chocolate cake (hurrah!  I can do that!) in the shape of Domo (shi....I mean sugar!).  Now Domo is quite a straightforward looking chap...but it’s always the simple characters that are the hardest to get right as there’s nowhere to hide.

Carving is not my forte:


Domo is an international phenomenon with a range of merchandise to rival Hello Kitty.  He is the mascot for a Japanese television station.  If you haven’t come across him, this is what he looks like:

I chose a rich chocolate sponge and this recipe in particular interested me because of the sheer amount of chocolate and cocoa it contains.  It is quite dense almost like a sponge/brownie hybrid – a heavy, but very flavoursome cake.  The addition of sour cream works well and adds a tang to the flavour and stops the whole texture being too cloying.


The chocolate fudge icing couldn’t be simpler – only three ingredients!  Not that you can see much of it, because Mr CC hinted that chocolate sprinkles might replicate Domo’s fur...hence the whole tube of chocolate sprinkles covering the cake!  The icing is a little unconventional and I need to point out how ugly it is when cooled.  Here it is just made and needing to cool (nice):


Here it is cooled and rather icky looking:


Here it is lovely and beaten and ready to spread on the cake.  What I’m trying to convey is don’t lose heart and think you’ve done anything wrong when it’s cooled:


This cake is rich – I’d recommend serving it with some cream to lighten it.  It is also more chocolatey than chocolate; a boast I don’t make lightly (I’d hate you to take me at my word and then be disappointed).  Serve in small slices...this is one to savour!


As it was a cake for Mr CC’s birthday, I didn’t want him to see it before it was finished.  I therefore had to delegate the final inspection to Domo Nerd:


If you don’t want a Domo cake (why wouldn’t you?????) then simply make this cake in a traybake tin and serve that way.  If you are making it like that then maybe halve the icing amounts, as I needed extra to cover the sides of Domo!
Happy birthday Mr CC


Ingredients
For the cake:
300g dark chocolate, broken into pieces
300g unsalted butter
300g light muscovado sugar
150ml hot water i.e. not just boiled but still hot
150ml soured cream
3 eggs, beaten
300g self raising flour
110g cocoa powder

For the icing (this is what I used; if you’re making a traybake consider halving it):
200g dark chocolate
340g condensed milk
200g unsalted butter

To decorate: chocolate sprinkles, fondant icing and maltesers (for the eyes)
To serve: cream

Method
Preheat the oven to 160°C/fan oven 140°C/320°F/Gas mark 3.
Grease a 30cm x 20cm traybake tin.  I actually used a 27cm square disposable foil tin as, once I cut a strip of cake off to make the arms, it left me with a better Domo shape!
Put the chocolate, butter, sugar and hot water into a large saucepan and gently melt together, stirring frequently.
Once melted and combined remove from the heat and leave to cool for 5-10 minutes.
Stir in the soured cream and the eggs.
Transfer the mix to a stand mixer, or a bowl suitable to use an electric whisk in, and add the flour and cocoa.
Beat just until the ingredients are combined.  (NB.  I tried to incorporate the flour and cocoa in the pan using a balloon whisk but it was just too heavy and clumpy for my feeble arms to manage – hence the stand mixer)
Pour into the prepared tin – it will be runny – and bake for approximately an hour or until a skewer inserted into the cake comes out almost clean.  I’d check the cake after 50 minutes as all ovens are different.
Leave to cool on a wire rack.
When the cake is cool you can make the icing: Place all the ingredients in a bowl and place over a saucepan of simmering water.
Leave the ingredients to melt, stirring occasionally.
Remove from the saucepan and leave to cool; you may need to chill it to get it to a spreadable consistency.
If your icing looks a bit gloopy and unspreadable, put it in your stand mixer and beat it for a couple of minutes – this gets the texture just right for spreading.
Either spread the icing over the top of your traybake, or use to completely cover your Domo!
Decorate as required.
Bask in the glory of the wonderful thing you have created.
Eat.

Sunday, 2 October 2011

Famous Faces’ Favourite Fancies – Ginger cake


“Legend” is a word that is bandied about far too often these days if you ask me, but I’m going to use it here and mean it. If you asked most people to name a snooker legend the first name out of their mouth would be Steve Davis
.


In terms of someone dominating a sport you’d have to look quite a way to beat Steve Davis. Just read this incredibly potted (ha ha, pun totally intended!) summary of his achievements:

  • First player to complete a televised 147 (maximum) break;
  • More professional titles than any other player;
  • Winner of the World Championship six times in the 1980s;
  • World number 1 for seven years running;
  • Famously lost the black ball finish in the 1985 World Championship final against Dennis Taylor, which although finishing past midnight had an audience 18.5 million people – still a record for BBC2;
  • BBC Sports personality of the year;
  • MBE and OBE;
  • Top ten hit with Chas & Dave (OK, he might want to forget that one!)


Famous for his ginger hair he gained nicknames such as “The Nugget” and “The Ginger Magician”. My grandmother though, who was a staunch fan, only ever referred to him by one name: Lover Boy. Quite how she came up with this name I do not know, but that was what she ALWAYS called him! Maybe that’s why I decided to write to him; he provided my grandmother with so much entertainment that, even now several years after her death, we still refer to him as Lover Boy (which might freak him out if he ever reads this!)


His calm-under-pressure temperament led him to be called boring, something that he has always played up to despite having a terrific sense of humour. Perhaps it was that sense of humour that led him to choose ginger cake as his favourite fancy!


This ginger cake is something a bit different; it is adapted from a German ginger spice cake recipe and doesn’t contain the usual golden syrup and treacle. This results in a lighter, less sticky texture. It replaces sugar with honey and adds some lightness in the addition of soured cream. I was further intrigued by the use of rye flour...which I couldn’t find anywhere so will have to revisit this when I find some! There’s quite a lot of spice:


I brushed some ginger syrup over the cake as it cooled just to intensify the flavour. This is optional. As with all ginger cakes, the flavours develop over time so try and make a day or two in advance of when you wish to serve it.


For this cake, I made my white icing much thicker than I normally would. I think it was the German influenced recipe which got me thinking about the thick icing on German Christmas gingerbread – often the biscuit will be shaped like a house with thick white icing representing snow on the roof. That’s what I’ve tried to do here and I love it –the icing looks almost cartoony!


Ingredients

For the cake:

125g unsalted butter
250g honey
3 eggs
4 teaspoons ground ginger
1 teaspoon ground cinnamon
½ teaspoon mixed spice
½ teaspoon allspice
125g plain flour
1 teaspoon baking powder
100g rye flour – I couldn’t find this in my local shops so used wholemeal flour
150ml soured cream

Optional: 2 tablespoons ginger syrup to brush over the cake when it comes out the oven

For the icing:

100g icing sugar
Enough water or syrup from a stem ginger jar to make a thick icing – add a tablespoon at a time

Method

Generously grease a 20cm bundt tin with butter or, ideally, cake release spray. The recipe I used gave no indication of cake tin size so I used a 23cm tin, which was too big.

Place the butter and honey in a large saucepan (all the other ingredients need to fit in here) and melt together. Leave to cool.

Preheat the oven to 170°C/ fan oven 150°C/325°F/ Gas mark 3.

Beat the eggs and spices into the butter-honey mixture.

Fold in half of the plain flour, rye flour and baking powder.

Fold in half of the soured cream.

Repeat the folding process until all the ingredients are combined.

Spoon the mixture into the prepared cake tin and level the surface.

Bake for 15 minutes then lower the temperature to 130°C/ fan oven 110°C/250°F/ Gas mark 1 and bake for approximately a further 40 minutes or until a skewer inserted into the cake comes out clean. Mine only needed 35 minutes which surprised me as I never thought the cake would cook successfully at such a low temperature.

Leave to cool, still in the tin, on a wire rack. I find ginger cakes rather fragile so usually let them cool in the tin before turning out.

If using, brush the ginger syrup over the cake in the tin, let it seep down the edges too (the cake will have just started to pull away from the tin giving a gap for the syrup!)

When the cake is cool it can be iced: place the icing sugar in a bowl and gradually beat in either water or ginger syrup. Add liquid sparingly as it is easy to make it too runny. I made mine very thick.

Pour the icing over the cake and leave to set.

Bask in the glory of the wonderful thing you have created.

Eat.