Showing posts with label baked custard. Show all posts

Sunday, 21 June 2015

Chocolate custard tarts


Did you miss me?  When I signed off in February I wasn’t planning on being away for so long but you know how things are sometimes...weeks become months and so it goes on.  Sorry.  If it’s any consolation I missed you all!    I can’t promise that I’ll go back to my regular-like-clockwork weekly updates but I shall try my very best.


This is the first time I have attempted chocolate pastry.  I’ve read before that it’s ‘tricky’ and can be difficult to roll etc, therefore I decided to take the approach I would to turn a sponge into a chocolate sponge: use a trusted recipe and replace some of the flour with cocoa.  It worked well and I didn’t have any issues with texture or rolling.
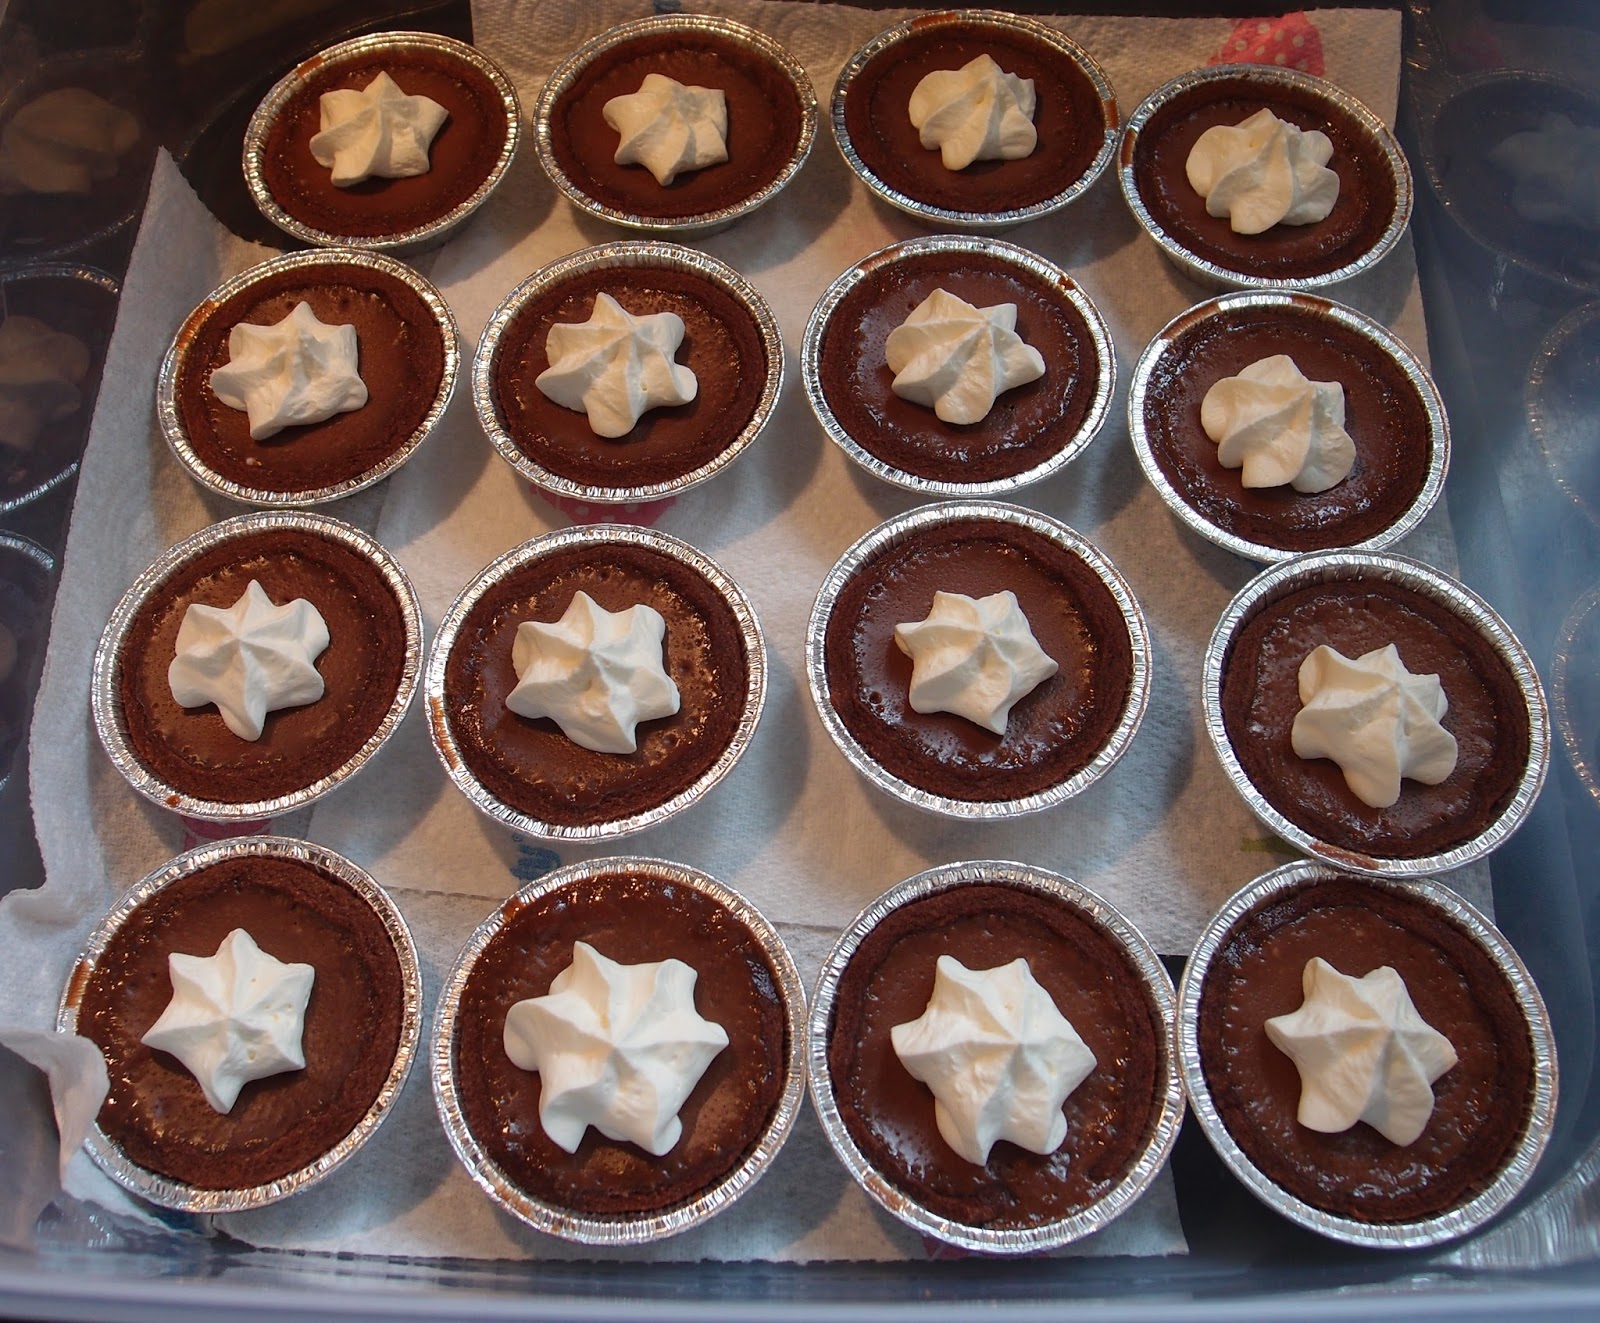


I didn’t have to pack chocolate flavour into the pastry as the tart filling was pure chocolate indulgence!  It combines the intense richness of ganache with the velvety texture of custard – be careful not to overbake it or you will lose the lightness of texture.  The use of milk chocolate makes it a tart to suit most palates (except those odd souls who like their chocolate so bitter it’s more of a punishment than a pleasure).


I only ever make individual pies and tarts in disposable foil cases now – they are so easy to use and the pastry never sticks.  There is no sadder sight in baking than a beautiful tart or pie ruined because it wouldn’t come out of the pan.  We’ve all been there – I remember mine was a batch of mince pies that ended up so scarred and battered by the knife I attacked them with to dislodge them, that I suspect they formed some sort of support group to get over the trauma.


Now of course these don’t need any adornment at all but I never know when to stop, so piped a simple rosette of whipped cream on the top of each tart.  I like the contrast it gave against the dark tarts.  I showed a modicum of restraint in not sprinkling crushed flake over the top….but you can bet your life I thought about it (and wanted to!).


Ingredients

For the pastry:
150g plain flour
25g cocoa powder
85g unsalted butter – cold
30g caster sugar
1 egg yolk
1 tablespoon cold water

For the filling:
225ml single cream
75ml whole milk
300g milk chocolate
2 eggs

To decorate:
200ml whipping cream


Method

Start by making the pastry: place the flour, cocoa and butter in a food processor and blitz until you have crumbs that look a bit like wet sand.

Add the sugar and blitz again.

Add the egg yolk and water and blitz just until the pastry starts to form.

Tip out onto a sheet of clingfilm and bring together into a ball of dough – don’t over handle or it may become tough.

Roll the pastry out between two sheets of clingfilm and, using a cutter of the appropriate size, cut out rounds to line either a cupcake pan or individual foil tart tins (I use the latter as they are a nice way to transport and protect the tarts).  I got 18 tartlets.

Prick the base of each tart with a fork, then cover with clingfilm and chill for about 30 minutes to 1 hour.  It won’t do any harm to chill overnight, if you want to get a head start!

Preheat the oven to 180C/fan oven 160C/350F/gas mark 4.

Line each pastry case with baking paper or non stick foil, then weigh down with baking beans or rice.

Bake for 10 minutes.

Remove the baking beans/rice and paper/foil and return to the oven – uncovered – for a further 5 minutes or until the pastry base no longer looks wet or shiny.  This is the best test for chocolate pastry as the colour will not help you!

Put to one side to cool.

Reduce the oven to 140C/fan oven 120C/275F/gas mark 1

Now make the filling: place the cream and milk in a saucepan and bring just to boiling point.
Remove from the heat and add the chocolate.

Stir until all the ingredients are combined.

Leave to cool for 10 minutes before beating in the eggs.

Spoon into the pastry cases – I found a ladle worked best.

Bake for 10-15 minutes or until the filling looks set but wobbles when you shake the tray – they will continue to set as they cool.

[If you have leftover filling spoon into ramekins and place them in a roasting tin.  Fill the tray with hot water until it comes halfway up the sides of the ramekins and bake for about 15-20 minutes or until set with a wobble – bonus dessert!]

Leave to cool on wire rack.

Decorate with whipped cream if required.

Refrigerate until about an hour before you wish to serve.

Bask in the glory of the wonderful thing you have created.

Eat.


Sunday, 4 January 2015

Pandoro cake


Every Christmas I buy a Pandoro cake, sometimes two.  For those of you who haven’t tried it, it’s basically Panettone with none of the ‘bits’ in it.  I buy mine from Tesco and they come with a sachet of icing sugar to sprinkle over the cake; it has a citrus taste to it that is simply lovely.  I’ll often slice up the Pandoro and make it into a posh bread and butter pudding, but this recipe takes that principle and creates a massive cake instead.


The recipe set out below is a blank canvas.  If you so wished you could soak the fruit in rum or brandy.  You could change the mix of fruit.  You could add some nuts.  The world is your oyster....but don’t add oysters; that wouldn’t work.


My personal preference in serving this cake is slightly warmed with some pouring cream.  It’s such a rich, custardy, indulgent cake.  It’s also huge, so make sure you’ve got a big eatership on hand to tackle it!  Here it is ready for the oven; it looks lovely even at this point when it’s uncooked:


This recipe is a cross between a really good bread and butter pudding, and a really good bread pudding.  I believe one should start the year as one means to go on....hence why I picked a recipe that used butter and over half a litre of cream!  Happy new year!


Ingredients

600g pandoro, panettone or brioche – thickly sliced
150g unsalted butter, at room temperature
350g sultanas – or a mix of sultanas, raisins and dried cranberries
8 eggs
600ml double cream
250ml milk
150g caster sugar
1 teaspoon vanilla extract

To serve: icing sugar and thick pouring cream


Method

Preheat the oven to 150C/fan oven 130C/300F/gas mark 2.

Line a 23cm cake tin with foil, and line the outside with foil too to catch any leakage.  If you have one large enough, use a deep pie dish instead (still line it with foil as it will help you lift it out) as this will mean the liquid cannot leak.

Butter the pandoro and cut it into chunks so that you can pack it into the dish. 

When you have a complete layer, scatter over handfuls of sultanas.

Continue until the buttered pandoro and sultanas are all used up – try to avoid having too many sultanas sitting exposed on the top as, due to the long cooking time, they may burn (I learned this through bitter experience!).

In a large bowl whisk together the eggs, cream, milk, sugar and vanilla.  Only whisk until they are combined – you don’t want it to thicken.

Ladle it over the pandoro and sultanas and take your time, so that the pandoro can absorb the liquid.  At first you will not believe all the liquid can be accommodated but patience will prove you wrong!

Leave to sit for 30 minutes.

Place the cake on a baking sheet and bake for approximately 1 ½ hours or until the top is golden and crisp, and there’s a wobble to the cake but no visible liquid.

Completely cool before de-tinning.

Lightly dust with icing sugar.

Serve either warm for dessert with custard, or at room temperature with pouring cream.

Bask in the glory of the wonderful thing you have created.


Eat.

Sunday, 27 April 2014

Baileys custard tart


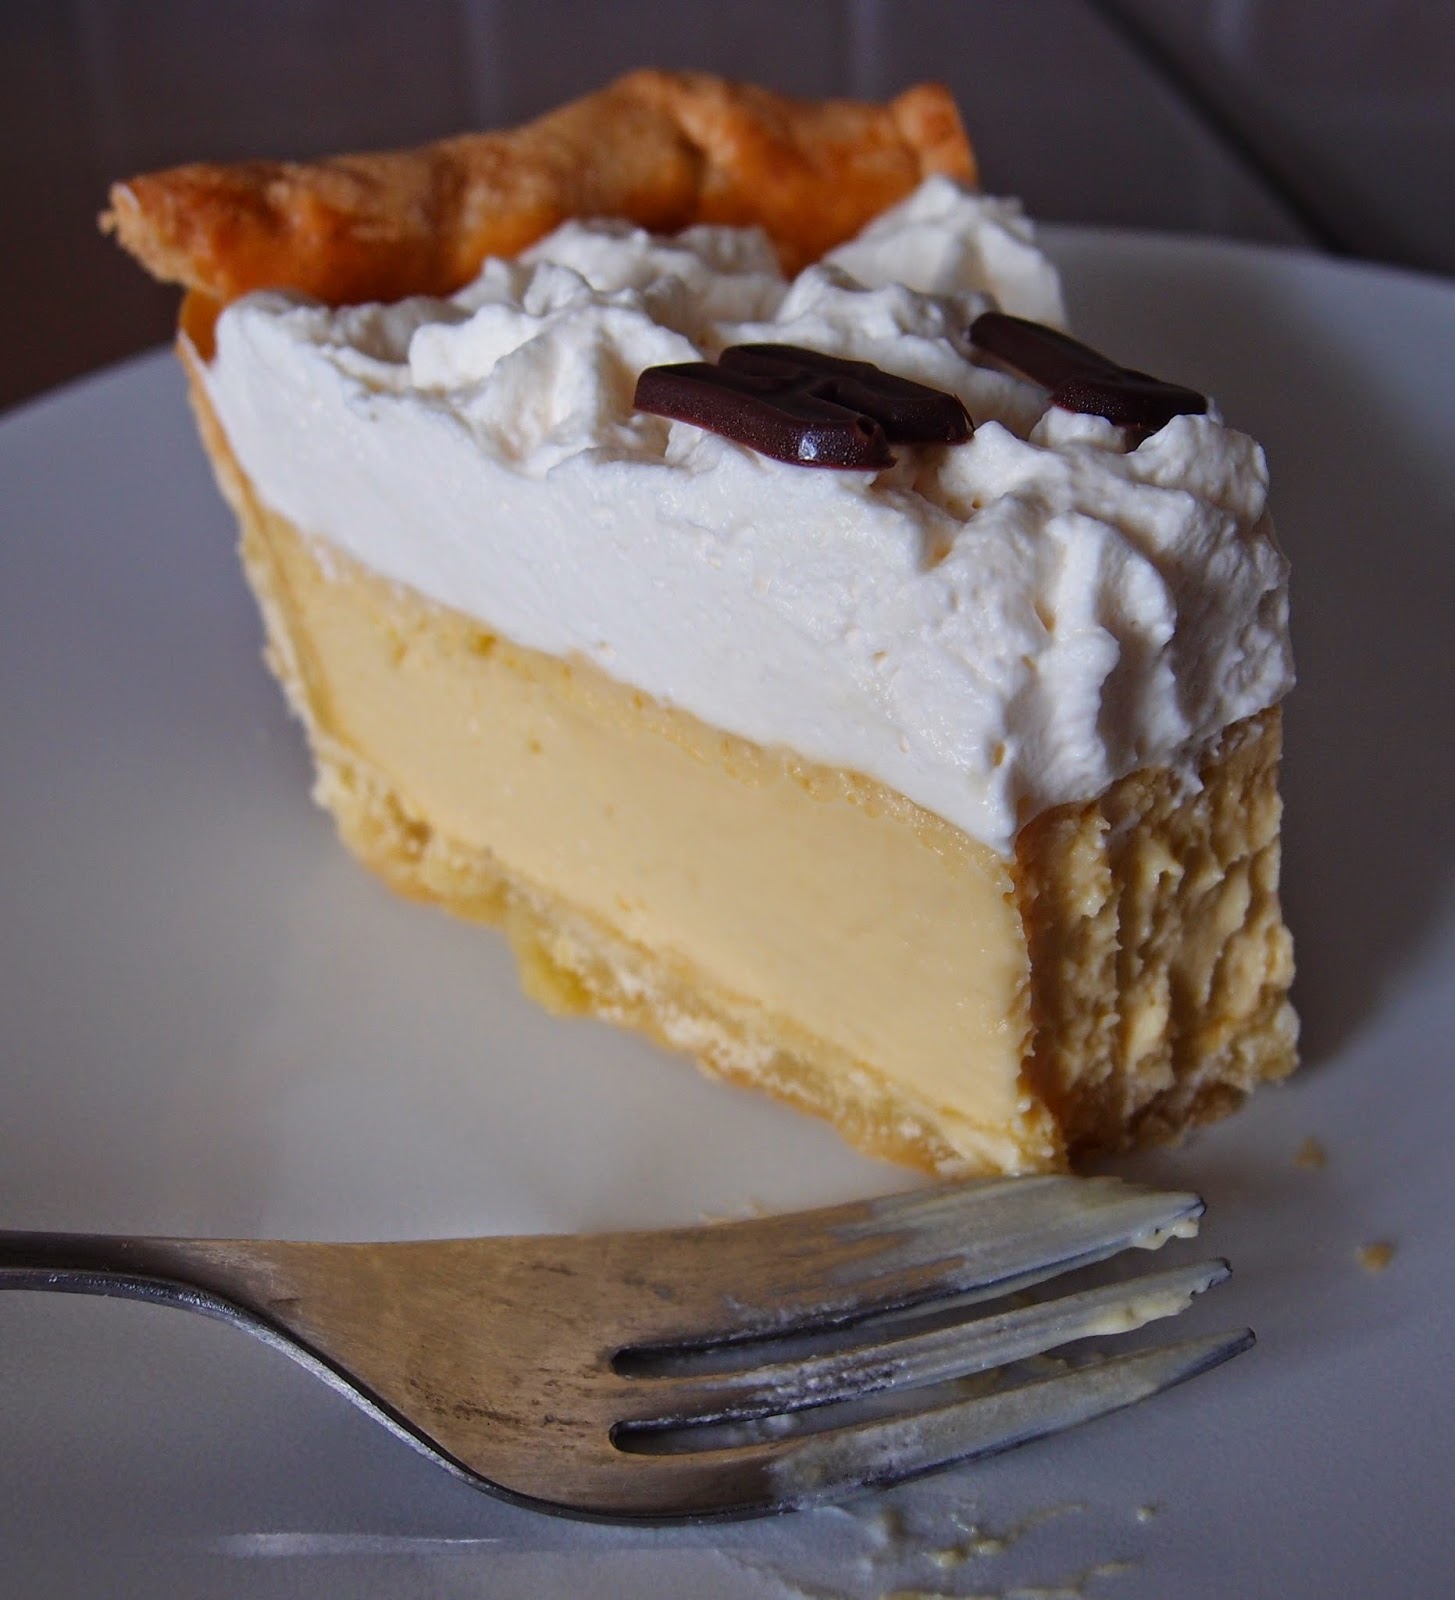
It is the CCD’s (Caked Crusader’s Da) birthday and, as I’ve noted before, he is rather partial to a custard tart.  He’s also fond of booze.  So why not combine the two?  You'll see in the picture below that a bit of pastry got knocked off in transit. Mr CC tried to advise me to be more careful and started explaining about G force and roundabouts but it didn’t make a lot of sense to me (I've never been scientific); all I remember from his teachings is that Formula 1 drivers have thick necks.


In case you’re in any doubt let me confirm: Baileys custard tastes awesome!  It smelled lovely cooking and tasted just as good.  It’s not overpowering but adds some ‘oomph’ to the custard in a more gutsy way than vanilla does.  You could vary the amount of Baileys you add: as long as the cream + Baileys = 500ml I think you’d be alright, as Baileys is very creamy.


I noticed that the filling cooked quicker than a standard vanilla custard tart and must therefore assume that the Baileys was responsible for this as it was the only difference to my standard recipe.


Don’t nine egg yolks look glorious?


Seeing as this was a custard tart for a special occasion I went all out and whipped up some more cream (because let’s face it, what this lacked was cream!) with more Baileys (ditto!) for a flavoursome and decorative addition.


Happy birthday CCD!


Ingredients

For the shortcrust pastry:
175g plain flour
120g unsalted butter, cold
3 tablespoons icing sugar
2 egg yolks
2 teaspoons vanilla extract

To glaze: 1 egg yolk, beaten

For the filling:
9 egg yolks
75g caster sugar
350ml whipping cream
150ml Baileys

Optional to decorate:
300ml whipping cream
50ml Baileys


Method

Start by making the pastry: put the flour, butter and icing sugar into the food processor and blitz until you get fine breadcrumbs.

Add the egg yolks and vanilla and blitz until the pastry just starts to come together.

Turn out onto a lightly floured surface and bring together into a ball of dough, handling no more than is absolutely necessary.

Chill the dough for 30 minutes so it is firmer to work with when you roll it out.

Line a baking tray with baking paper. Have to hand a 20cm round deep ring, or use a foil disposal pie tin (I did and makes leakage less of a worry). Whatever ring or tin you use, try to find a deep one (ideally 3.5cm) as this will give a lovely deep tart and a luscious thick layer of baked custard.

Roll out the pastry between two sheets of clingfilm and use to line the flan ring/pie tin.
Don’t worry if you have some tears, the pastry is good-natured and patches easily.

Let the pastry overhang the edges. Take some of the surplus pastry off and put to one side – you may need this for patching later on.

Chill the pastry for a further 30 minutes once the tin is lined to minimise shrinkage when baked.

Preheat the oven to 190°C/fan oven 170°C/375°F/Gas mark 5.

Line the chilled pastry with a sheet of baking paper and cover with baking beans.

Bake in the oven for 10 minutes.

Beat the egg yolk and when the 10 minutes is up, remove the pastry from the oven and remove the paper and beads. Have a look at the pastry and use the spare that you put to one side to patch any little holes or cracks that you can see. When happy, brush all of the egg yolk over the interior of the pastry case and return to the oven for 5 minutes. This seals the pastry so that it won’t go soggy when you add the custard.

Remove the pastry from the oven and leave to cool. When it is cool enough to handle trim the excess pastry away using a serrated knife. Leave the pastry in the ring/tin.

Reduce the oven temperature to 150°C/fan oven 130°C/300°F/Gas mark 2.

From now on it’s all easy! Make the custard by whisking together the egg yolks and sugar. Add the cream and Baileys and whisk again.

Pour through a sieve into a heavy saucepan. Don’t skip this stage as there’s lots of eggy bits that will get caught by the sieve and would make the custard lumpy in texture if not removed.

Heat the custard over a low heat stirring all the time. When it gets to 37°C remove it from the heat.

Pouring through a sieve, pour as much of the custard into the pastry case as possible. I got all of mine in but it will depend on how deep your ring/tin is. If you’re not confident that you’ll get the tart into the oven without spilling the custard, put the tray (with the tart case on it) onto the oven shelf and then pour the custard in. I would’ve done this but when I pull my oven shelf out it dips slightly so I could not have got all the custard in.

Bake for 35-40 minutes or until the custard looks set but still wobbles slightly when the tray is moved. NB. This is less time than I would normally recommend for a custard tart but the Baileys seemed to speed up the cooking process.

Leave to cool on a wire rack.

Refrigerate until you are ready to serve.

Shortly before serving whip up the cream and Baileys and pipe onto the top for some extra decadence.

Bask in glory at the wonderful thing you have made.

Eat.

Sunday, 4 August 2013

Caramel custard tart


This is a sensation of flavour and texture – it’s also pretty full on in terms of indulgence...not one for the faint hearted!  The buttery, crumbly pastry works beautifully with the sweet, rich custard filling.  I am pleased I added the plain whipped cream on top as it lightens the dish.


I do love tinned caramel.  I’ve always found making caramel a little bit hit and miss and this takes all the stress out of it.  I don’t struggle with making the caramel it’s usually what follows – this recipe contained the instructions for making caramel but then told you to stand the pan in cold water before whisking in cream.  I did that...and my caramel set hard at the bottom of the pan!  Oh how I enjoyed cleaning up after that little mishap....not!


This is sweet.  And I’m saying that.  Best to serve in smaller slices and let people have more if they want it.  Sigh. This is the sort of thing I type when I try to be populist...who am I kidding?  Of course I don’t recommend serving it in small slices – serve it in big slices!  Always big slices!


The cream balls on the top caused a bit of a stir.  Luckily, they came out looking cute but I cannot claim this was the intended design.  Having selected a plain piping tip, I didn’t really have a plan so started piping dumpy little balls...and then kept on going!  I was asked what they were and explained that you could now buy whipped cream balls that came on a sheet and you just peeled them off and placed them.  I did not expect this to be believed.  But it was.  Twice.  My relatives are gullible!


Please check out the result from my cake mould giveaway
 – if you’re Liz, please get in touch with your address!


Ingredients

For the pastry:
225g plain flour
50g icing sugar
150g unsalted butter, straight from the fridge
1 egg

For the custard filling:
375g caramel – I used a tinned, ready made version
4 egg yolks
150ml double cream
150ml full fat milk
1 teaspoon vanilla extract

To decorate:
300ml double cream


Method

Preheat the oven to 200°C/fan oven 180°C/400°F/gas mark 6.

Place the flour, sugar and butter in a food processor and blitz until you have fine crumbs.

Add the egg and blitz again until the pastry just starts to come together.

Tip out onto a sheet of clingfilm – don’t panic, the pastry is very soft at this stage.

Form into a disc, wrap in clingfilm and refrigerate for 20 minutes.

Roll out between two sheets of clingfilm and then line a 23cm loose bottomed tart tin.  There is no need to grease the tin.

Don’t worry if you need to patch the pastry – it’s very good natured!

Refrigerate for a further 20 minutes.

Line the pastry case with baking paper or non stick foil and weigh down with baking beads.

Bake for 15 minutes, then remove the beads and paper and bake uncovered for a further 5 minutes.

Leave to cool.

Reduce the oven to 160°C/fan oven 140°C/325°F/gas mark 3.

Now make the filling: tip the caramel into a small pan and heat gently to loosen it up.

In a large bowl beat the egg yolks until they are pale and fluffy.

In another pan, bring the double cream and milk just to the boil, before adding the vanilla.

Beating the whole time, pour the cream and milk over the egg yolks.

Still beating, add the warm caramel.

Pour through a sieve back into the saucepan you heated the cream in.  This is important as it will ensure there are no lumps of caramel.  Use a wooden spoon to push the caramel through.

Stir over a gentle heat until the custard coats the back of the spoon and you can draw a line through it with your finger.

Pour into the pastry case and bake for approximately 35 minutes or until the custard is set but still has a wobble in the centre.

Leave to cool completely.

Whip the double cream and pipe over the top of the tart.

Serve in generous slices.

Bask in the glory of the wonderful thing you have created.


Eat.

Sunday, 3 March 2013

Creme Brulee tart


I come from a family whose passion for custard knows no bounds.  I married a man whose passion for custard frankly makes me think we were just playing at it.  Mr CC’s ‘dairy stomach’ is the stuff of legends and can be called into play after any huge meal meaning that dessert can be enjoyed.  In truth, I envy it!


When I found this recipe for crème brulee tart I knew it was a winner.  If there is crème brulee on a dessert menu Mr CC never reads beyond it.  Therefore, I knew I couldn’t waste his time and make only one tart that he’d have to share with my family...I made two meaning that he has enough to see him through the next few days!


There is nothing intrinsically tricky in this recipe but what it needs is time, and that might not be apparent from a quick scan of the recipe.  The pastry has to be chilled twice (total of 1 hour fridge time), the custard has to be left to cool (30 mins), the tart bakes at a low temperature (at least an hour), and the baked tart has to cool before you can brulee it (yet another hour).  Don’t make this one if you are pushed for time!


Also, the pastry is incredibly short.  I consider myself pretty experienced in the ways of shortcrust pastry but found this a tricky one to roll and handle.  However, it does patch and I don’t want to put you off it because it is yummy with its inclusion of custard powder.  Don’t do what I did and chill it for an hour and then watch it turn into crumbs when you start rolling it out – 30 minutes is plenty! 


Here’s the tart fresh from the oven, pre brulee:


I prefer a thin brulee topping as I don’t like my teeth getting gunged up with a thick layer of sugar.  I like a brulee that needs a sharp tap to get in, but then eats nicely adding a little crunch without dominating the custard.  If you like a thick brulee then simply increase the amount of sugar you sprinkle over the top of the tart.


I struggle with getting a nice even brulee topping – my grill isn’t powerful or even enough in its heat, and my blow torch started to die part way through.  What I’m trying to say is...the topping tasted better than perhaps it looks!


Ingredients

For the pastry:
225g plain flour
2 tablespoons custard powder
125g unsalted butter – cold
1 egg yolk
1 tablespoon cold water – you may need more
An extra egg yolk for patching – if needed

For the filling:
5 egg yolks
75g caster sugar
1 vanilla pod
450ml whipping cream
80ml milk

For the topping:
2 tablespoons caster sugar


Method

Start by making the pastry: put the flour, custard powder and butter into a food processor and blitz until you have bread crumbs.

Add the egg yolk and blitz again and add enough water until the pastry forms clumpy crumbs. (NB. You could make the pastry by hand using the rubbing in method i.e. rub the butter into the flour, then stir in the custard powder, egg and water).

Tip the pastry out onto a sheet of clingfilm and handle as little as possible to form a fat disc.

Wrap in clingfilm and refrigerate.  Normally I’d say chill for an hour but this is a very short pastry and would be unworkably crumbly.  Chill for 30 minutes only.

Roll out the chilled pastry between two sheets of clingfilm – this saves having to add any flour.

Use the pastry to line a 24cm loose bottomed flan tin.  No need to grease the tin as the pastry is buttery enough not to stick.

Don’t panic if you need to patch the dough – it is very short and will crumble, but it does patch and there’s enough spare pastry to do this.

Pop the pastry back in the fridge for a further 30 minutes.

Preheat the oven to 200°C/fan oven 180°C/400°F/gas mark 6.

Line the pastry case with either non-stick foil or baking paper and use baking beans to weigh the pastry down i.e. so it won’t rise.

Bake for 10 minutes, then remove the paper and beans and bake for a further 10 minutes or until the pastry is lightly golden.

NB. If at this point you notice cracks or holes in your pastry it is important to deal with them otherwise the custard will fall straight through.  I painted on whisked egg yolk to close up any tiny cracks and put the pastry back in the oven for a further 5 minutes.  It did the job!

While the pastry case is cooling, make the filling: In a large bowl whisk together the egg yolks and sugar until they are pale and thick.

Meanwhile, slice open a vanilla pod and scrape out the seeds.  Put the pod and seeds into a saucepan and pour over the cream and milk.

Warm the cream and milk over a gentle heat until approaching boiling point.

Remove the vanilla pod.

Pour over the whisked egg yolks and continue to whisk to ensure the egg doesn’t scramble.
Pour through a sieve into a jug or pan and leave to cool a little.

Preheat the oven to 150°C/fan oven 130°C/300°F/gas mark 2.

Pour the cooled custard into the pastry case and bake for approximately 1 hour or until the custard is set.  You can tell if you gently shake the baking sheet and the custard has only a faint wobble.  Mine took just over the hour.

Leave to cool completely.

Now make the topping:  Sprinkle the sugar evenly over the tart.

There are two options for creating the brulee topping:
  • You can put your grill to the highest setting and pop the tart under it for 2 minutes or until the sugar has melted and turned brown.  It might be sensible to cover the edges of the pastry with a collar of foil to stop it burning.  If the sugar hasn’t melted completely sprinkle some water on top and pop it back under the grill.
  • You can use a blow torch – this is what I did.  I prefer this method as my grill never seems to get hot enough to melt sugar, and I feel more in control holding the torch!


Leave to cool before putting in the fridge.  It will need to go back into the fridge for at least 30 minutes before serving as the heat from the brulee-ing process will soften the custard.  If you want to cut nice clean slices it needs to re-set.  I made and bruleed my tart the day before serving and that was too far in advance and the brulee lost some of its crispness...so be warned!

Bask in the glory of the wonderful thing you have created.

Eat.

Sunday, 11 March 2012

Portuguese custard tarts


I have wanted to make these for so long – probably dating back to before I started my blog in 2007! What took me so long? I can’t honestly say...but they were worth the wait!


The method for lining the pastry cases is unusual in that you roll the puff pastry up (swiss roll style), cut discs and then roll them out. Here are the three stages:


I have never been able to find an explanation as to why this is the traditional method – if anyone knows the reason then please share your knowledge! (NB. Having now made them, I think it might be so that the pastry rises like a cylinder to keep the custard contained, rather than the usual pillowy way puff rises)


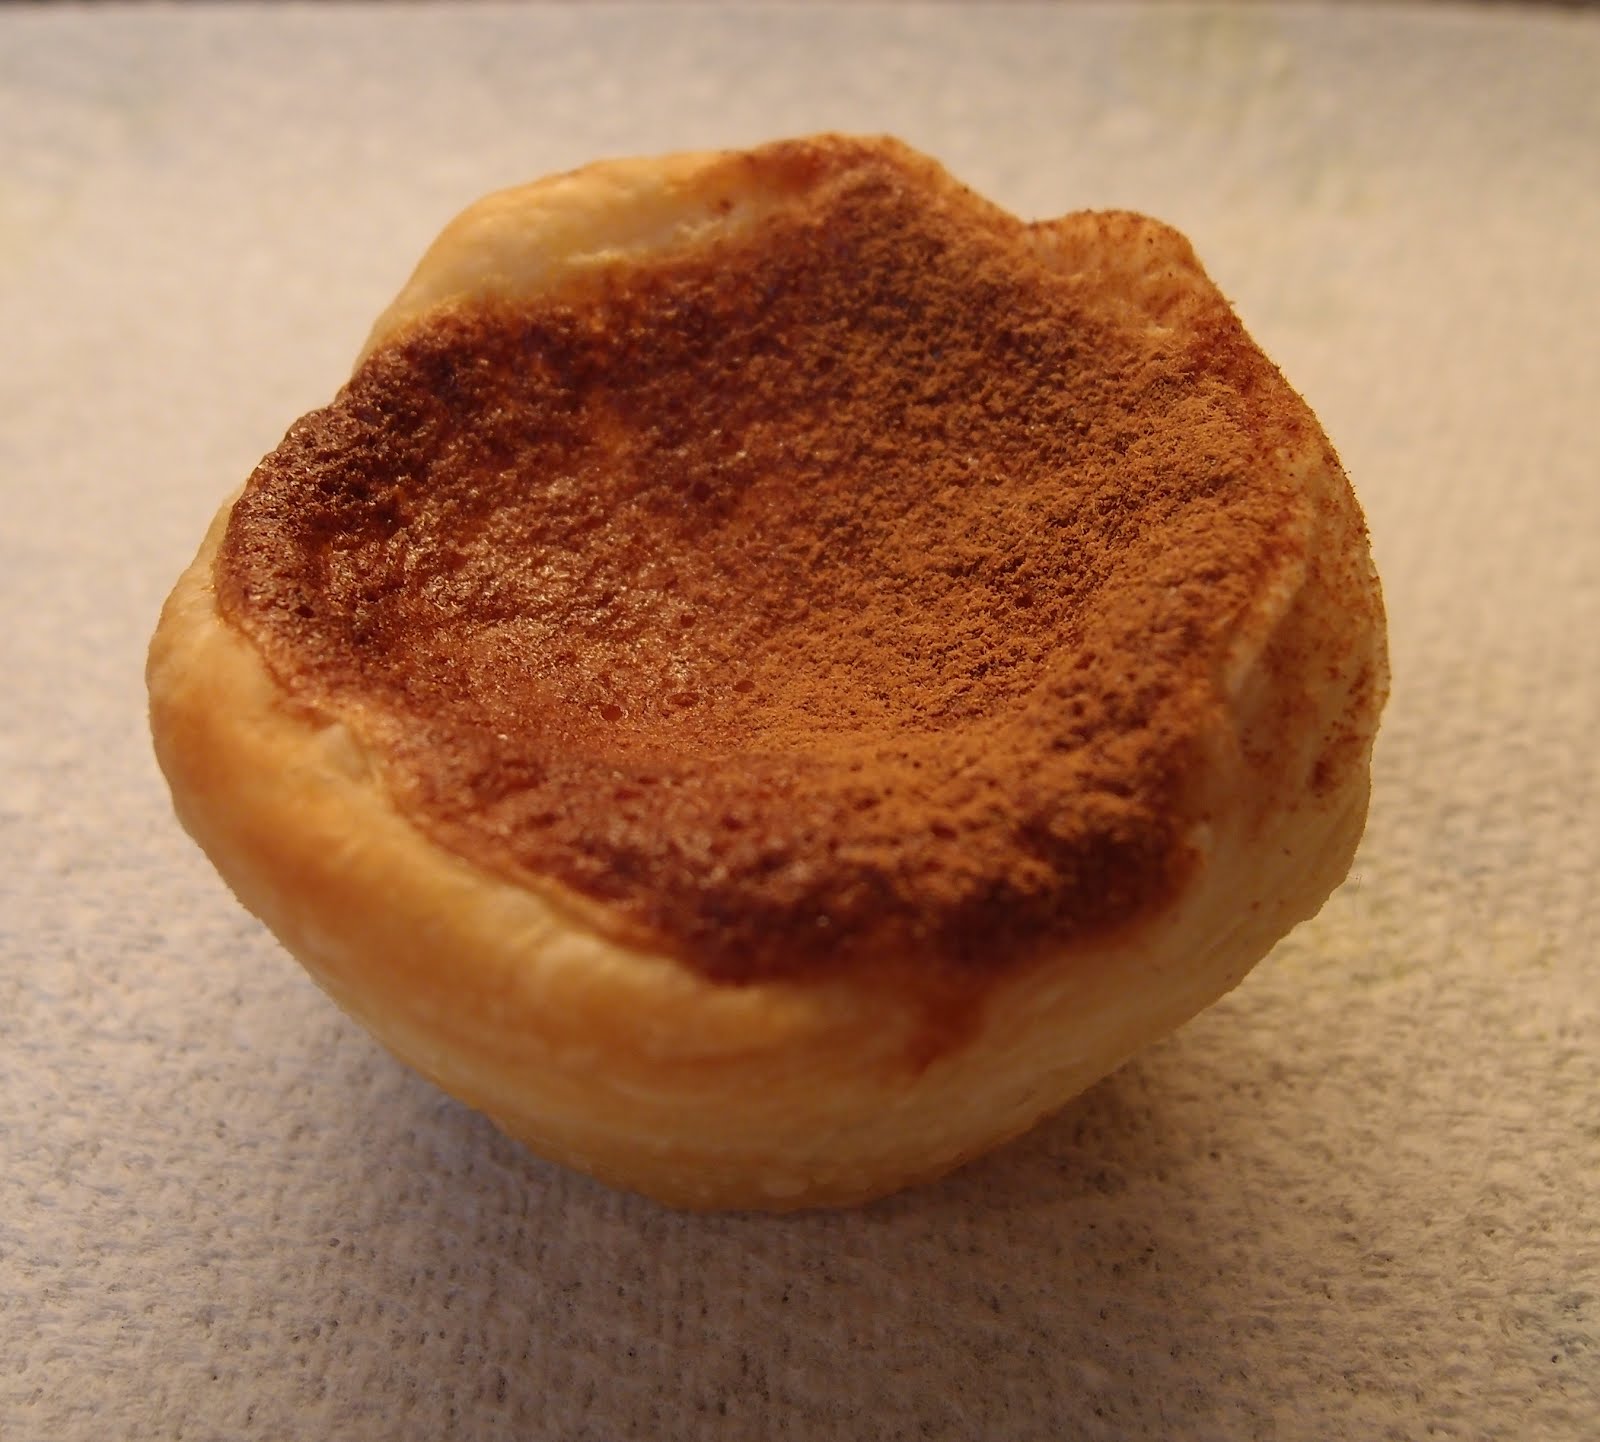
This photo (above) shows how many layers of frilly puff pastry you get – it looks rather pretty!


The custard part of the recipe is more involved than a normal custard, but seeing as I didn’t make the pastry it seems almost churlish to complain (the only two pastries I will buy readymade are puff and filo).


The unusual part of the custard recipe is that it uses whipped egg whites as well as the yolk. I found this impossible to fold in to the liquid milky mixture and used my kitchenaid as it was the only way – this meant I ended up with frothy custard! Probably, this was why I couldn’t use all the custard in my pastry cases, so I ladled the leftovers into two bowls and baked them separately. Waste not want not!


It is lucky that this recipe made 24 tarts, because they are extremely addictive. Best eaten slightly warm so the custard retains some squidge; I could eat more of these than I’m happy to admit! One final comment; these don’t keep well (they need refrigerating and the pastry loses its crispness) so you’ll need to eat them on the day of baking...oh, the hardship!


Finally, I’d like to introduce my new kitchen assistant, Alfredo “Al” Dente. Here he is selecting the custard tart he wants!


Ingredients

600g puff pastry (I used 2 packs of pre-rolled, all butter puff pastry which amounted to just over 700g)
250g caster sugar
100ml water
1 tablespoon plain flour
500ml milk
6 egg yolks
2 egg whites
icing sugar and cinnamon to finish


Method

If you have a block of puff pastry roll it out into a rectangle; mine was pre-rolled.

Roll it up along the long edge into a tight swiss roll shape.

Take the other sheet of pastry and continue rolling the same swiss roll i.e. so you end up with one, really fat roll of pastry.

Chill for 10 minutes.

Cut into 24 equal pieces and roll out a little flatter until they fill your cupcake pans or foil pie tins. The pastry will get sticky with handling so dust it with some plain flour.

Place in the fridge while you make the filling.

Mix the sugar and water and heat gently in a pan until the sugar has dissolved. Leave to simmer for 10 minutes – do this over a gentle heat so the sugar does not colour.

Place the flour and milk in a saucepan and bring it to the boil, whisking now and then to ensure the flour is not lumpy.

Remove from the heat and whisk in the sugar syrup. Leave to cool.

Preheat the oven to 220°C/fan oven 200°C/ 425°F/ gas mark 7.

When the milk mixture is cool whisk in the egg yolks

In a separate bowl beat the egg whites to firm peaks and then fold into the milk mixture. ( I couldn’t achieve this with a metal spoon so resorted to my kitchenaid – my custard went frothy – thinking about it, I think I should have sieved it to lessen the froth!)

Remove the pastry cases from the fridge and fill them with the custard.

Place any leftover custard in small oven proof bowls and bake after the custard tarts.

Bake the tarts for approximately 15 minutes or until the pastry is golden and the custard is turning dark brown in patches on the top.

Remove from the oven and leave to cool on a wire rack.

Sprinkle with icing sugar or cinnamon and eat slightly warm.

Bask in the glory of the wonderful thing you have created.

Eat.