Showing posts with label custard cream. Show all posts

Sunday, 18 May 2014

Custard creams


If I’m offered a selection tin of biscuits to choose from my first thought will always be to look for the custard creams and the pink wafers.  OK, that’s a lie; my first thought is actually ‘how many can I take without it looking greedy/weird/unusual/rude?’  I’m always glad if someone else has gone first and set the bar high!


What I’m trying to say is that I love custard creams.  Unless you’re rocking some serious high end chocolate biscuits in your tin, these babies are top of the tree.  Some of you will recoil in horror, others will frantically nod in agreement, but I love dunking them in a mug of tea just long enough so that the creamy filling becomes softer and the biscuit is on the cusp of soggy.  It is a reckless person who ‘over dunks’ and loses their biscuit to the sad resting place at the bottom of the mug.  Mushy biscuit at the bottom of a mug is a sign of bad biscuit management.


I will freely admit that the homemade version lacks the ornate squiggles so loved on the commercially farmed version, but what’s the point in a homemade version looking the same?  Isn’t the point of homemade that it does look different?  The big benefit of making them at home is that you get to control the size of the biscuit.  I have used the, ‘I only had one biscuit’ line many times failing to explain that the biscuit was the size of a dinner plate.  I’m exaggerating (honestly) but you get my drift!


To aim for some sort of uniformity I used my kitchen ruler to determine the biscuit size.  I may sound a bit OCD but I have a ruler in my kitchen which is handy for so many things, most commonly measuring cake tins because I often forget their dimensions.  This ruler has been my trusted culinary companion for years now; to save you straining to see what it is, it’s got all the cantons of Switzerland on it.


Ingredients

For the biscuits:
175g unsalted butter, at room temperature
50g golden caster sugar
50g icing sugar
2 egg yolks
2 teaspoons vanilla extract
300g plain flour

For the custard filling:
100 unsalted butter, at room temperature
140g icing sugar
2 tablespoons custard powder
3 teaspoons vanilla extract
Optional: a few drops of yellow food colouring – I used Dr Oetker natural gel colouring


Method

Preheat the oven to 200°C/fan oven 180°C/390°F/gas mark 6.

Line three baking sheets (if you only have two line those but be prepared to rotate the sheets for the second batch) with either baking paper or non stick foil.

Start with the biscuit dough: Beat together the butter, both sugars, egg yolks and vanilla until they are well combined and creamy looking.

Add half the flour and mix well.

Add the remaining flour and mix well; use your hand to bring the dough together.

Roll the dough out between two lightly floured sheets of clingfilm – aim for the thickness of a £1 coin.

Use the cutter of your choice to cut the dough then place the biscuits on the prepared trays.  Leave a little room for expansion although they do not spread much during baking.  (NB. If, like me, you’re using a ruler lightly flour it so it doesn’t stick to the dough).

Bake for approximately 8-10 minutes or until golden in colour.  Don’t worry if they take longer – trust your eyes more than your timer!

Leave the biscuits on the baking sheet to crisp up before you move them to a wire rack to cool completely.  If you try and move them too soon they can crumble.

Now make the filling: Beat all the ingredients together until smooth and whippy looking.

Either pipe or spread some of the filling onto one biscuit, and use another biscuit to sandwich.

Repeat until all the biscuits are paired up.

Bask in the glory of the wonderful thing you have created.


Eat.

Sunday, 20 October 2013

German bee-sting cake


I begin with a confession: traditional German bee-sting cake (Bienenstich) is usually a yeasted batter, but regular readers will know my fear/horror/dislike of using yeast, so when I found this non-yeasted version I made a bee-line for it (pun intended).


Like many traditional cakes the origin has been lost.  One legend claims that a bee was attracted to the honey topping and stung the baker who made it (I don’t like dissing legends but that one is quite lame, as legends go).  Another legend claims that 15th century German bakers successfully fended off raiders by throwing bee-hives at them and celebrated their victory by inventing this cake (this is more like it – I choose to believe this one!).


This cake uses popular flavours – honey, almond and vanilla – but has a twist in its method that makes them seem fresh and new.  When you spoon the cake batter into the tin you add a thick layer of runny honey on top over which you scatter a lot of flaked almonds.  The weight of all this suppresses the rise of the sponge but what your reward for this is a sticky spongy topping with lovely toasted nuts. It’s not dissimilar to the lovely bit of sponge that’s absorbed all the syrup on a steam sponge pudding.


As if all that wasn’t enough, the cake is then sliced and filled with vanilla custard cream.  I almost wept with happiness when I read the recipe!  I began with a confession but I must also end with another one – I messed up.  Big time.  To create the filling you make the custard and let it set in the fridge, then whip some cream and fold them together.  Stupidly, I added the custard to my whipped cream and let the kitchenaid whip them together which made it far too runny to sandwich the cake with.


Even more stupidly, asI was adding the custard to the mixer I thought, ‘I’ve done this before and it didn’t go well’.  Doh!  So, I didn’t cut the cake into layers; I left it whole and served my custard cream on the side.  Just as delicious but tinged with shame!  Please don’t let my idiocy put you off because this is a gorgeous cake.


Ingredients

For the cake:
125g unsalted butter, at room temperature
150g caster sugar
1 teaspoon vanilla extract
2 eggs
225g self raising flour
6 tablespoons milk
125ml runny honey, warmed
150g flaked almonds

For the filling:
50g caster sugar
2 tablespoons cornflour
3 egg yolks
125ml milk
75ml double cream


Method

Preheat the oven to 180°C/fan oven  160°C/350°F/gas mark 4.

Line a 20cm round springform tin with baking paper.

Beat together the butter and sugar until light and fluffy.  It won’t go pale and creamy because of the proportions, but you will notice it become lighter.

Beat in the vanilla.

Beat in the eggs, one at a time.

Beat in 1/3 of the flour followed by 2 tablespoons of milk.

Repeat until the flour and milk are fully incorporated.

Spoon into the prepared cake tin and level the surface.  Make a good attempt at levelling it so that the honey doesn’t pool into one side when you pour it on.

Pour the honey over the unbaked sponge and use the back of a spoon to gently guide it over the cake.

Sprinkle the almonds over the cake ensuring the cake and honey is completely covered.  It will look like a lot of almond.

Bake for approximately 45-50 minutes or until a skewer inserted into the cake comes out clean.

Leave to cool in the tin before turning out.

The cake can be made a day in advance and stored in an airtight container if you so wish.

Now make the filling: whisk together the sugar, cornflour and egg yolks until smooth.

Gradually whisk in the milk.

Pour into a saucepan and cook over a low heat, stirring all the time.

When the mixture is thick enough to coat the back of the spoon remove from the heat and pour into a bowl.

Press clingfilm onto the surface of the mixture to stop a skin forming. 

Refrigerate.

Whip the cream until firm peaks form before folding in the chilled egg yolk mixture.  Do this by hand – don’t be tempted to let the mixer do it – it will make it runny!

To serve, slice the cake in half horizontally and place one half on a plate.

Spread the custard cream over the cake and place the nut-topped layer of cake on top.

Dust with icing sugar if you desire.

Bask in the glory of the wonderful thing you have created.

Eat.


Sunday, 16 December 2012

Profiteroles


Having said only last week that I didn’t want to be faffing around making a croquembouche in the run up to Christmas, this week I found myself making choux pastry...me and my big mouth!  However, I didn’t make a tower and left my little buns at the profiterole stage.


I’d never made choux before and it’s become a long running joke between Mr CC and me that whenever I ponder what to make he says, ‘choux’ before adding that I can’t consider myself a proper baker having never attempted it (he certainly knows how to goad me!).  So I attempted it.  I did what I always do in times of kitchen troubles...turn to Delia.  Her profiterole recipe interested me because she says to spoon the choux onto the baking sheet rather than pipe it.  I realised why when my choux was so runny it fell off the spoon without any encouragement.  Shamefully, I started to doubt Delia and question her recipe.  See how runny it was:


But I should know better by now than to doubt Delia.  Of course they worked just fine and puffed up into pretty little balls.  For the Fanny Cradock fans out there I am happy – and proud - to report that there was no goo.


Delia’s recipe fills the profiteroles with whipped cream, which is lovely, but I decided on a halfway house between cream and crème pat with my cheaty custard cream filling.  It really is yummy and tastes like so much more work than merely adding some pre-made custard into whipped cream.  Here they are just after I piped the cream into them.  I found using a metal nozzle allowed good control to stuff that little bun full:


What struck me with choux is how much you get for so little.  Look at the quantities in the ingredients listings – they’re tiny, yet I got a good 22 profiteroles from it.  I was surprised at how quick they were to make too.


Of course, the only concern I have now is what will replace Mr CC’s choux-demands?  I only hope it’s something easy!


Ingredients

For the choux:
60g plain flour
1 level teaspoon caster sugar
150ml cold water
50g unsalted butter – cut into small cubes
2 eggs, beaten

For the cream:
300ml whipping cream
300g vanilla custard – the good quality, ready made stuff from the supermarket chiller cabinet

For the chocolate:
225g chocolate – I used a mix of milk and plain


Method

Preheat the oven to 200°C/fan oven 180°C/400°F/gas mark 6.

Line two baking sheets with baking paper or non stick foil.  Grease very lightly.

Tear off a sheet of baking paper or foil and lay it flat on the work top.  Sift the flour and sugar on to it – you must do this now so it is ready for when you need it.

Place the water and butter in a saucepan and melt together over a medium heat.  Stir.

As soon as the butter is melted and the temperature is reaching boiling, remove from the heat and tip in all the flour and sugar.

Beat like mad (I used an electric whisk) until the paste is smooth and a unified ball that leaves the side of the pan.

Beat in the eggs gradually until you have a thick glossy paste.

Flick some water onto the baking sheets – this will create steam and help the pastry to rise.

Spoon teaspoonfuls of choux onto the baking sheet leaving a 2cm gap between the buns.

Bake for 10 minutes and then increase the heat to 220°C/fan oven 200°C/425°F/gas mark 7 and bake for a further 15-20 minutes or until the buns are crisp, light and golden.

Pierce the side of each bun to allow the steam to escape and leave to cool.

For the filling I whipped the cream and then added the custard a spoon at a time.

Cut a slot in each bun and pipe or spoon the filling into the cavity.  Do this as close to serving as possible because the cream will soften the pastry.

Melt the chocolate in a bowl over a pan of simmering water taking care that the bowl does not touch the water.

When melted, remove from the heat and allow to cool a little before spooning over the profiteroles.

Serve immediately. (NB. I did put mine in the fridge and you lose the gloss on the chocolate but they’re perfect otherwise).

Bask in the glory of the wonderful thing you have created.

Eat.

Sunday, 12 July 2009

Summer fruits pavlova


Pavlovas are so easy to make that I feel almost guilty at how fantastic they look – everyone will think it has taken hours to create your masterpiece when, in reality, there is very little hands-on work.

My meringue cracked at little but it makes no difference to the flavour and I don’t think it spoils the look either:

There is something temptingly luscious about a big pavlova; the individual ones make it to the plate more beautifully but a big pavlova –requiring two hands to transport to the dining table - brings out far more greedy desires.

Slices are messy and the fruit and cream tumbles out onto the plate:


The combination of berries, so juicy, delicious and richly coloured at this time of year, contrasts wonderfully with the snowy meringue, particularly when the fruit juices mingle with the cream:


It’s such an easy to make crowd pleaser. I like my meringue crisp on the outside but soft and cloudlike inside:


I end with a plea: has anyone else had trouble with blogger during the past week? I've had lots of error messages when trying to upload photos - they all begin with a BX reference number, and when I have uploaded photos it won't let me click and drag them into position (i.e. scrolling down through my post); I have to move them down a screen at a time...which takes ages. Is it blogger or me? Any ideas? I know you're a clever bunch so throw myself on your mercy!

Ingredients:
For the meringue:
6 egg whites
375g caster sugar

For the custard cream:
600ml double cream
500ml good quality ready made custard

For the fruit:
I used a supermarket punnet each of raspberries, blackberries, blueberries and strawberries but couldn’t fit them all on.

How to make:
- Preheat the oven to 150°C/fan oven 130°C/300°F/Gas mark 2.
- Line a large flat baking sheet with baking paper.
- Whisk the eggs whites to the stiff peak stage then gradually whisk in the sugar until you have a thick, glossy meringue.
- Spoon the meringue onto the prepared baking sheet and shape into a bowl – the meringue is good natured and you can sculpt it quite easily.
- Bake for 40-50 minutes or until pale and crisp.
- Turn off the oven and leave the pavlova to cool in the oven with the door slightly open.
- When cold you can store overnight in an airtight container until needed.
- When ready to serve (don’t do this in advance or the meringue will go soggy) make the cream filling: whisk the cream until it is just about holding soft peaks, then whisk in the custard a spoonful at a time.
- Spoon the custard cream into the meringue case and top with fruit of your choice.
- Bask in glory at the wonderful thing you have made.
- Eat.

Sunday, 22 February 2009

Fruit tarts

These are oh-so-simple to make but look really impressive. Perfect for serving on a pretty cake stand or when you wish to impress.


The combination of pastry, fresh fruit and creamy filling has everything a sane person could want. If the fruit is not sweet enough, simply sprinkle a tiny amount of sugar over it and let it stand for an hour or so; I find this brings out the fruit's natural juiciness and enhances the flavour.


These little silver trays are actually meant for making pies in, but I thought they were just perfect for these tarts.


Ingredients:
For the shortcrust pastry:
175g plain flour
120g unsalted butter, cold
3 tablespoons icing sugar
2 egg yolks
2 teaspoons vanilla extract

For the filling:
250g mascarpone cheese
500g ready made, good quality fresh custard
2 teaspoons vanilla extract

For the topping:
Fruit of your choice

How to make:

- Start by making the pastry: put the flour, butter and icing sugar into the food processor and blitz until you get fine breadcrumbs.
- Add the egg yolks and vanilla and blitz until the pastry just starts to come together.
- Turn out onto a lightly floured surface and bring together into a ball of dough, handling no more than is absolutely necessary.
- Roll the pastry out between two sheets of baking paper and cut to line the size containers you’re using.
- Preheat the oven to 190°C/fan oven 170°C/375°F/Gas mark 5.
- Line the chilled pastry with a sheet of baking paper and cover with baking beans.
- Bake in the oven for 10 minutes, then remove the paper and beans and cook for a further 5 minutes until the pastry is golden and cooked.
- Leave to cool on a wire rack.
- Now make the filling: beat the ingredients together until you have a thick custard cream that will hold its shape.
- Spoon the custard filling into the pastry cases.
- Top with fresh fruit.
- Bask in glory at the wonderful thing you have made.
- Eat.

Saturday, 3 January 2009

Trifle

There are certain staple foodstuffs one must always have at Christmas and trifle is one of them. I think many of us dismiss trifle because we have had bad experiences of shop bought atrocities with an almost concrete jelly and fruit layer.

A good trifle should not contain jelly. The eating experience should be soft and juicy with a lovely mix of sponge, fruit, custard and cream. I used my final swiss roll to provide the trifle’s base.

Here is my pictorial masterclass to trifle making! Step one - have a fruit layer so tempting that you forget it’s good for you:


The fruit should sit heavily on the sponge base so as to ensure there are no pockets of emptiness; these will only limit the amount of custard and cream you can wedge into the bowl:


Step two - add a creamy custard layer so naughty you feel 4 pounds heavier just looking at it:


Step three – add whipped cream and a healthy, understated decoration (ahem):


The finished trifle should be a visual treat as well as a tasty one!


However gorgeous your trifle, sadly, it will always look messy in the bowl:


Ingredients:
These quantities made me a huge trifle (my bowl was approx 30cm tall and 25cm across), vary them according to the size of your bowl:
1 swiss roll – for the recipe click here
1 kilo of washed assorted fruit – I used raspberries, blackberries and strawberries
1 litre of ready made fresh custard
500g mascarpone
600ml double cream
2 Cadbury flakes

How to make:

- Cut the swiss roll into approximately 1.5cm slices.
- Line the bottom of the bowl with the swiss roll.
- Mix the fruit together and place on top of the swiss roll. Push down gently on the fruit to compact it a bit.
- Whisk together the custard and mascarpone until smooth and creamy. Whatever amount you make, remember that the volume of custard must always be twice the weight of the mascarpone.
- Spread the custard mix over the fruit. It will sink into any crevices in the fruit.
- Whip the cream until you have soft peaks and spread over the custard layer.
- Decorate as required – I used strawberries and crushed flake.
- Refrigerate until required.
- Bask in glory at the wonderful thing you have made.
- Eat.

Sunday, 7 September 2008

Toffee apple cake

What grabbed my attention with this cake was that the toffee apple topping was on both sponges, not just the top layer. The apples bake in brown sugar as the cake cooks and you end up with caramelised apples not dissimilar to tarte tatin but with absolutely none of the faff!

Here are the apples in the tins before being topped with cake batter:


These shots shows the ‘tarte tatin’ look of the cake:


I think that sponge, apple and cream is a marriage made in heaven and it shows that – British Royal family aside - three in a marriage can sometimes work. But I digress...

The toffee oozes into the sponge and is sticky, sweet and scrummy. You may also notice that I don't believe in skimping on the filling:


The recipe said to sandwich the layers with whipped double cream. I’m sure that would be divine, but I tweaked it slightly and added some good quality fresh custard. I use custard cream a lot for accompanying cakes – basically it’s whipped cream with spoonfuls of custard beaten in to it.


This cake defines “squidgy”. When you cut slices the cream gently oozes out at the edges


One tip – when the cakes are baking, some of the brown sugar leaks out of the tin (if you use a loose bottomed tin). Stand the tins on a baking sheet to stop this making a mess.

Note to optimistic work colleagues: you won’t be seeing this cake tomorrow. Sorry.

Ingredients:
For the cakes:
3 small eating apples (I used Pink Lady)
6 tablespoons dark brown sugar
175g unsalted butter
175g caster sugar
3 eggs
175g self raising flour

For the filling (and also serving cream):
600ml double cream
500ml fresh custard
Dash of vanilla extract

For the topping:
2 tablespoons icing sugar
1 teaspoon ground cinnamon

How to make:

- Preheat the oven to 180°C/fan oven 160°C/350°F/Gas mark 4.
- Line the bases of two 20cm sandwich tins with baking paper.
- Peel and core the apples then slice them thinly. Toss them in the brown sugar until well covered.
- Arrange the apple slices in the base of each tin.
- Now make the sponge: Cream together the butter and sugar until pale and fluffy.
- Beat in the eggs one at a time, adding some of the flour if the mix starts to curdle.
- Beat in the remaining flour.
- Divide the batter between the two tins and spread carefully so as not to disturb the apple slices. Level the surfaces.
- Bake for 30-35 minutes or until a skewer comes out cleanly. Mine took 37 minutes.
- Place the tins on a wire rack and leave to cool before turning out of tins. If you turn the cakes out too soon the toffee apple won’t be set and could slide off the top of the cakes!
- Lightly whip the cream then gradually add spoonfuls of custard. This is not an exact science – add as much as you think the cream can hold without turning runny. It’s not difficult though and there’s no need to be frightened!
- Sandwich the cakes together with as much of the custard cream as you think necessary. Put the rest in a bowl for people to help themselves when you serve the cake.
- Mix together the icing sugar and cinnamon and sprinkle over the top of the cake.
- Bask in glory at the wonderful thing you have made.
- Eat.

Sunday, 25 May 2008

Rhubarb cornmeal cake

Rhubarb seems to be one of those things you have to mature into like comfy slippers, brussel sprouts and thinking policemen look young. All I know is that I was never mad about rhubarb then – bang – love the stuff!


The CCD (Caked Crusader’s Da) seems to be having a bumper rhubarb season so I scoured my books for a rhubarb cake. This recipe – from Nigella – attracted my attention as it used two ingredients I have never used in baking before namely cornmeal and yoghurt. The cornmeal not only adds a nice texture to the cake but also soaks up some of the juices that rhubarb releases meaning that you retain all the flavour without the cake being soggy.

For some reason (probably that I’m weird) I thought the little rhubarb chunks looked cute:


Don’t get me wrong, I love all cake but this is the type of cake that excites me most; the sort of cake you’d expect to see waiting for you in a farmhouse kitchen. It’s a cake that knows it’s great and doesn’t need any flashy tricks.

Isn’t she a beauty? You can see, even before the cake is cut how juicy it looks and it had a lovely squidgy-to-the-touch texture:


This cake can be served at teatime with some cream or warm with custard or ice cream for dessert. Wanting the best of all worlds, I decided to make custard cream to serve with it – basically just whipping up some double cream and spooning good quality vanilla custard into it until I got the taste and texture that pleased me. Of course, it requires a lot of tasting along the way until you get it just right....... (hopefully, after all this arduous tasting, there will be some left for others to eat!)


It was a nice surprise that the red and green chunks of rhubarb remained red and green after cooking. This slice shows the lovely colours:

Was there ever a more perfect double act?


Ingredients:
For the cake:
500g rhubarb
300g caster sugar
125g unsalted butter, at room temperature
2 eggs
1 teaspoon vanilla extract
150g plain flour
1 teaspoon bicarbonate of soda
1 teaspoon ground cinnamon
155g fine cornmeal (polenta)
250g natural yoghurt

For the custard cream (optional):
300ml double cream
500g good quality vanilla custard
Vanilla extract

How to make:

- Preheat the oven to 180°C/fan oven 160°C/350°F/Gas mark 4.
- Butter and line a 23cm springform cake tin.
- Wash and dry the rhubarb then cut into small chunks (about 0.5cm). Place in a bowl and sprinkle 100g of the sugar over the top. Put to one side while you make the cake. Only do this when you’re going to actually make the cake – if it’s sitting around for too long a lot of liquid will come out of the rhubarb.
- Cream the butter with the remaining 200g of sugar. Beat until light and fluffy.
- In a bowl, beat together the eggs and vanilla then gradually beat into the butter mix. If your beater is powerful enough, the mixture shouldn’t curdle. If it does curdle it will correct itself on adding the flour so don’t panic.
- Weigh out the flour, bicarbonate of soda, cinnamon and cornmeal and combine until they are well mixed. Put to one side.
- Add the flour mix to the cake batter alternately with the yoghurt. I did this in three lots i.e. flour, yoghurt, flour, yoghurt, flour, yoghurt.
- Lastly, tip in the rhubarb and juices. Fold the rhubarb carefully into the cake batter then spoon into the cake tin. You will notice that there is a lot of mix! This is a big cake.
- Bake for approximately 1 hour or until a skewer comes out clean. Mine took exactly one hour. It’s worth checking the cake after 40 minutes in case your oven is browning it too quickly – if it is, cover with foil for the remaining baking time.
- Keep the cake in its tin and place on a wire rack to cool.
- Serve either hot or cold with custard, cream or ice cream. If you’re making custard cream lightly whip the cream and add vanilla extract. Then, a spoon at a time whisk in the custard. Keep beating until it’s just at the soft peak stage – I like it soft and know it’s ready when it very slowly drops from the whisk.
- Bask in glory at the wonderful thing you have made.
- Eat.

Sunday, 10 February 2008

Cream horns

It’s silly to talk about trends in cakes, but when was the last time you saw a cream horn? How can something so delectable fall so out of fashion? It’s an outrage! So this is my little contribution to bring them back into the minds of you all out there.

Until I started investigating the disappearance of the cream horn I hadn’t considered how they were moulded into the distinctive cornucopia shape. I then purchased these intriguing moulds :


When they arrived my instinct was to put them on my fingers and start cackling like a witch. When my brother saw them he put one on his finger and turned it into that mouse from Fingerbobs. This was a tv programme shown quite a lot in Britain in the 1970s and 1980s – the odd thing is that I remember it ALWAYS being on, yet only 13 episodes were made. It was presented by a slightly creepy man who wore a glove and stuck cheap cardboard puppets onto his fingers. There aren’t many things a gloved and carded finger can look like so you got a mouse, a seagull, a tortoise and a scampi. Yep, a scampi, I kid you not. And there was the insanely catchy ‘fingermouse’ song. Listening to it again on Youtube highlights the poor lyrics of “fingermouse, fingermouse, always on the brinkermouse”. Goodness we were easily pleased back then. But I digress....cream horns.

The ‘horn’ part of a cream horn is made from puff pastry. This, along with filo, is a pastry that I use shop bought. One day, I will attempt to make it but not yet. The trick is to cut long strips of the pastry and wind it round the mould. A dab of water on the end of the strip enables it to stick.
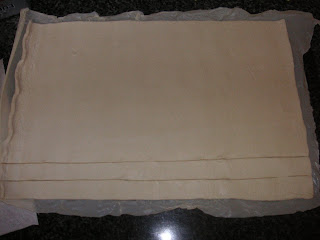
Glazed and ready for the oven:


Once the horn is made you can fill it how you please. I decided on custard cream with raspberries for half of them, and custard cream and chocolate for the other half. While the horns can be baked the day before, I would only recommend filling on the day you will serve them – otherwise you risk making the pastry soggy.

Cooked horn ready for filling:


I found that one sheet of puff pastry gave me 6 horns. The recipe below is for 12 horns.


Ingredients:
For the horns:
2 sheets of ready rolled puff pastry
1 egg
Caster sugar

For the filling:
300ml double cream
250g good quality fresh custard
Vanilla extract, if required
Small box of raspberries
2 tablespoons of light brown sugar
1 small tub chocolate curls (available in the cake decorating section of the supermarket – chocolate chips would also work)


How to make:

- Preheat the oven to 200°C/fan oven 180°C/400°F/Gas mark 6.
- Line your baking sheets with baking paper. I recommend putting only 4 horns on each baking sheet as they puff up.
- Have a little bowl of water next to where you are working.
- Unroll the pastry and cut strips of about 1.5cm lengthways. Dampen the end with water and then roll around the cream horn mould taking care to overlap so there are no gaps. Place on the baking sheet and repeat until you have 4.
- Brush the pastry with beaten egg and then sprinkle with caster sugar.
- Bake in the oven for approximately 15 minutes. You’re aiming for a dark golden colour. In my oven, this took 18 minutes.
- Allow the horns to cool slightly before removing the mould. The pastry will have puffed up around the mould but with gentle twisting it is easy to remove.
- Repeat until all the horns are baked.
- Both fillings have the same custard cream. Start whisking the cream until it thickens slightly. Add the vanilla extract, if using, and whisk until incorporated.
- With the whisk still running, spoon several tablespoons of the custard into the cream. When it is incorporated add more custard. It’s best to do this gradually as you don’t want to inhibit the cream thickening. You won’t be able to beat all the custard into the cream so use your judgement.
- Now all that is required is assembly. Spoon half the custard cream into a piping bag and pipe a horn one third full. Add some raspberries (if the raspberries are tart, spoon some light brown sugar over them and let it be absorbed – I did this the day before building my horns), then pipe some more cream, then some raspberries and so on.
- For the chocolate horns stir the chocolate curls into the custard cream, then pipe into the horns, adding more chocolate if desired.
- Bask in glory at the wonderful thing you have made.
- Eat.