Chocolate is a bringer of joy. It gave me even more joy when I saw that each bar of Green & Black’s chocolate that I bought came with a free taster bar of cherry chocolate. Some days it’s all good.
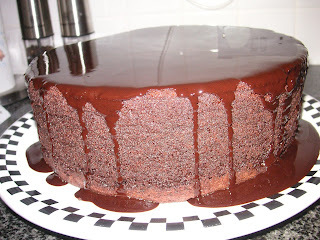
This cake has a lot of chocolate in it as well as cocoa powder. And then, in case you were worried it might not be quite chocolate-y enough, it’s covered with a chocolate icing. Here it is before the icing has set – it’s so glossy and mirror-like that you can see a reflection of the plug socket on the wall:
 Make no mistake – this is a big cake. When I took it out of the oven I was stunned at just how much it had risen and assumed that it would sink a bit, as most squidgy cakes do. It didn’t. It remained as proud as it was straight from the oven. Just to repeat: some days it’s all good. Here it is nude:
And here’s how it looked before icing. You’ll notice that I flipped the cake – so the top, which goes a bit craggy during baking, becomes the bottom. The advantage to this is that you get a perfect flat surface to pour your icing over; it makes the result that little bit more professional looking.
Before it sets the icing is shiny – it reminded me of a freshly opened conker. This is a cake that benefits from good ingredients (not that I’d ever advocate using bad ingredients). Buy the best quality chocolate you can – I used Green & Black’s 70% cocoa content; any higher percentage than this and it will be too bitter.

One thing I did find was that this cake takes hours to cool down so make it early in the day if you intend to keep it in an airtight container and serve the next day. The cake will keep for several days but you must refrigerate it. The last thing I would say is that, on glancing down the ingredients list you might think that this looks a rich and sweet cake. I’m not going to lie and say it isn’t but it’s nowhere near as heavy as you might expect and is very, very eatable!
Ingredients:
For the cake:
250g unsalted butter
250g dark chocolate (I used 70% cocoa content Green & Black)
150g self raising flour
150g plain flour
60g cocoa powder (I used Green & Black)
½ teaspoon bicarbonate of soda
550g caster sugar
4 eggs, lightly beaten
2 tablespoons of oil (I used ground nut oil but any light oil will do)
125ml buttermilk
For the glaze/icing:
150g unsalted butter
150g dark chocolate
How to make:
- preheat oven to 160°C/fan oven 140°C/315°F/ Gas mark 2-3 and grease a 23cm springform or loose bottomed cake tin. Line the tin with greaseproof paper and ensure that paper comes up at least 2 inches above the rim of the tin as this cake rises a lot and you’ll be heartbroken if it overflows and sticks to the base of your oven.
- Put the butter, chocolate and 185ml of hot water into a saucepan and stir over a low heat until smooth. Remove from the heat.
- Place the flour, cocoa and bicarbonate of soda into a large bowl and stir in the sugar. Don’t panic at the amount of sugar – it’s there to take the bitterness out of the chocolate.
- Make a well in the centre of the dry mix and add the eggs, oil and buttermilk. Using a large metal spoon, or using an electric beater on a low setting, combine.
- Little by little, add the chocolate butter mix to the bowl ensuring you combine it thoroughly. I used my kitchen aid for this but a hand held electric beater will be fine. You can do it by hand but the sheer volume of the mix will make it hard work.
- Pour the mixture into the prepared tin and bake for 1 hour 45 minutes or until a skewer comes out virtually clean. The cake is squidgy so you don’t want a completely clean skewer. Mine took just under 2 hours.
- Leave to cool in tin. Remove from the tin when completely cold.
- Now make the icing. Melt the butter and chocolate together over a low heat.
- Leave to cool slightly – if you pour it over the cake at this point it will be too thin and you won’t get a nice thick covering on the top and sides. It takes quite a while to cool and thicken.
- Pour over the cake and allow it to run down the sides.
- Bask in glory at the wonderful thing you have made.
- Eat.


1 comment:
Yummy. That looks so good. And just pure chocalate goodness, nothing else.
Post a Comment