Showing posts sorted by relevance for query coconut cake. Sort by date Show all posts

Sunday, 11 May 2008

Coconut cake

Happy birthday CCM!


There are three flavours the CCM (Caked Crusader’s Ma) loves in a cake: coconut, lemon and coffee. Of these three, the only one I like is coconut. Rather surprisingly, I chose coconut as the feature ingredient for the CCM’s birthday cake? Who’d have thought?

The coconut sponges looked beautiful on their own.....I'm starting to think that I find cake waaaaaay too alluring...


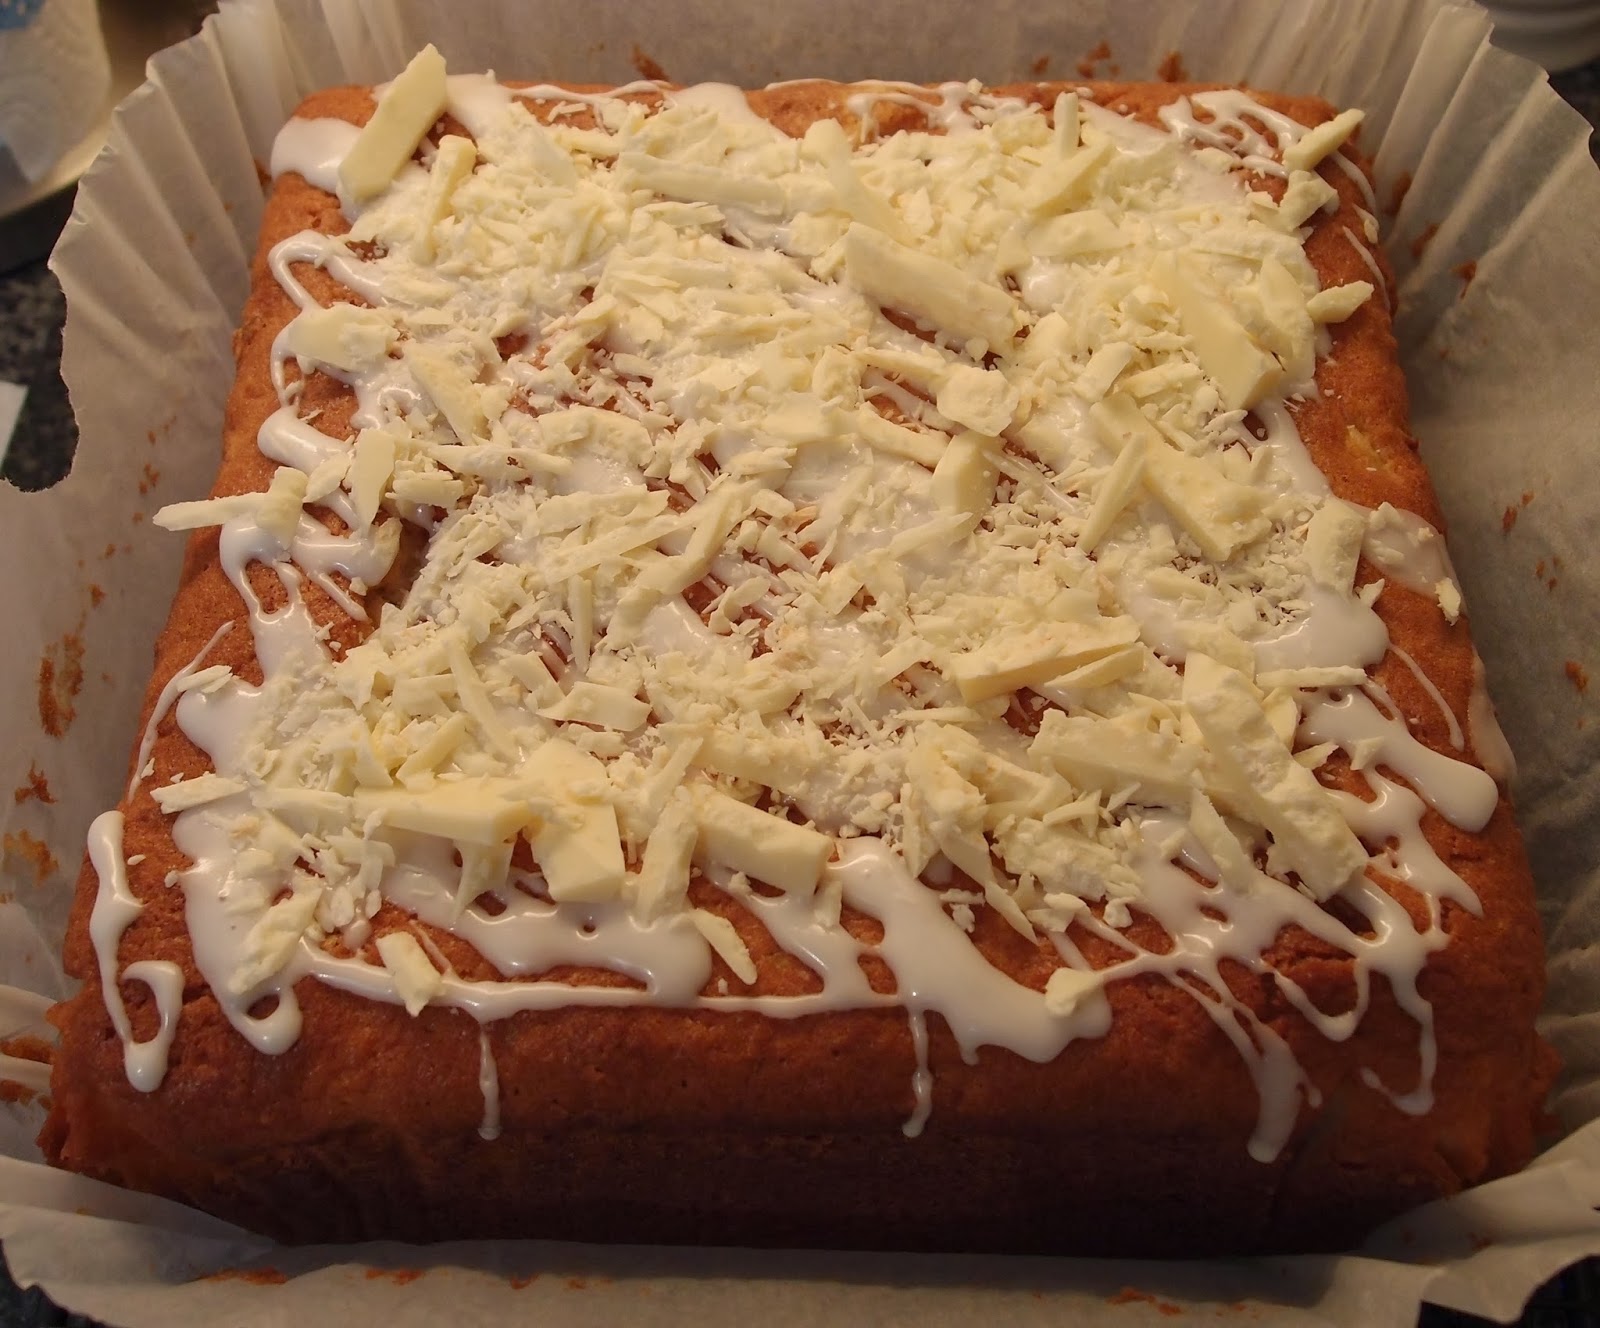
....even before they were teamed up with the coconut cream icing and jam:


While I don’t agree with all the CCM’s choice of flavours I do agree with her choice of TV eye candy and had no problem buying a cake topper to please her. One of her current favourites is David Tennant – how do I know this? Well, my Casanova (forget the rubbish film – this is the version you want) and Blackpool (where he plays a pastry obsessed policeman – can TV get any better???) DVDs have been borrowed and digested and I’ve even heard her commenting on Dr Who (as the CCM doesn’t like sci-fi this is perhaps the biggest clue). So, not only a coconut cake but with David Tennant wishing her happy birthday – what more could the CCM want?

I purchased my cake toppers from Icing Toppers. They have a selection of popular characters but you can also design your own. It did amuse me that the sample David Tennant one on the site was for Dr Who fan Jason (aged 12) – just a few years younger than the CCM!

The cake was very crumbly which contrasted beautifully with the thick smooth buttercream – a match made in heaven:


This extreme close up highlights the texture:


What interested me about this recipe was the use of coconut cream as well as desiccated coconut. I have never used coconut cream before and was unable to find it in my local supermarket. Instead I bought a block of creamed coconut and followed the instructions on the packet to make it into coconut cream – basically just diluting it. This cake had a more intense coconut flavour than other coconut cakes I have made. I particularly liked the creamy icing.

One thing I would say is that when spooned into the tins for baking it doesn’t look like there’s enough cake batter and I fretted that I would be presenting the CCM with a birthday Frisbee (albeit a Frisbee with David Tennant on it – how bad could that be?). It rose considerably in the oven and you can see from the photos the lovely depth. So don’t panic that you haven’t got enough mix!

The CCM is a sentimental old coot – look at the piece of cake she’s held off cutting until absolutely necessary!


Ingredients:

For the cake:
175g unsalted butter
175g golden caster sugar
3 eggs
175g self raising flour
1 ½ teaspoons baking powder
½ teaspoon nutmeg
55g desiccated coconut
2 tablespoons coconut cream (or creamed coconut turned into coconut cream following instructions on packet)

For the icing:
280g icing sugar
105g unsalted butter
3 tablespoons coconut cream
5 tablespoons jam (I used raspberry but any flavour would work)

For decoration:
Toasted shredded coconut (I couldn’t find this so sprinkled some desiccated coconut)

How to make:

- Preheat the oven to 180°C/fan oven 160°C/350°F/Gas mark 4.
- Grease and line two 20cm round deep sandwich tins.
- First make the cake. Place the butter and golden caster sugar in a bowl and cream until light and fluffy.
- Beat in the eggs, flour, baking powder, and nutmeg until smooth.
- Stir in the desiccated coconut and coconut cream.
- Spoon the mixture evenly between the two sandwich tins and level the surface.
- Bake for approximately 25 minutes or until a skewer comes out clean. Mine took 32 minutes.
- Leave to cool in the tins for 10 minutes or until just cool enough to turn out. Leave to cool totally on a wire rack.
- Now make the icing. Sift the icing sugar into a bowl and add the butter and coconut cream. Beat together until smooth.
- Spread the jam on top of one of the sponges. Top the jam with just under half the buttercream icing.
- Place the other sponge on top and spread the remaining icing on top of the cake.
- Sprinkle with toasted coconut (or desiccated).
- Bask in glory at the wonderful thing you have made.
- Eat.

Sunday, 11 April 2010

Coconut cake


For the life of me, I cannot recall what triggered my need for a coconut cake this weekend but all I know is that the need was deep!
The cake I was craving was simple – no fancy buttercream – just a good slab of sponge. Unlike Bono, I found what I was looking for.


When I perused the quantities in this recipe and then the recommended cake tin size I assumed that the cake maybe wouldn’t rise as much as the ingredients suggested; maybe the inclusion of the coconut cream would somehow prohibit the cake rising.
Wrong! Look at the height of this cake – I love it! If you wanted a more normally proportioned cake I would suggest going up a tin size.


I’ve never used solidified coconut milk in a cake before and found it a fascinating ingredient.
It looked pretty unappealing – like a block of Trex or Cookeen but smelled divine. As soon as it starts to warm i.e. even room temperature, it softens and you get a sense of the creaminess of the coconut. I grated it in a mini chopper as I think handling it too much might result in a mushy mess. The coconut milk was in the Indian, Thai, and Caribbean products aisle of my supermarket – it comes in a cardboard box shaped exactly like a block of butter.


Coconut cakes usually use desiccated coconut which adds flavour and texture to the sponge.
The coconut milk added an extra layer of flavour – a rich creaminess, somehow making the sponge fuller flavoured in a way that made my mouth water.

The glace icing was delicious and benefits from the addition of a tiny amount of butter. The original recipe used water but I decided on a touch of decadence and used Malibu!


The recipe also provided measurements in cups, so for the benefit of my readers across the Pond I include them in the recipe below.


I’m now off on travels for work – I will try to visit as many of your lovely blogs as usual, but it might not be until next weekend!


Ingredients

For the cake:

440g (3 ½ cups) plain flour
3 teaspoons baking powder
250g (2 sticks) unsalted butter
315g (1 ¼ cups) caster sugar
60g (1/2 cup) desiccated coconut
35g (1/3 cup) solidified coconut milk, grated
4 eggs
185ml (3/4 cup) milk

For the glace icing:
15g (1 tablespoon) unsalted butter
2 tablespoons Malibu, or water if you prefer
250g (1 ½ cups) icing sugar
Additional water, if required

To decorate: I used crystallised coconut from my local sweet shop but shredded coconut would be just as nice

Method

Preheat the oven to 180˚C/fan oven 160˚C/350˚F/Gas mark 4.

Line a 20cm round springform tin with baking paper making sure the paper comes up 3-4cm above the height of the tin. If you want a flatter cake, consider using a 23cm round springform tin.

Sift the flour and baking powder into a large bowl and rub in the butter until the mixture resembles bread crumbs. You can do this in a food processor, if you prefer.

Stir in the sugar and both types of coconut.

Gradually beat the eggs and milk into the batter.

Transfer the batter (it will be thick but pourable) into the prepared tin and level the surface.

Bake for approximately 1 ½ hours or until a skewer inserted into the cake comes out clean. I checked mine after 1 hour 10 minutes but it needed the full 1 ½ hours.

Place the tin on a wire rack and, when the tin is cool enough to handle, remove the cake and leave on the wire rack to cool completely. You can make the cake a day in advance and store in an airtight container.

Now make the glace icing: place the Malibu (or water) and butter into a dish and microwave for 10 seconds or so, until the butter is soft enough to stir into the liquid.

Place the icing sugar in a bowl and gradually whisk in the butter and rum.
You may need to add additional water to reach the right consistency; ideally this will be thick, glossy but spoonable and spreadable.

Spoon the icing onto the top of the cake and spread gently. Work quickly as it will set. I spread it just over the sides but you can spread it all over if you wish.

Decorate with either shredded or crystallised coconut.

Leave to set for 10 minutes before serving.

Bask in the glory of the wonderful thing you have made.

Eat.

Sunday, 11 November 2007

Coconut Cake

This was actually posted on 17th November - it's showing 11th November because I created a stock of items on this day as I'm working abroad for a short while and didn't want my site to get stale!

If vanilla didn’t exist, far more of my thoughts and hankerings would be turned over to coconut. I love it in any sweet cooking but abhor it in any savoury. I thought, naively, that the world shared my coconut love. However, on mentioning my plan to make a coconut cake to my colleague Alan (the poet, if you recall) he said “that might be a tougher one to promote”. I’m not ashamed to admit that I reeled – yes, reeled – at such a comment.

Is coconut really so out of favour with the great British public in anything other than some revolting Thai dish?


This cake is lovely and, unashamedly coconut obsessed – there’s coconut in the cake and on the buttercream. The recipe is adapted from a traditional British country cake called “Coconut Pound Cake” in which the recipe calls for some pink food colouring in the cake mix. I’m not a fan of adding colouring unnecessarily to a recipe so haven’t. If it’s important to you to be traditional then go ahead. I don’t think it will make any difference to the taste.


The cake is crumbly but moist and the buttercream has that lovely smoothness to it that tells you you’re eating something tasty but naughty.


I would put this in the category of “cakes that look like you spent much longer making than you really did”. (Incidentally, if you're wondering about the lovely plate the cake is on it's from the Bahamas and the decoration around the edge is of Junkanoo headdresses)


Ingredients:
For the cake:
225g unsalted butter
225g caster sugar
2 large eggs, lightly beaten
115g desiccated coconut
225g self raising flour

For the buttercream:
225g icing sugar
115g unsalted butter, softened
3-4 tablespoons desiccated coconut

1 glace cherry to decorate, optional


How to make:

- Preheat oven to 180°C/fan oven 160°C/350°F/ Gas mark 4 and line either an 18cm round tin with greaseproof paper.
- Cream together the butter and sugar until pale and fluffy. Don’t skimp on this stage as I think it is the foundation of success. Take a tiny piece of the mix and place on your tongue. Press it to the roof of your mouth – if it’s gritty the mix needs more beating. When it’s smooth you can move to the next stage.
- Beat in the eggs, then the coconut, then the flour.
- Spoon into the cake tin and bake for about an hour or until a skewer comes out clean. Mine took about 1 hour 10 minutes but it’s probably worth checking on it after about 45 minutes as ovens vary greatly.
- Leave to cool for 10 minutes in the tin and then remove from the tin and leave to cool completely on a wire rack.
- For the buttercream, cream the butter and icing sugar together until very smooth and spread onto the top (and sides if you wish) of the cake.
- Immediately after, sprinkle on the desiccated coconut.
- I tend to make the cake the day before I want it, and then make the buttercream on the morning of the day on which the cake will be served.
- Bask in glory at the wonderful thing you have made.
- Eat.

Sunday, 25 September 2011

Macmillan Cancer Support Coconut Cake


You may have seen adverts or mentions for the “World’s Biggest Coffee Morning” on Friday 30th September
; now in its 21st year this event encourages people to take some time out with their nearest and dearest, enjoy a cup of coffee (or tea!) and perhaps a slice of lovely cake whilst raising money for Macmillan Cancer Support.


This year, even if you can’t hold or attend an event you can do your bit by buying Macmillan’s Little Book of Treats from any M&S Cafe – the book is amazing; it’s only £3 and has 31 recipes in it...and I honestly want to make ALL of them! And if that isn’t for you, you can simply buy any from a range of nine products in an M&S Cafe and they will donate 10p to Macmillan for each purchase.


So, faced with a book where I wanted to make all 31 recipes what did I pick? I followed my heart and went with one of my true loves – coconut! The moist coconut cake recipe is lovely and I made minimal tweaks to it.


The cake has an interesting method in that you soak the desiccated coconut in the milk for a few hours to plump it up before adding to the cake batter. Not only does this soften the coconut, but it also infuses the milk a bit too. I will definitely be using that tip again.


Textures are important in this cake; the soft, moist sponge is one of the lightest I’ve ever made – you’d almost swear it was made with only the white from the egg (it isn’t). The white icing was thinner than I’m used to and set with an almost crisp, shell-like quality. I loved it – cake perfection!


I really rate this tip I picked up from watching Ina Garten
– stand the cake on 4 squares of paper or foil before pouring on runny icing. These protect the plate from having a puddle of icing – simply remove i.e. pull out when the icing is set! Here are the three stages:


If you’re hosting a coffee morning on 30th September you won’t go far wrong with this cake. I could eat it forever if there was a continual supply of cups of tea!


Ingredients

For the cake:

100g desiccated coconut
150ml milk
110g unsalted butter, at room temperature
250g caster sugar
2 eggs
250g self raising flour

For the icing:

25g desiccated coconut – or you can use sweet tobacco (it’s just a name – it isn’t tobacco), available from sweet shops – it’s toasted shredded coconut tossed in cocoa powder
200g icing sugar
75ml water or lemon juice – I used water


Method

2-4 hours before you wish to start baking, soak the coconut in milk.

Preheat the oven to 170°C/fan oven 150°C/340°F/gas mark 3.

Line a 20cm round springform tin with baking paper.

Beat together the butter and sugar until light and fluffy. It won’t go creamy as it normally would because the amount of butter has been reduced to accommodate the milk.

Beat in the eggs one at a time.

Gently stir in the flour, coconut and milk.

Spoon into the prepared tin and level the surface.

Bake for approximately 1 - 1 hour 15 mins or until a skewer inserted into the cake comes out cleanly. Check it after an hour and cover the top with foil if it’s browning too much.

Leave to cool, in the tin, on a wire rack. When the cake is cool enough to handle de-tin it and leave to cool completely on the wire rack.

Now make the icing: sprinkle the desiccated coconut into a dry frying pan and toast gently. It will burn quickly so don’t leave it unattended. I used sweet tobacco from a sweet shop (it doesn’t contain tobacco)

Tip onto a plate and leave to cool.

Place the icing sugar in a bowl and gradually beat in the water/lemon juice – you may not need it all. Beat until you have a glossy, thick, lump free icing. You want a consistency that will ooze but not run...if that makes sense!

Stand the cake on 4 squares of paper or foil – this will collect any icing and stop it pooling on the plate. Simply remove when the icing is set.

Drizzle the icing over the cake and allow it to ooze down the sides a little.

Sprinkle the toasted coconut on top.

Bask in the glory of the wonderful thing you have created.

Eat.

Sunday, 13 October 2013

Coconut carrot traybake


I’m always drawn to recipes that are familiar but with a new twist to them – this is a perfect example; it’s a carrot traybake but unlike most carrot cake recipes it’s a butter cake rather than an oil based recipe.  It also has a crunchy coconut topping rather than cream cheese frosting.  Both were really good ‘tweaks’.


This is such a light cake, amazingly so.  I thought the whole point of using oil in carrot cakes was to achieve lightness of sponge but this recipe produced the softest, fluffiest carrot cake I’ve ever eaten.  Without a doubt it will be my ‘go to’ carrot cake recipe from now on.


I added sultanas because, frankly, everything’s better with sultanas but you could replace them with nuts or simply omit them if they’re not your thing.  Sultanas add such a sweet, juicy little pop of joy to everything and it works very well against this cake’s crunchy topping.


The topping turns crunchy and toasted in the oven and adds a new texture to carrot cake.  I didn’t even miss the cream cheese frosting...and that’s saying something!  It definitely gave the whole cake a lighter feel.


Grating carrot has to be one of my least favourite tasks in baking.  I see people grate things on TV and it looks so easy, but my carrot was spraying everywhere and I couldn’t get a proper grip on it.  Of course, my food processor has grating discs, and I even have a plug in kitchen grater.  But did I use them?  No.  I used my metal grater so I could moan about it!


Ingredients

For the cake:
250g unsalted butter
300g light muscovado sugar
1 teaspoon vanilla extract
3 eggs
200g self raising flour
50g desiccated coconut
200g grated carrot (about 3 medium carrots)
2 teaspoons mixed spice
Optional: 150g sultanas

For the topping:
50g unsalted butter, melted
85g desiccated coconut
25g light muscovado sugar


Method

Preheat the oven to 180°C/fan oven  160°C/350°F/gas mark 4.

Grease a 30cm x 20cm traybake pan or roasting tin.

Start by making the cake: melt the butter gently in a large pan (it needs to be big enough to take all the cake ingredients); take your time with this as you do not want the butter to brown.

Leave to cool for five minutes.

Beat in the sugar, vanilla and eggs.  Make sure the mix is smooth and the eggs are well incorporated.

Stir in the flour, coconut, carrot, spice and sultanas (if using).

Pour into the prepared tin and bake for 30 minutes (or until virtually baked).

Meanwhile, make the topping: melt the butter and stir the coconut and sugar into it.

If it dries out while you’re waiting for the cake to cook, a dash of milk will moisten it up – but only a tiny amount; less than a teaspoon.

Take the cake from the oven and gently spread the topping over it.  I found the best way to do this was the back of a wooden spoon and my fingers.

Bake for a further ten minutes until the topping is golden.

Leave in the tin to cool before cutting into squares.

Bask in the glory of the wonderful thing you have created.


Eat.

Sunday, 17 April 2011

History corner – Golden crunch cake


This history corner is the ‘youngest’ book I’ve featured – it’s “A Spoonful of Sugar” issued by the British Sugar Bureau in 1973. Two very good things happened for the world of cake in 1973; firstly, this booklet was published and, secondly I was born! Now you see why I opened with how this is the most recent book I’ve featured in history corner......


This cake is a simple sponge with a coconut meringue topping baked onto it. It’s far less complex to make than you might think because both the cake and topping bake at the same time. I was sceptical as to how well this would work but I shouldn’t have worried – it’s a doddle, a very delicious doddle!


The booklet features a surprising number of savoury recipes and, while we all know that a spoonful of sugar can help regulate the acidity of tomatoes and bring out the flavour of carrots I’m not sure I want to add sugar to dishes such as devilled prawns with egg mousse...even I think that’s taking things too far!


Sugar has many uses beyond eating; I think the British Sugar Bureau was just (some might suggest cynically) trying to get people to use as much sugar as possible so I can’t vouch for any of the following “Sugar Hints” printed inside the cover:

  • A cube of sugar in your biscuit tin will help keep biscuits fresh and crisp

  • A cube of sugar is just the answer if you’ve run out of candles for a birthday cake. Drain a small can of apricot halves and arrange them around the cake, putting the cut side uppermost. Soak some sugar lumps in lemon essence, put one on each apricot and light with a match [I love the notion that you’re so disorganised you’ve run out of candles, yet will have tinned apricots, sugar cubes and lemon essence in your cupboard! They might as well have suggested that you use albatross feathers!]

  • A spoonful of sugar added to the water in a vase of flowers will make them stay fresh longer

  • Three of four cubes [they really increased the “hard sell” with this one!] of sugar put in a suitcase will prevent damp odours when storing

  • A spoonful of sugar in water used for washing a linoleum floor will give it an extra shine [and no doubt attract all the neighbourhood ants and wasps!]


The quantities looked a bit mean so I’ve doubled them; the doubled amount is what’s set out below. I also made two tweaks to the recipe; firstly I added coconut extract to the sponge (but vanilla or almond would work just as well) and secondly, I dotted some jam on top of the batter to add an almost bakewell vibe to it. Feel free to leave both out if you want to be a purist about it (but, when I make the cake again, I will definitely repeat both those modifications). It didn’t need much jam:


The cake sunk a little in the middle during cooling but the topping didn’t. I wonder if that was caused by my adding jam to it – whatever the reason it had no effect at all on flavour.


This cake is awesome! It’s the sort of cake that, however much of it you eat, you want just a tiny slice more. The topping is crunchy and coconutty and the cake is soft and spongy – the extra egg yolks make it wonderfully golden in colour and give it an almost custard-like flavour. I think it’s one of the best cakes I’ve eaten in a long while as it packs so much flavour and texture into such a simple recipe.


I finish how I began: 1973 was a very, very good year for cake!


Ingredients

For the cake:
170g unsalted butter, at room temperature
170g caster sugar
2 eggs
2 egg yolks (keep the whites for the topping)
230g self raising flour
2 tablespoons milk (either whole or semi skimmed)
Optional: 1 teaspoon of coconut, vanilla or almond extract

Optional: 2-3 teaspoons raspberry jam

For the topping (which bakes at the same time as the cake):
2 egg whites
115g desiccated coconut
115g Demerara sugar

Method

Preheat the oven to 160°C/fan oven 140°C/325°F/Gas mark 3.

Line a 20cm round springform tin with baking paper.

Beat the butter and sugar together until they are pale, light and fluffy. Don’t skimp on this stage as it’s where you get all the air into your sponge.

Beat in the two eggs and two egg yolks along with one tablespoon of the flour.

Fold in the remaining flour and milk and – if using – coconut extract.

Spoon the mixture into the prepared tin and level the surface.

If using, dot the jam over the surface of the batter.

Now make the topping: whisk the egg whites until they are stiff and then fold in the coconut and sugar.

Spread on top of the cake batter.

Bake for approximately 30 minutes or until a skewer inserted into the cake comes out clean. I found this far too short a time and mine actually took 55 minutes – although, thinking about it, I did double the quantities so it actually makes sense!

Leave to cool, in the tin, on a wire rack until the tin is cool enough to remove safely.

Leave the cake to cool completely on a wire rack.

Serve in thick slices – no accompaniment is needed.

Bask in the glory of the wonderful thing you have created.

Eat.

Sunday, 22 September 2013

Pineapple and coconut cake


When Lindt contacted me regarding their new Hello Summer fruity chocolate range I zeroed straight in on the luscious looking white chocolate, pineapple and coconut bar. 


It didn’t disappoint and is a great chocolate bar to soften the blow of Autumn and Winter arriving so suddenly this year.  The berry, lime and strawberry versions are a bit of alright too, and Mr CC made very appreciative sounds over the coffee version.  (My toughest challenge on this one was holding him back long enough to photograph all the chocolate!)


As luck would have it, I had bookmarked the recipe for this cake from Laws of the Kitchen, one of my favourite bloggers. You should visit her site anyway, but especially if you want to find this recipe in cups.


I decided to add a pineapple glaze to the cake and scatter finely chopped Lindt chocolate over the top.  It worked well as the filling was firm enough to hold its shape when I cut it into fine shards.  The bar is shaped nicely – I always think long thin bars taste better than squarer ones!


The one mistake I made was forgetting to buy buttermilk.  My local shop doesn’t stock it and I couldn’t face a trip to the supermarket just for one ingredient.  So I did what I always do in a crisis...I turned to the internet!  I never realised how easy it is to make buttermilk – simply milk and lemon juice.  I liked that I could make the quantity I needed; normally when I buy a pot of buttermilk for a recipe I end up wasting some of it.  It wasn’t quite as thick as the shop bought version but did the same job.  In this photo you can see the curdling start to take place:


Thank you Lindt for the lovely samples...any time you need someone to taste your chocolate I will make the time to assist!!!


Ingredients

For the cake:
250g unsalted butter, at room temperature
300g caster sugar
5 eggs
375g plain flour
1 tablespoon baking powder
180ml coconut milk
120ml buttermilk (or make your own with 120ml milk and 1 tablespoon lemon juice)
100g desiccated coconut
230g crushed pineapple – save the juice for the icing (I could only get pineapple chunks so mashed them up a bit with a fork)

For the icing:
100g icing sugar
1 tablespoon pineapple juice (from the can!)

To decorate: Lindt coconut and pineapple chocolate


Method

Preheat the oven to 180°C/fan oven 160°C/350°F/gas mark 4.

If you are making your own buttermilk mix together the milk and lemon juice and leave to stand for at least 10 minutes.  It will start to curdle but won’t become quite as thick as the shop bought version.

Line a 20cm square cake pan with baking paper.

Beat together the butter and sugar until light and fluffy.

Beat in the eggs one at a time – if the mixture starts to curdle add some of the flour.  Having said that, I didn’t find the mixture curdled – beat the butter and sugar for a long time and you should be ok.

Stir together the coconut milk and buttermilk.

Stir in 1/3 of the flour followed by half the buttermilk and coconut milk.

Repeat with a further 1/3 of flour and the remaining buttermilk and coconut milk.

Stir in the remaining flour and the baking powder.

Stir in the pineapple and coconut.

Spoon into the prepared cake tin and level the surface.

Bake for approximately 1hour – 1 hour 15 minutes or until a skewer inserted into the cake comes out clean.

Leave to cool for 30 minutes in the tin before de-tinning and leaving to cool completely on a wire rack.

Now make the icing – beat together the ingredients until thick and glossy.

Drizzle over the cake.

Sprinkle over shards of lovely Lindt chocolate.

Bask in the glory of the wonderful thing you have created.


Eat.