Sunday 26 June 2011

History corner – Pineapple and walnut cake


Good Housekeeping’s “New Cooking” was published in 1964 and the cover couldn’t scream “1960s” any louder if it tried! It’s hard to believe, but the couple on the cover could be well into their seventies now! The back cover shows their swanky and covetable kitchen/diner. At the time it was probably cutting edge but now looks rather kitsch and retro. I suppose all our kitchens will look that out of date in 50 years’ time!


As soon as I found this gem of book, priced at a meagre 50p, on a second hand bookstall in my local market I knew it was coming home with me. What instantly struck me was that, even though the book acknowledges that young couples are likely to both work, matters of running the household and cooking fall squarely on the wife’s shoulders.


One section is brilliantly titled “how much will he eat?” and provides guidance as to the quantities of food you should give your husband. No offence to the fragrant and delightful Mr CC, but I would not look forward to an evening where I had given him ½ lb of cabbage for dinner!


All the feminists out there will love the section titled, “Wife at work”. For your entertainment I shall quote directly: “the career-wife really has to put her back into the catering problem, or she will find herself eternally serving fish fingers and frozen peas. Feeling a bit of a bristle yet? Let me continue: “Try to organise some of your cooking ahead. An hour’s baking on Saturday can provide flan cases for mid-week puddings, a meat or fruit pie for Monday or Tuesday, a fruity cake to eat with coffee instead of having to make a sweet.


The chapter covering entertaining does at least manage to patronise both the husband and wife: “Slick cooperation between husband and wife makes all the difference to smooth running dinner parties...and it you have trained him to make the coffee and to wash up afterwards – well, good for you!


This is actually a really good cook book packed with some lovely and unusual recipes. I found it hard to select just one for this post but eventually went for the pineapple and walnut cake simply because it uses two of my favourite ingredients.


The recipe was written in ounces so I include those in the listing below. The glace icing is my own addition.


I also made English Madeleines this week; I’ve made them before (recipe can be found here
) but this time used my new Dr Oetker cake release spray. Dariole moulds can be a terror for turning out cakes but they just slid out! Great product.

No post from me next weekend as I’m off on hols; expect a ‘cakes I ate whilst abroad’ type update on my return!

Ingredients


200g / 7oz unsalted butter, at room temperature
140g / 5oz caster sugar
3 eggs
255g / 9oz self raising flour
225g / 8oz drained canned crushed pineapple – save the juice for the icing
55g / 2oz walnuts, chopped
2 tablespoons warm water

Optional glace icing:

200g/ 7oz icing sugar
3 tablespoons pineapple juice, from the can of pineapple

To decorate: walnut halves

Method


Preheat the oven to 180˚C/ fan oven 160˚C/350˚F/Gas mark 4.

Line a 20cm round springform tin with baking paper.

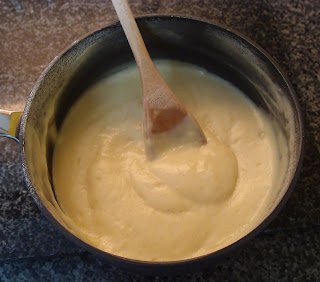
Beat together the butter and sugar until light and fluffy. This will take several minutes so don’t skimp and move on too quickly.

Add the eggs, one at a time, beating as you go. If the mixture looks like it might curdle add a little of the flour. (If you spent long enough whipping up the butter and sugar, the mix shouldn’t curdle).

Fold in the flour.

Stir in the pineapple, walnuts and warm water.

Spoon into the prepared cake tin and level the surface.

Bake for approximately 1 hour – 1 hour 15minutes or until a skewer inserted into the cake comes out cleanly.

Place the cake, still in its tin, on a wire rack and leave to cool.

Remove the cake from the tin when it is cool enough to safely handle, and then leave the cake on the wire rack until cool.

The cake will store for several days in an airtight container.

If you wish to make the glace icing simply combine the icing sugar and pineapple juice in a bowl and whisk until you have a thick white icing.

Pour onto the cake, it will run down the sides a little but not too much.

Place walnut halves on top for decoration

Bask in the glory of the wonderful thing you have created.

Eat.

Sunday 19 June 2011

Spiced beer cupcakes with honey buttercream


As it’s Father’s Day this weekend, my choice of baking had to be something that the CCD (Caked Crusader’s Da) would really enjoy. The CCD likes a spice cake and he likes beer, so this recipe seemed to select itself!


I chose Adnam’s Broadside as it’s one of the CCD’s favourites. Bitterness seems to be my nemesis with flavours – I just can’t fathom how anyone can drink a pint of beer without their mouth puckering up!

The intensity of the heavy spicing and beer needed balancing out with something softer and silkier, so I added a honey buttercream to the cake; it adds a beautiful texture to the cake.
My logic was that there are honey beers, so it had to be a combination that worked!

The aroma that filled the kitchen while these little cakes baked was intoxicating. I always used to be wary of baking with beer as I don’t like the drink, but the harsh flavour disappears on baking and adds richness and depth to the spices.

Don’t be tempted to cut down on the amount of sugar in the sponge recipe; I know it looks a lot, but it’s necessary to balance the bitterness of the beer. The dark sugar and the beer combine to produce an amazing flavour – first of all you get beer, but without the bitterness, then the spice hits, then the beer comes back.
Really flavoursome with a grown up edge!

Happy Fathers’ Day CCD!


Ingredients
For the cake:
110g unsalted butter, at room temperature
220g dark brown soft sugar
1 egg
1 teaspoon mixed spice
1 teaspoon ground cinnamon
1 teaspoon allspice
½ teaspoon nutmeg, freshly grated
200g plain flour
½ teaspoon bicarbonate of soda
250ml beer – I used Adnam’s Broadside, because it’s one of the CCD’s favourites
For the buttercream:
125g unsalted butter, at room temperature
300g icing sugar
3 tablespoons honey
Method

Preheat the oven to 190°C/fan oven 170°C/375°F/Gas mark 5.
Line two cupcake pans with paper cases (this mix will make 14 cupcakes).
Beat together the butter and sugar until well combined and light – as the recipe uses dark brown sugar it will never whip up like caster sugar will, but you should notice it gets lighter.
Beat in the egg.
Beat in the spices.
Fold in half the flour, along with the bicarbonate of soda.
Stir in half the beer. I found it best to keep the beaters going and pour the beer in a very slow trickle.
Repeat the process with the remaining flour and beer.
Ladle the batter into the paper cases; the batter it will be wet – don’t panic!
Bake for approximately 15-20 minutes or until a skewer inserted into the cake comes out cleanly. Mine took 20 minutes.
Leave to cool, in the tin, on a wire rack for 5 minutes until the cakes are cool enough and firm enough to handle.
Remove from the tin and leave to cool completely on the wire rack.
At this point the cakes will keep for several days in an airtight container.
Now make the buttercream: whip up the butter until it is light and fluffy.
Beat in the icing sugar and continue to beat until well combined. A good test for this is to take a little of the mix on your tongue and press against the roof of your mouth – if it feels grainy keep beating!
Beat in the honey.
If the buttercream seems soft, refrigerate for 10-15 minutes until it firms up.
Spread or pipe over the top of the cupcakes.
Optional: grate a little nutmeg over the top of the cupcakes.
Bask in the glory of the wonderful thing you have created.
Eat.


Sunday 12 June 2011

Strawberry tart


Nothing smells of an English summer like strawberries. I’m very lucky to live in Essex, which grows some of the tastiest, sweetest, prettiest strawberries in England…not that I’m biased!


I have wanted to make crème patisserie for ages and thought it would be the perfect accompaniment to the strawberries in this classic, unfussy tart.


My earliest memory of crème patisserie has to be the Marks & Spencer choux bun. Like everything (except my waistline) they were definitely bigger in the past, and the creamy light custard filling tasted like heaven! It was the sort of treat that you almost ate too quickly in your desire to consume it, and then regretted that you hadn’t savoured it more. Of course, the CCM (Caked Crusader’s Ma) usually made sure there was more than one cake to be enjoyed…(see earlier comment about waistline!)


This crème patisserie recipe produced very thick, rich results and – while delicious – didn’t have the lightness I wanted for my tart. So I did what any proper gourmet (i.e. gutbucket) would do in the circumstances...I whisked some cream into it. I then achieved the light, custardy cream that I wanted. This example highlights one of life’s important lessons – always add cream. To be honest, it probably didn’t need it and whisking alone would’ve lightened the texture. But never let reality get in the way of adding cream.


This tart relies on great ingredients and should probably only be made in the summer when the strawberries are local, and packed with flavour. The simple shiny glaze gives a professional looking finish.


The buttery pastry is crisp and crumbly and provides a lovely textural contrast to the thick, creamy crème patisserie.


Cut a very large slice, sit back and enjoy!


Ingredients


For the pastry:

250g plain flour
125g unsalted butter, straight from the fridge and cubed
50g caster sugar
2 eggs

For the crème patisserie:

4 egg yolks
100g caster sugar
25g plain flour
1 vanilla pod, cut in half lengthways and the seeds scooped out
350ml milk
optional: 4 tablespoons double cream (whisked in just before assembling tart)

For the strawberries:

2 large punnets (about 400g each) strawberries
3 tablespoons caster sugar
3 tablespoons water

Method


Start by making the pastry. Place the flour, butter and sugar into a food processor and blitz until you have breadcrumbs. (You can do this by hand with the old rubbing the butter into the flour method)

Add the eggs and blitz again.

Tip out onto a sheet of clingfilm and, with a little extra flour if necessary, bring the mixture into a dough.

Wrap in clingfilm and chill for at least 30 minutes.

Preheat the oven to 150°C/fan oven 130°C/300°F/Gas mark 2.

Roll out the pastry between two sheets of clingfilm until it is large enough to line a 25cm loose bottomed flan tin. There is no need to grease the tin as the pastry is so buttery. I found the pastry behaved really well and there was no tearing thus no patching needed. Leave any surplus pastry hanging over the edge.

Line the pastry with a sheet of baking paper and fill with baking beans and bake blind in the oven for 45 minutes. This sounds a long time but the temperature is very low so the pastry won’t burn.

Remove the paper and beans and, if the pastry looks wet, return to the oven for a further 5 minutes to dry it out.

When cool enough to touch, trim away the excess pastry.

Leave to cool and then store in an airtight container (the tart should only be built on the day of serving).

Now make the crème patisserie – this can also be made a day in advance and refrigerated until required.

Whisk together the egg yolks and sugar until light and thick – don’t skimp on this stage, it will take several minutes.

Whisk in the flour.

Place the vanilla pod and milk into a saucepan and bring it to the boil slowly; take it off the heat as soon as it boils and remove the vanilla pod.

Pour the milk onto the egg and sugar mix and whisk all the time.

Return the mixture to the sauce pan and stir over a low heat until it comes back to the boil.

Stir all the time; you will feel the mixture start to thicken as it approaches boiling point. This won’t be a subtle thing – you will have no doubt that your liquid has firmed up!

If you find the crème patisserie becomes lumpy whisk it quickly, off the heat. Don’t panic though – you can always pass the mixture through a sieve. Some people are funny about this and think it’s a sign of failure - I always do this, just to be on the safe side, whether there are lumps or not – why be proud and risk it?

When the crème patisserie has thickened, remove the pan from the heat and press clingfilm onto the surface to stop a skin forming.

When it is cool, transfer it to a bowl and cover with clingfilm; refrigerate until you build the tart.

Add the cream to lighten your crème patisserie when you build the tart. Take the crème patisserie from the fridge and whisk in a large bowl – it will have set so whisking loosens it up.

Add cream, a tablespoon at a time, until you achieve the light consistency you require – mine took 4 tablespoons. (if you don’t mind a thicker crème patisserie omit the cream, but still whisk it to lighten the texture).

Now prepare the strawberries: wash them and hull them (this means remove the green leaves and the little white core you get in the middle).

When the strawberries have dried, you are ready to start building the tart: fill the pastry case with the crème patisserie and arrange the strawberries on top.

Now make the glaze for the strawberries: place the sugar and water into a saucepan and bring them to the boil, stirring occasionally to ensure that the sugar dissolves.

Brush the glaze over the strawberries and leave to cool.

Refrigerate until ready to serve.

Bask in the glory of the wonderful thing you have created.

Eat.

Sunday 5 June 2011

Upside down peach and blueberry sponge


OK, so we’re in June and summer’s here (sort of).
I know I shouldn’t be making a cake using tinned peaches and serving it warm with custard but what can I say? I’m a contrarian baker!


This recipe is on the lines of a pineapple upside down cake, but made with peaches.
I used the blueberries as they provided a lovely colour contrast but also because I love the flavour and texture of a cooked blueberry.


This cake is a whopper!
The tin only just contained it, hence my comment in the method that if you have a bigger tin you might want to use it! Here it is from the oven, so upside down to how it’s served:


Is there a more pleasing piece of fruit than a tinned peach half?
It’s so perfectly smooth and round and such a beautiful colour. It made me forget that you only get a measly 6 halves per tin!


Mr CC is well trained in baking matters now. He found himself in Norfolk this week for work and came back with a rather special gift:


This is flour is from Letheringsett Mill, Norfolk’s only flour producing water mill. There has been a water mill at Letheringsett as far back as the Domesday book...that’s 1086! The flour was beautiful – incredibly fine and soft, almost like talc.


We had the cake warm, with custard, on the day of baking. The next day it was equally delicious eaten at room temperature with thick cream:


Ingredients:

For the topping:

2 tablespoons caster sugar
1 tablespoon plain flour
small punnet of blueberries
3 cans (400g each) of peach halves, drained

For the sponge:

250g unsalted butter, at room temperature
280g self raising flour
250g golden caster sugar
½ teaspoon baking powder
4 eggs
150ml natural yoghurt
1 teaspoon vanilla extract
Blueberries left over from the punnet listed in the topping ingredients

To serve: ice cream, cream or custard (depending on whether you serve hot or cold)

Method:

Preheat the oven to 180˚C/ fan oven 160˚C/350˚F/Gas mark 4.

Line a 20cm x 30cm roasting/baking tin with baking paper - make sure it’s a deep tin, although if you wish, you can use a slightly bigger tin.

Sprinkle the tin with the sugar and flour.

Place a blueberry into each peach half and then place the peaches, cut side down, in the tin.

Now make the sponge: place all the ingredients into a bowl and beat together until smooth and lump free.

Spoon the batter over the peaches, taking care not to dislodge the peaches.

Level the surface then gently push any leftover blueberries into the batter.

Bake for approximately 1 hour or until a skewer inserted into the sponge comes out clean.

Leave to cool on a wire rack for 10-15 minutes then turn the cake out. If you leave it too long, the caramelised peaches may stick to the paper.

Serve either warm with ice cream or custard, or at room temperature with cream.

Bask in the glory of the wonderful thing you have created.

Eat.