Sunday, 26 October 2014

Sticky orange potato cake


I remember watching Sesame Street when I was growing up and there would always be a bit where the screen was split into quarters depicting four different things or activities accompanied by a song, ‘one of these things is not like the others’.  You had to spot the odd one out.  You can play that game with the title of my cake this week: the correct answer is ‘potato’.


There are German plum dumpling recipes that use a potato based mix to enclose the plums but this is my first potato cake.  With all that mashed potato in it you expect it to be heavy or densely textured.  It isn’t!  It’s a light sticky cake and it melts in your mouth.  Enjoy it at room temperature with a cup of tea (always my preferred option) or warm with ice cream for dessert.  Or get the best of both worlds by eating it at room temperature and then warming the leftovers the next day for dessert.


The ground almonds provide texture and the syrup gives a sticky, wet texture.  The texture is unusual at first.  After my first bite I wasn’t sure if this was the cake for me however, once I got used to the texture I really enjoyed it.  I have pondered how best to describe it and struggled; I think the best way is to say that if you don’t like the following then it’s not the cake for you: 
  • Syrup cakes 
  • Baklava (the stickiness of it) 
  • Semolina (the texture)

Really – I’m not trying to put anyone off but this is not a cake for everyone and I want you to bake it knowing what you’re going to get.  Satisfied customers only on my site!


Using gluten free baking powder will turn this into a gluten free bake.


Ingredients

For the cake:
350g potatoes suitable for mashing – I used maris piper
200g unsalted butter, at room temperature
155g caster sugar
1 teaspoon vanilla extract
4 eggs
175g ground almonds
2 tablespoons (not a typo) baking powder
Zest of two oranges

For the syrup:
Juice of two oranges
3 tablespoons caster sugar

Method

Peel the potatoes and cut into large chunks.

Place in a pan and cover with water.

Bring to the boil then reduce the heat, part cover the pan, and simmer for approximately 15 minutes or until the potatoes are soft enough to mash.

Mash the potatoes.

Put to one side and leave to cool.

Preheat the oven to 180°C/fan oven 160°C/350°F/gas mark 4.

Line a 20cm springform round tin with baking paper.

Beat together the butter and sugar until light and fluffy.  Don’t skimp on this stage.

Beat in the vanilla.

Beat in the eggs, one at a time.

Stir in the ground almonds, baking powder and orange zest.

Stir in the cooled mash potato.

Spoon into the prepared cake tin and level the surface.

Bake for approximately 45 minutes or until a skewer inserted into the cake comes out clean.

About 20 minutes before the cake is cooked, place the orange juice into a saucepan and bring to the boil.

Let boil until the liquid has halved.

Remove from the hob and leave to cool.

Stir in the sugar – wait until the orange syrup is cool or the sugar will melt.

When the cake has been out the oven for 15 minutes de-tin it and place on a wire rack with a piece of foil underneath.

Spoon the orange syrup over the top (the foil underneath the rack will catch any drips)

Leave to cool completely before serving.

Bask in the glory of the wonderful thing you have created.


Eat.

Sunday, 19 October 2014

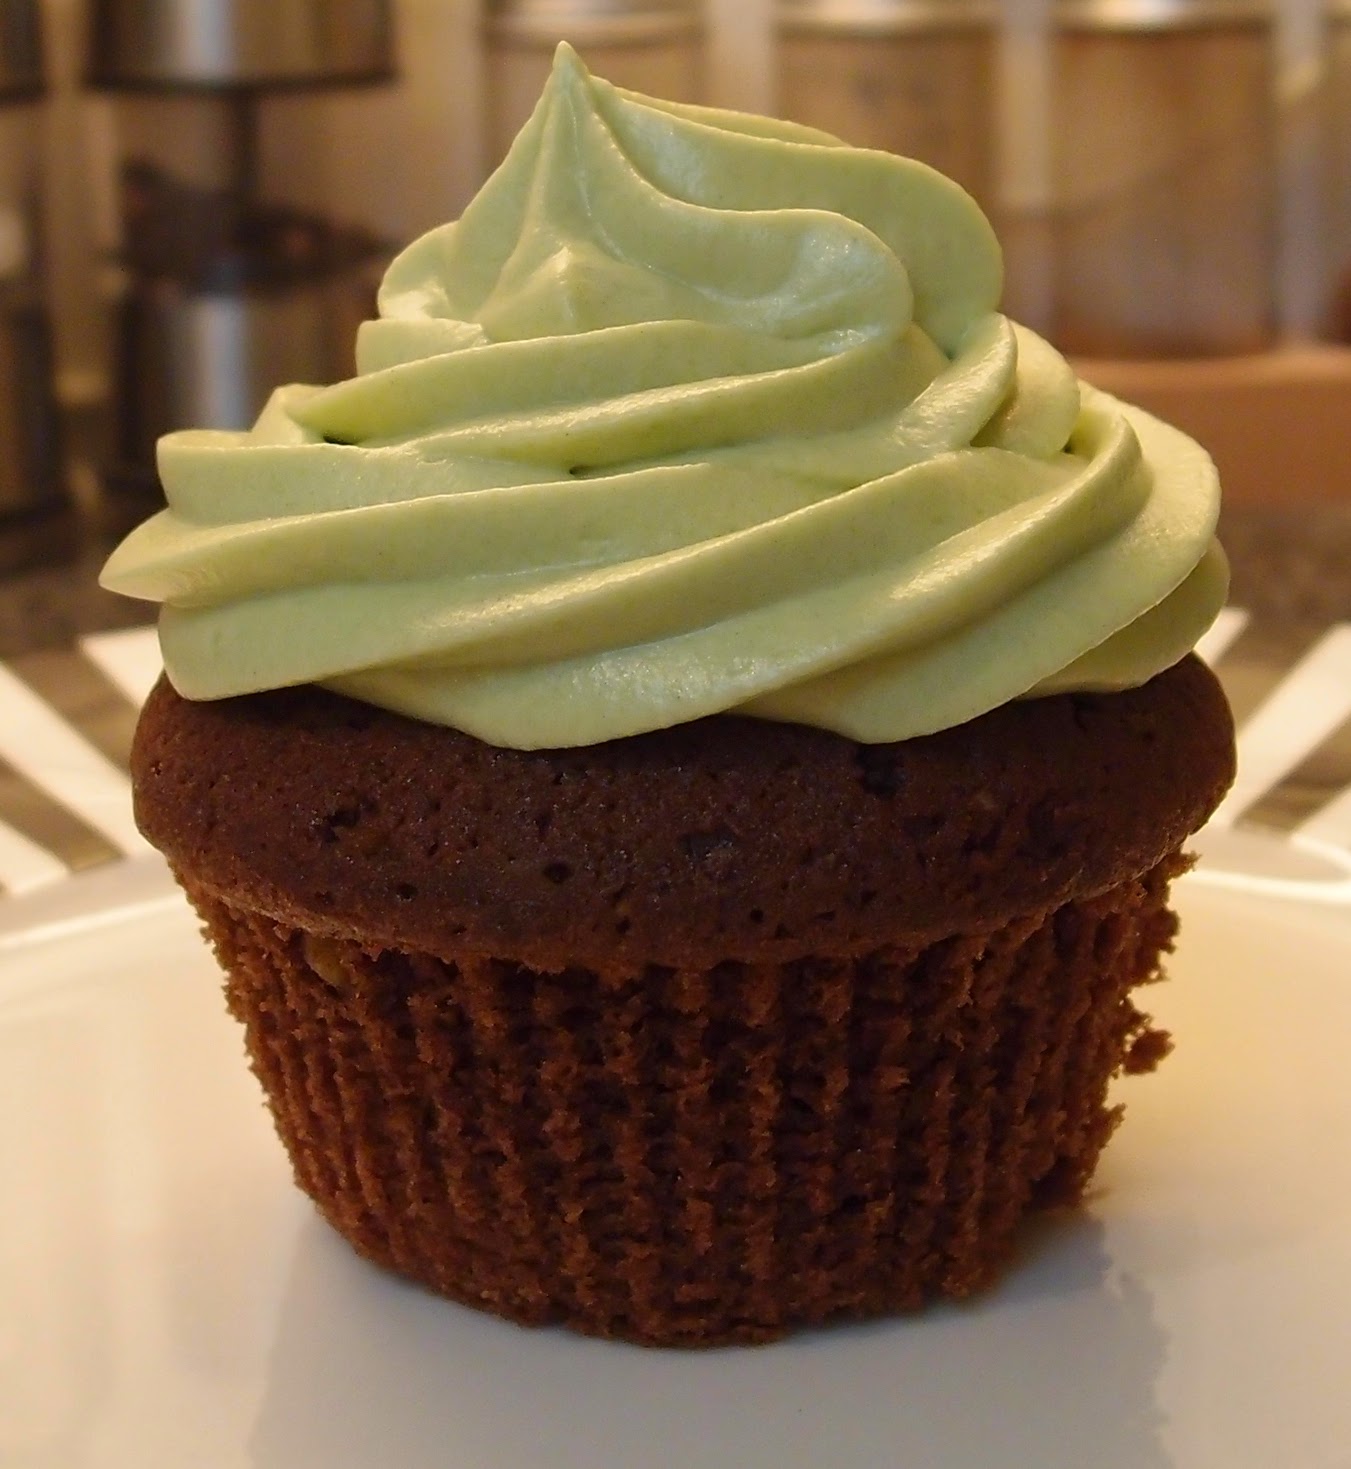
Matcha and chocolate cupcakes


When Tombo Tea kindly offered me a sample of their matcha baking mix I was intrigued and also a little wary.  I don’t like green tea as a drink but, when I’ve tried it in bakes, have always enjoyed it. I pondered how best to bake with matcha: it has a fresh, clean, almost grassy taste so figured it would balance well with rich ingredients like chocolate and cream cheese.  These cupcakes were the result of my musings and I am extremely pleased with them!


One of my great joys in baking (I already know I’m overselling this) is when you take a teaspoon of something, tip it out and it holds its shape.  Look at this lovely ball of greenness:


I loved how green the frosting turned out; one of the features of Tombo Tea’s matcha baking mix is that it retains its green colour.  It would be perfect for any Halloween bakes but also all year as it’s a natural rather than garish colour.  I also enjoyed something being green but not minty – it’s always interesting to see everyone’s expectations challenged; we get conditioned that certain colours equal certain flavours so it’s nice to shake things up!


The matcha cut through the very rich frosting; the balance between freshness and richness was perfect and at that moment I became a convert to green tea!  The chocolate cupcakes didn’t benefit from the colour, but again the addition of the matcha elevated these to something lighter and fresher than the usual rich chocolate cake.


Definition of sod’s law: the cupcake you pick to cut in half will always be the one you tested during baking with the skewer.  Notice the little vertical line in the centre at the top?


Now some eagle eyed readers will notice that the recipe makes 12 cupcakes but there are only 11 in the tin.  I have a two word answer for you, my friends: cook’s perks.


Thanks to Tombo Tea for sending me the sample of matcha baking mix - I absolutely loved it.

Ingredients

For the sponges:
175g unsalted butter, at room temperature
175g golden caster sugar
1 teaspoon vanilla extract
3 eggs
145g self raising flour
30g cocoa powder
½ teaspoon baking powder
1 teaspoon matcha green tea powder
2 tablespoons milk, if needed

For the frosting:
200g unsalted butter, at room temperature
300g icing sugar
180g cream cheese – I used Philadelphia
1 ½ teaspoon matcha green tea powder


Method

Preheat the oven to 180°C/fan oven 160°C/350°F/gas mark 4.

Line a cupcake tin with 12 paper cases.

Start by making the sponges: beat together the butter and sugar until pale, light and fluffy.  Don’t skimp on this stage.

Beat in the vanilla.

Beat in the eggs, one at a time, adding some of the flour if it looks like it might curdle.  Use this as a learning opportunity – if it starts to curdle, you need to beat the butter and sugar for longer next time.

Fold in the flour, cocoa powder, baking powder, matcha powder.

If necessary, add the milk to loosen the mixture to a dropping consistency (I needed to use it).

Spoon into the cupcake cases and bake for approximately 25 minutes or until a skewer inserted into the sponges comes out clean.  Probably best to check the cupcakes after 20 minutes in case your oven is quicker than mine.

Leave to cool – out of the tin - on a wire rack.

Now make the frosting: beat the butter until it is pale and whippy looking.

Add the icing sugar and beat again until well incorporated.

Beat in the cream cheese and matcha.

Pipe or spread over the sponges.

Refrigerate until 20 minutes before serving.

Bask in the glory of the wonderful thing you have created.


Eat.

Sunday, 12 October 2014

Honey and poppy seed cake with honey buttercream


I am a terror for a gift shop, be it at a museum, gallery, stately home, or anywhere really.  They have always been utterly irresistible to me and I will always come out clutching a bag of ‘treasure’ which you can be pretty sure will contain, amongst other things, a fridge magnet or several fridge magnets should I have found the choice too difficult to make.  Luckily, Mr CC is supportive of the purchase of tat (sometimes through gritted teeth, but mostly with a good heart).  However, during our visit to the stunning Audley End House last weekend, Mr CC had his sensible hat on and suggested that – given our impending move – we limit ourselves to ‘edible items only’.


All this explains why I chose to bake a honey cake this week; we bought a jar of beautiful honey made by industrious Essex bees living and working in Saffron Walden.  I am funny with honey (rhyme not intended).  I love it baked into cakes or biscuits but do not like it at all on bread or toast.  I matched the honey sponge with a honey buttercream to allow the honey to be the star of the show; it is often teamed with other flavours and gets a bit lost.  Poppy seeds always add lovely texture – little bursts of crunch, and look so pretty when you cut a slice of cake.


This was a very popular cake indeed; the soft sponge and silky sweet buttercream had a vintage feel to them – the sort of cake that you’d see on an old fashioned tea-time table.  I kept the decoration simple with some wafer flowers; my logic being that bees like flowers.  I added a layer of honey lime curd in the centre of the cake, but it was only to justify the purchase of the pot of curd at my local town fair this weekend; the cake was planned without this addition.


Footnote: Limiting my purchases to edible items resulted in the purchase of: honey (good – edible!), two bags of duck food (edible…if you’re a duck), a book (eating paper won’t do you much harm, I suspect), a fridge magnet (not so edible), and a horseshoe (have a dentist on standby if you try and bite into that).


Ingredients

For the sponge:
260g unsalted butter, at room temperature
150g golden caster sugar
130g clear, runny honey
4 eggs
210g self raising flour
35g cornflour
3 tablespoons poppy seeds
1 tablespoon milk
For the buttercream:
115g unsalted butter, at room temperature
225g icing sugar
2 tablespoons clear, runny honey
1 tablespoon milk – if needed

Optional: honey curd or any fruit curd of your choice


Method

Preheat the oven to 180°C/fan oven 160°C/350°F/gas mark 4.

Line two 20cm loose bottomed round sandwich tins with baking paper.

Start with making the sponge: beat together the butter and sugar until pale and well combined.

Add the honey and beat until fluffy and whipped looking – don’t skimp on this stage.

Beat in the eggs, one at a time, adding some flour if it looks like it might curdle.

Fold in the flour, cornflour. poppy seeds and milk.

Spoon into the prepared tins and level the surface.

Bake for approximately 25 minutes or until a skewer inserted into the sponges comes out clean.  Mine took a bit longer - nearer 40 minutes.  Cover the cake loosely with foil if it's browning too quickly.

Leave to cool in the tins for about 15 minutes, before de-tinning and leaving to cool completely on a wire rack.

The sponges can be made a day in advance of assembling the cake – simply store in airtight containers.

Now make the buttercream: beat the butter until it is smooth and whippy.

Beat in the icing sugar until the ingredients are well combined.

Add the honey and beat, at a high speed, to lighten the buttercream and get lots of air into it.

If needed, add the milk to loosen the buttercream and give a nice spreadable consistency.

Now you can assemble the cake: place one sponge on the serving plate.

Spread over some curd – if using.

Spread just over half the buttercream over the sponge, placing the other sponge on top.

Spread the remaining buttercream on top.

Decorate as you wish – I used wafer flowers.

Bask in the glory of the wonderful thing you have created.

Eat.


Sunday, 5 October 2014

English Macaroons


If there is a bake that makes Mr CC misty eyed with nostalgia then it’s probably this one – an English macaroon with a rice paper base.  I think if you were a child of the 1970s, as we both were, you could guarantee that any bakery you went into would have a tray of English macaroons – or macaroons as they were called back then, prior to the invasion of the fancy French version with an ‘o’ missing.  I remember them decorated with half a vividly red glace cherry (picking it off would have to be done before I could start eating) but this recipe suggested an almond, perhaps to add an air of sophistication?


The best bit about the macaroon back then (and now) was the rice paper base.  It added to the glorious chewy/crunchy/sticky joy of the macaroon and also added stability so that, when it crumbled, it still held together supported by its paper base.  I ordered my rice paper online but I think larger supermarkets may stock it.  And yes, I did eat the off cuts.  It tastes of a sweet nothingness on its own and is dry in the mouth, just like eating absorbent paper (who could’ve guessed that?) but I stayed true to my task wondering why on earth I was doing it.  My only regret is that I wasn’t more careful how I placed the batter on the rice paper – it would’ve been nice to cover more of the paper.  The first photo shows them raw;  the second, baked:


The only warning about making these is that they really do spread in the oven so don’t be tempted to pack them closer on the baking sheet.  I guessed what size to cut my rice paper discs but it doesn’t matter if the biscuit spreads to a bigger or smaller size.  I used the top of an espresso cup as my template – it was the sort that’s wide at the top and tapers to a smaller base.  I worked with four layers of rice paper at a time and used a knife to score the circle and then scissors to cut it out fully.


I think it’s time to re-popularise the English macaroon and get it back on the tea-time cake stand.  Whisper it softly but I think it tastes better than its French counterpart and has a lot more going on in texture too.  Beautiful in its simplicity it will keep for days in an airtight tin and – if anything – the flavour keeps improving.  I think Mrs Overall would be proud of these!


Ingredients

Optional: Sheets of rice paper
2 egg whites
100g ground almonds
175g caster sugar
25g ground rice or semolina
2 drops almond extract
Approx 25 whole blanched almonds or glace cherries


Method

Preheat the oven to 170°C/fan oven 150°C/340°F/gas mark 4.

Line three baking sheets with either baking paper or non stick foil.

If you are using the rice paper, cut it into circles (the batch makes about 25 biscuits, so maybe start with cutting 12 circles and judge how many more you’ll need when you’ve used those up) – I used the top of a glass to press onto the rice paper; it left enough of a mark to cut round with scissors.  NB. It speeds things up if you cut through multiple sheets of rice paper at a time.

Place the discs out evenly on your baking sheets – aim for about 9-12 biscuits per sheet, depending on the size of your sheet.

Now make the biscuit dough: whip the egg whites until they will hold their shape in soft peaks.

Stir in the ground almonds, sugar, ground rice and almond extract.

The recipe then stated:
Take heaped teaspoons of the dough and roll into balls – think big marbles and you’re at about the right size.  NB. The dough is very sticky so you’ll find it easier to handle if you dip your hands into cold water between each rolling.

My dough was far too wet to roll so I spooned generous teaspoons of batter onto the rice paper bases.  They baked just fine so don’t worry if your mix is runny.

Place each ball of dough onto a disc of rice paper and place a whole almond or half a glace cherry on top.  If you’re not using the rice paper, simply place the ball of dough directly onto the prepared baking sheet.

Bake for 20-25 minutes or until the biscuits are spread and a pale golden colour (they don’t take on much colour at all).

Leave to cool on the baking sheet – they will be very soft while warm and moving them will cause them to break.

If the biscuit has not spread enough to cover the rice paper you can trim any excess off with scissors (I didn't bother).

Bask in the glory of the wonderful thing you have made.


Eat.