Sunday, 30 August 2009

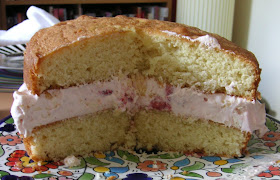
Victoria Eton mess sponge


I wanted to come up with something special for my blog’s second birthday and this is it! In the two years since I launched my alter ego on the world I haven’t made a Victoria sponge as I always default to my favourite sponge recipe.

While there’s nothing wrong with a classic Victoria sponge i.e. sponge filled with either jam and cream or buttercream, I wanted something with a little more pizzazz and more fitting for a dessert. Taking the classic Victoria sponge filling of strawberry and cream, I went one stage further and used Eton mess as a filling. Eton Mess is a classic dessert in its own right and comprises of strawberries, cream and crushed meringue.

The hidden crunch of the meringue in the creamy filling compliments the sponge perfectly and was a lovely mix of tastes and textures.

Don’t worry about having any leftover – keep it in the fridge and it stays just as delicious for a day or so. If you wish to keep it longer than that hang your head in shame and vow, right now, to increase your cake consumption!

Ingredients
For the sponges:
200g caster sugar
200g unsalted butter, at room temperature
3 eggs
200g self raising flour
1 teaspoon baking powder
2 tablespoons milk

For the Eton mess filling:
6 meringue nests, crushed (I used Marks & Spencer’s as they use only egg white and sugar i.e. just like if you’d made them yourself...which of course you could if you wanted!)
225g strawberries, washed and hulled
1 tablespoon icing sugar
300ml double cream

Method

- Preheat the oven to 190°C/fan oven 170°C/375°F/Gas mark 5.

- Line the base of two 20cm round sandwich tins with baking paper.

- Place all the ingredients for the sponge into a bowl and beat together until smooth and well combined.

- Divide the mixture evenly between the tins and level the surfaces.

- Bake for approximately 20 minutes or until a skewer inserted into the centre comes out cleanly. Mine took 25 minutes.

- Leave to cool on a wire rack before turning out of the tins.

- While the sponges can be made in advance and stored in an airtight container, the Eton Mess filling can only be made when you need it.

- Blitz half the strawberries in a blender or processor to make puree.

- Stir in the icing sugar then pass the puree through a nylon sieve.

- Chop the remaining strawberries into small chunks.

- Whip the cream until you have soft peaks.

- Fold in the crushed meringues and the chopped strawberries, then fold in the puree.

- Place one sponge on a serving plate and cover with the Eton Mess. Don’t worry if you can’t use it all – simply spoon any leftovers into small glasses and you have a dessert for another meal!

- Top off with the second sponge.

- Dust with icing sugar, if desired.

- Bask in the glory of the wonderful thing you have made.

- Eat.

Canadian butter tarts


I’ve seen differing recipes for these tarts, some of which include coconut. Now I love coconut but it didn’t seem quite right with the other ingredients so I asked my Authority-On-All-Things-Canadian, Soo, what she thought and she stated that her mother never put coconut in to her butter tarts. So that was good enough for me.

These little tarts are very rich and very delicious. Buttery, short pastry filled with raisins, nuts and sticky caramel. I used walnuts and these worked well as they provide contrast in both texture and taste to the softer, sweeter, gooier components.

My quantities below made 24 individual tarts (using a shallow cupcake pan). I see no reason at all why you couldn’t halve the quantities if you only wanted 12.

I find pastry inexplicably beautiful, particularly when it’s rolled out and the cutter has worked its magic; it's the food equivalent of Christmas Eve - everything is about to happen:

Tell me it isn’t just me who finds this photo cute?

Ingredients

For the pastry:
230g plain flour
160g unsalted butter, cold
4 tablespoons icing sugar
2 egg yolks

For the filling:
4 eggs
350g light muscovado sugar
200g raisins
2 teaspoons vanilla extract
100g unsalted butter, at room temperature
8 tablespoons single cream
100g chopped walnuts

How to make

- Start by making the pastry: place all the ingredients except the egg yolks into a food processor and blitz until you have fine crumbs.

- Add the egg yolk and blitz again until a golden, buttery pastry starts to form.

- Tip out onto a sheet of clingfilm and bring to a ball of dough. You may need to add a tiny bit more flour to achieve this.

- Wrap in clingfilm and chill for at least 30 minutes.

- Preheat the oven to 190°C/fan oven 170°C/375°F/Gas mark 5.

- Grease two cupcake trays i.e. 24 holes, with butter.

- Roll the pastry out between two sheets of clingfilm and use an appropriate size round cutter to line the patty tins. The pastry is good natured and will re-roll as many times as you need.

- Now make the filling: lightly beat the eggs and put into a saucepan with all the other ingredients except the chopped walnuts.

- Stir over a medium heat until the butter and sugar have melted. The mixture will bubble and thicken – stir all the time to avoid it burning.

- As soon as the mixture is thick enough to coat the back of a spoon, remove from the heat and stir in the walnuts.

- Spoon the filling into the pastry cases making sure you get a good mix of raisins and nuts in each – fill the pastry cases to the top as the mixture does not expand on cooking. I found that I had some liquid left over – possibly I should have cooked it for longer and reduced it more.

- Bake for approximately 18 minutes or until the caramel is an even deep golden colour. Mine took exactly 18 minutes.

- Leave to cool in the trays until you can handle them to turn them out.

- Leave to cool completely on a wire rack.

- Serve warm with cream or ice cream or at room temperature with a cup of tea

- Bask in the glory of the wonderful thing you have made.

- Eat.

Thursday, 27 August 2009

ICL Challenge IV: Cupcakes of the World - prizes


The next Iron Cupcake London challenge is “Cupcakes of the World”. For all details of the challenge, including the tweaks to the rules please click here.

But what is a challenge without prizes? A pretty poor one, I would say….so let me unveil the main prizes up for grabs on Tuesday 1st September.....ta da!

First place will win this beautiful china cake stand, decorated around the edge with cupcakes:


Both first and second place will each win a cupcake umbrella (very useful as Autumn approaches)….


….and this ‘couldn’t be any cuter if it tried’ cupcake kitchen timer:


The prizes are awarded in official ICL bags (also available for purchase on the night) and there will be other goodies in there to, so hopefully you can see that it’s worth winning! Plus there is the winner’s certificate and rosette.

What are you waiting for? Crank the oven up to 11 and get baking…..as usual I’d appreciate advance warning if you plan to enter or taste – just so I can get tea and coffee numbers right on the night!

See you Tuesday….

Sunday, 23 August 2009

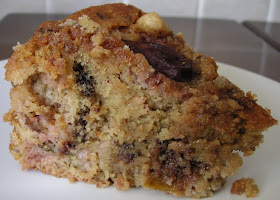
Plum, chocolate and hazelnut cake

I’ve have made plum tarts before, and no doubt will again before the season is over, but this recipe struck me as something highly original – teaming plums with chocolate isn’t a combination that leaps to mind but goodness me, does it work!

I think the key is to go as bitter as you dare with the chocolate. The rich, dark bitterness compliments the juicy, sweet acidity of the plums to create deliciousness! The chocolate isn’t immediately obvious but gives an extra something to the flavours.


The plums I used are damson plums. Most people I talk to don’t realise that some damsons can be eaten like plums. Damsons seem to get a bad press as acidic, tart and inedible without turning into jam. My damsons came from the tree in my parents’ garden and are as sweet as any Victoria plum.


Perhaps it’s sentimental but I always think that the damson tree’s bounteous crop is its way of thanking us for saving it. Many, many years ago (possibly over 20) I went to garden centre and there, in the reduced-to-clear section, was a rather pathetic looking twig in a pot. The label stated it was a damson plum tree but such a grand declaration didn’t really match the look of it. It was the only tree in the bargain section and seemed rather forlorn; for reasons I can’t explain it tugged at my heartstrings so I bought it – even though it was in the sale it was expensive (to me, at the time) for a twig. The tree grew steadily but it took several years for any crop to appear, but when it did – oh wow! Year after year we are rewarded with pounds of delicious, juicy, sweet damsons – we give away bagfuls to friends and neighbours, we make jam, pies, cakes, we leave the high fruits for the birds and still we have pounds of damsons!


When I started telling you the story of the damson tree I didn’t realise I would reach anything like a moral ending, but I suppose the moral of this story is that just because you start out as a twig in a pot in the sale section needn’t mean you can’t turn into a beautiful tree producing wonderful fruit! Here endeth today’s lesson….normal flippant service will be resumed shortly….

Ingredients

500g plums (I used damsons)
175g light muscovado sugar, plus 2 tablespoons to sprinkle on top
175g unsalted butter
175g self raising flour
175g ground hazelnuts (if you can’t find these simply place chopped or whole hazelnuts into the food processor and blitz until ground)
3 eggs
1 tsp baking powder
50g dark chocolate (70 per cent cocoa), chopped
2 tbsp hazelnuts

To serve: thick cream

Method

- Preheat the oven to 180°C/fan oven 160°C/350°F/Gas mark 4.

- Line the base of a 20cm round springform cake tin with baking paper.

- Halve and stone 4-5 of the plums depending on their size and set aside for later.

- Chop the remaining plums – not too small, you want to know they’re there in the cake.

- Place the sugar, butter, flour, ground hazelnuts, eggs and baking powder into a bowl and beat until smooth and well combined. It will take a few minutes.

- Stir in the chopped plums and chocolate.

- Spoon into the prepared tin and level the surface.
Arrange the retained plum halves over the top and gently press them just into the cake mix.

- Scatter over the whole hazelnuts.

- Sprinkle over 2 tablespoons sugar.

- Bake for 40-50 minutes or until a skewer inserted into the cake comes out cleanly. Mine took 55 minutes

- Cool in the tin, on a wire rack, until you can handle the tin to turn the cake out. Leave to cool completely. Because this is a squidgy cake it might sink a little on cooling – don’t worry, it will still taste juicy and divine.

- Serve with thickly whipped cream or, if serving as a dessert, pouring cream or ice cream.

- Bask in the glory of the wonderful thing you have made.

- Eat.


Banoffee pie (aka Banamel pie)


This has to be one of the simplest desserts to make yet is always greeted with delight. If you can open packets and chop things, you can make an awesome banoffee pie. You don’t even need an oven!

I suppose you could make this into more work – if you really wanted to – by making your own caramel. I know you can do this by boiling a tin of condensed milk for several hours but I’ve heard stories about the tin exploding if you don’t keep it covered with water. I really didn’t fancy steam cleaning my entire kitchen this weekend so I bought my caramel!

The CCM (Caked Crusader’s Ma) declared banoffee pie to be in her “top two desserts”. When I enquired as to the other she admitted that she hadn’t thought that far ahead but felt she should leave some leeway for other great desserts!

My love affair with the crushed hobnob biscuit base continues – it works very well here giving some oaty crunch to an otherwise soft dish.

Whilst making this I pondered the name: banoffee. It’s a contraction of ‘banana’ and ‘toffee’ but why? The dish contains no toffee – it’s caramel. Why isn’t it called Banamel pie? Or Caramana Pie?

My extensive research (ok, so I googled it – that still counts!) revealed that toffee and caramel are different (see here if you’re interested) mainly because toffee contains no milk or cream. Banoffee pie only ever contains caramel. So why does toffee get the name check and steal the glory? The campaign to rename the dish starts here….

Ingredients

300g oaty biscuits (I used Hobnobs )
120g butter , melted
397g tin NestlĂ© Carnation Caramel (or any other caramel – I used Dulce de Leche) – save a little to drizzle over the cream
3 -4 bananas, sliced
350ml double cream
1 tbsp icing sugar
Chocolate to sprinkle over the top – I used 2 crushed Flake bars

How to make

- Crush the biscuits in a food processor or by placing them in a bag and hitting with a rolling pin.

- Add the melted butter and pulse to combine.

- Press the mixture into a 24cm tart tin or pie dish. No need to grease it – the biscuit base is buttery enough not to stick.

- Chill in the fridge until the base is set.

- Retain two tablespoons of the caramel and spread the rest over the biscuit base and return to the fridge until the caramel firms up – about an hour.

- Slice the bananas and arrange over the caramel.

- Whip the cream and icing sugar until you reach the soft peak stage then spread over the bananas.

- Drizzle the retained caramel over the cream.

- Crush the flakes and scatter over the top.

- Chill until you wish to serve

- Bask in the glory of the wonderful thing you have made.

- Eat.


Sunday, 16 August 2009

Bramley and blackberry traybake


I am lucky enough to live right next to a very beautiful part of the Lee Valley park so when I had a hankering to go blackberry picking this weekend I didn’t have to go very far. In terms of food miles, the blackberries used in this recipe did less than one!

I should point out that I wasn’t alone in this venture and was more than ably assisted by the CCBF (Caked Crusader’s Boyfriend). All the outdoors photos used in this post were taken by him (when he should’ve been picking fruit – anything to get out of hard labour!!! But I’ll let him off as he peeled and sliced all the apples used in the cake....I’ll turn him into my commis chef yet!)

The bushes directly in the sun were abundant with big, juicy blackberries and we far exceeded the amount we needed to make two of these cakes. It was apparent that no one had been there before us – I remember when you had to time it right to ensure that the bushes had anything left to pick; now it seems like no one can be bothered, which is a shame.

Our haul of luscious berries:

Here are the two cakes ready for the oven:

For reasons I can’t quite explain, this cake tasted French to me. It’s not a spongy cake and it’s not as batter-y as, say, a Clafoutis but somewhere between the two. One thing I can say with clarity – it’s utterly delicious! There’s actually more fruit than cake and each bite is packed with flavour and texture. Very simple to make and extremely lovely to eat.

The colours of the blackberries and the apples start to merge giving a very pretty hue:


Grab a Tupperware, put on some thick trousers (those prickles snag) and get picking – with very little effort you could be enjoying this:


Ingredients:

175g unsalted butter, at room temperature
284ml whipping cream
225g golden caster sugar, plus 2 tablespoons for sprinkling on top
3 eggs
300g plain flour
4 bramley apples, peeled, cored and cut into chunky slices
300g blackberries

To serve: ice cream or thick cream

How to make:

- Preheat the oven to 200°C/fan oven 180°C/400°F/Gas mark 6.

- Grease a 30cm x 20cm deep roasting tin with butter.

- Tip the butter and cream into a saucepan and bring slowly up to the boil. Remove from the heat and set to one side.

- Whisk the sugar and eggs together until thick and fluffy. This takes a good few minutes and you’ll know when you’re there as the colour will turn pale.

- Whisk the cooled cream and butter into the egg mix.

- Sieve in the flour and fold until combined.

- Peel, core and cut the apples into wedges. Cut each quarter into three chunky slices.

- Pour the batter into the prepared tin and scatter over ¾ of the blackberries.

- Arrange the apple slices – you’ll need to place them compactly to get them all in.

- Scatter the remaining blackberries over the top.

- Sprinkle over two tablespoons of golden caster sugar.

- Bake for 50 minutes – 1 hour until the batter is starting to pull away from the sides of the tin.

- Leave to cool then serve with either ice cream or cream.

- Bask in glory at the wonderful thing you have made.

- Eat.