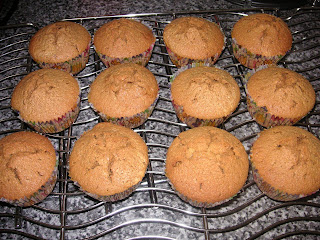
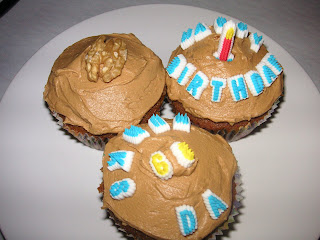
It’s a double birthday celebration this week – the CCD (Caked Crusader’s Da) and his twin brother, my Uncle (known to all the family as “Nunks”) are another year older – happy birthday to you both!
Something this gorgeous doesn’t need much dressing up:

OK, I’m not going to beat about the bush with this one – quite simply, this is THE BEST thing I have ever made and was of professional patisserie standard. It was the most exquisite custard – soft and smooth like velvet; it melted as if by magic in your mouth and the only clue it had ever been there was the gorgeous taste of custard.
As soon as I took it out of the oven I knew something rather special was in the offing:

Using a buttered pastry ring gives a deeper tart than using a flan tin, which tend to be shallower:

Look at the depth of this beauty - 3.5cm to be precise!


If there’s one thing in the cake/pastry line that gets the CCD’s taste buds tingling it’s a custard tart, so in honour of his birthday I finally got round to tackling the
Marcus Wareing recipe that I’ve been putting off for months. I don’t know if anyone else does this, but sometimes I’ll see a recipe that I know would be popular but something in it spooks me and I never make it. This recipe falls into that category. In truth, several things spooked me with this. Here they are in no particular order:
-Marcus Wareing has two Michelin stars so just because his came out alright didn’t mean that mine would
-This very recipe won a nationwide public vote on a BBC TV show to be served to the Queen for her official 80th birthday lunch at the Mansion House (which kinda meant the recipe worked! If it came out yucky I could be certain it was my fault)
-I saw Marcus Wareing make it on TV twice and both times it looked divine and everybody who tasted it agreed it was the best custard tart ever
-The pastry part of the recipe looked a real faff (technical term!)
But spurred on with the knowledge that the CCD would prefer this to any birthday cake, and that Marcus Wareing writes a great recipe (the
scones made in Cakefest were his) I rolled up my sleeves and confronted my fears.
Here’s the custard in progress:

I won’t lie – there were moments when Marcus probably wondered why his ears were burning as I cursed at the pastry but it was definitely worth it. The pastry is extremely fragile and unyielding. If you’re not confident with pastry and you panic if it behaves badly then I would recommend that you save yourself the stress and use your usual shortcrust recipe instead. If you like a challenge and want to taste the tart deemed good enough for the Queen then go for the recipe as written – it is worth it. The custard was exquisite and so simple that I found myself wondering where all the flavour came from!
Brushing the pastry case with egg yolk seals the pastry and stops it getting soggy when the custard is poured in. You can see the thin layer of egg yolk in these photos of cut slices:


I know there’s lots of photos this week but this is the tart to end all tarts! I am so proud of it! Here are some more gratuitous photos:


Just to manage the expectations of my Monday morning eaters – the CCD got so attached to this tart that he wouldn’t let any of it leave the house. Sorry. But here’s what it would have been like to eat..... this fork's for you!
 Ingredients:For the shortcrust pastry:
230g plain white flour
Pinch of salt
150g unsalted butter, chilled
75g caster sugar
Finely grated zest of 1 lemon (I didn’t put this in)
1 egg, beaten
1 egg yolk
To glaze: 2 egg yolks, beaten
For the filling:
9 egg yolks
75g caster sugar
500ml whipping cream
Nutmeg, for grating
How to make:
- Start by making the pastry. Rub the flour and butter together until it resembles fine bread crumbs.
- Stir in the sugar and, if using, the lemon rind then add the eggs and using your hand form a dough. You may need to flour your hands as the dough is sticky.
- Shape the dough into a ball and then flatten slightly. Wrap in clingfilm and refrigerate for 2 hours. This is a very soft, delicate pastry and you will have less cracking and splitting if you work with it cold.
- After two hours, roll out the pastry. Even if rolling out between baking paper or clingfilm, you will still need to flour the pastry as it is sticky. Here’s the unusual step – when you’ve rolled it out put it back in the fridge. This stops it tearing quite so much when you try to put it into the flan ring. Chill for 30 minutes.
- Line a baking tray with baking paper. Grease a 18cm pastry ring or loose bottom flan tin and stand it on the tray. Whatever ring or tin you use, try to find a deep one as this will give a lovely deep tart and a luscious thick layer of baked custard.
- Take the rolled pastry from the fridge and line the pastry ring/flan tin with it. Let the pastry overhang the edges. Take some of the surplus pastry off and put to one side – you may need this for patching later on.
- Put the pastry back in the fridge for a further 30 minutes.
- Preheat the oven to 190°C/fan oven 170°C/375°F/Gas mark 5.
- Cover the pastry with baking paper and weigh down with baking beads/rice/lentils etc. Bake in the oven for 10 minutes.
- Beat the two egg yolks and when the 10 minutes is up, remove the pastry from the oven and remove the paper and beads. Have a look at the pastry and use the spare that you put to one side to patch any little holes or cracks that you can see. I found that my pastry squidged down the ring a little (even with the overhang supposedly stopping this) and took the opportunity to push the pastry back to where I wanted it. When happy, brush all of the egg yolk over the interior of the pastry case and return to the oven for 5 minutes. This seals the pastry so that it won’t go soggy when you add the custard.
- Remove the pastry from the oven and leave to cool. When it is cool enough to handle trim the excess pastry away using a serrated knife. Leave the pastry in the ring/tin. I wrapped the tin in foil so that if there were any leaks the custard wouldn’t escape too far!
- Reduce the oven temperature to 150°C/fan oven 130°C/300°F/Gas mark 2.
- From now on it’s all easy! Make the custard by whisking together the egg yolks and sugar. Add the cream and whisk again.
- Pour through a sieve into a heavy saucepan. Don’t skip this stage as there’s lots of eggy bits that will get caught by the sieve and would make the custard lumpy in texture if not removed.
- Heat the custard over a low heat stirring all the time. When it gets to 37°C remove it from the heat.
- Pour as much of the custard into the pastry case as possible. I got all of mine in but it will depend on how deep your ring/tin is. Cover the surface with grated nutmeg. If you’re not confident that you’ll get the tart into the oven without spilling the custard, put the tray (with the tart case on it) onto the oven shelf and then pour the custard in. I would’ve done this but when I pull my oven shelf out it dips slightly so I could not have got all the custard in.
- Bake for 45-50 minutes or until the custard looks set but still wobbles slightly when the tray is moved. Mine actually took an hour to get to this stage.
- Leave to cool on a wire rack.
- Bask in glory at the wonderful thing you have made.
- Eat.